
I want to bake a gradient color into a texture in Blender!
So, here is a summary of the procedure for baking gradients in Blender.
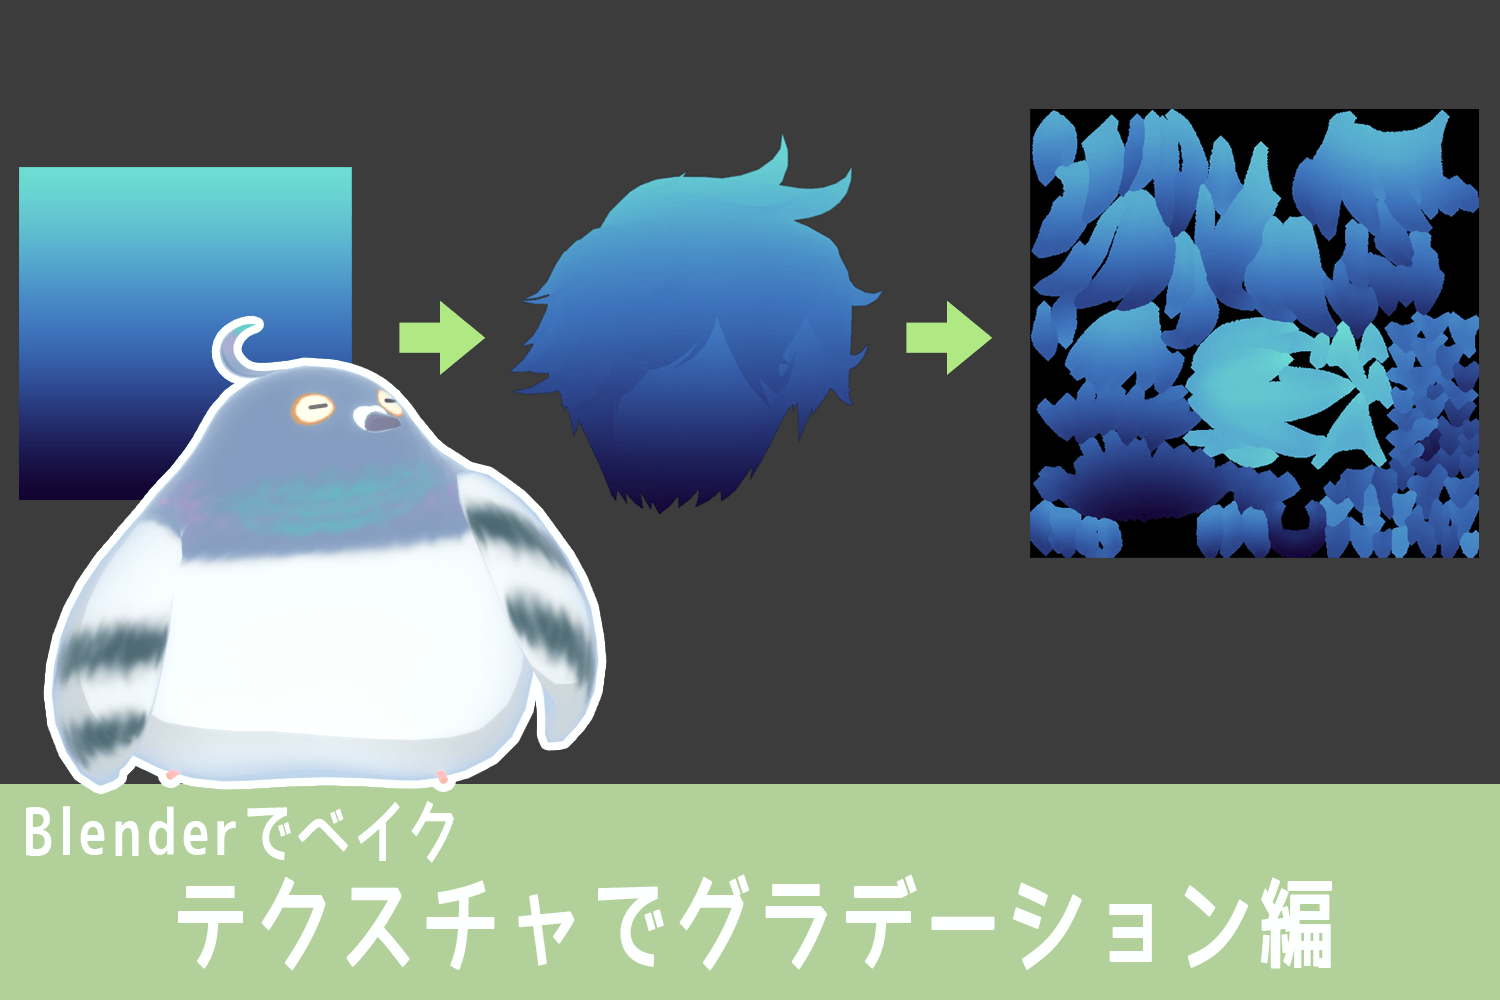
Baking a gradient drawn on another texture onto the production UV texture, so it can be applied to textures with various patterns other than gradient colors.
This time, bake a vertical gradient color into the hair object. I'll try to be as concise as possible.
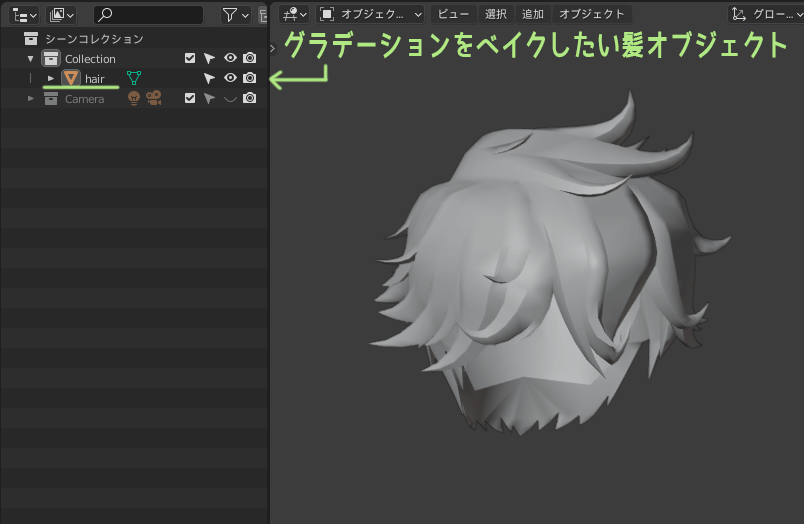
- Prepare the object you want to bake the gradient on
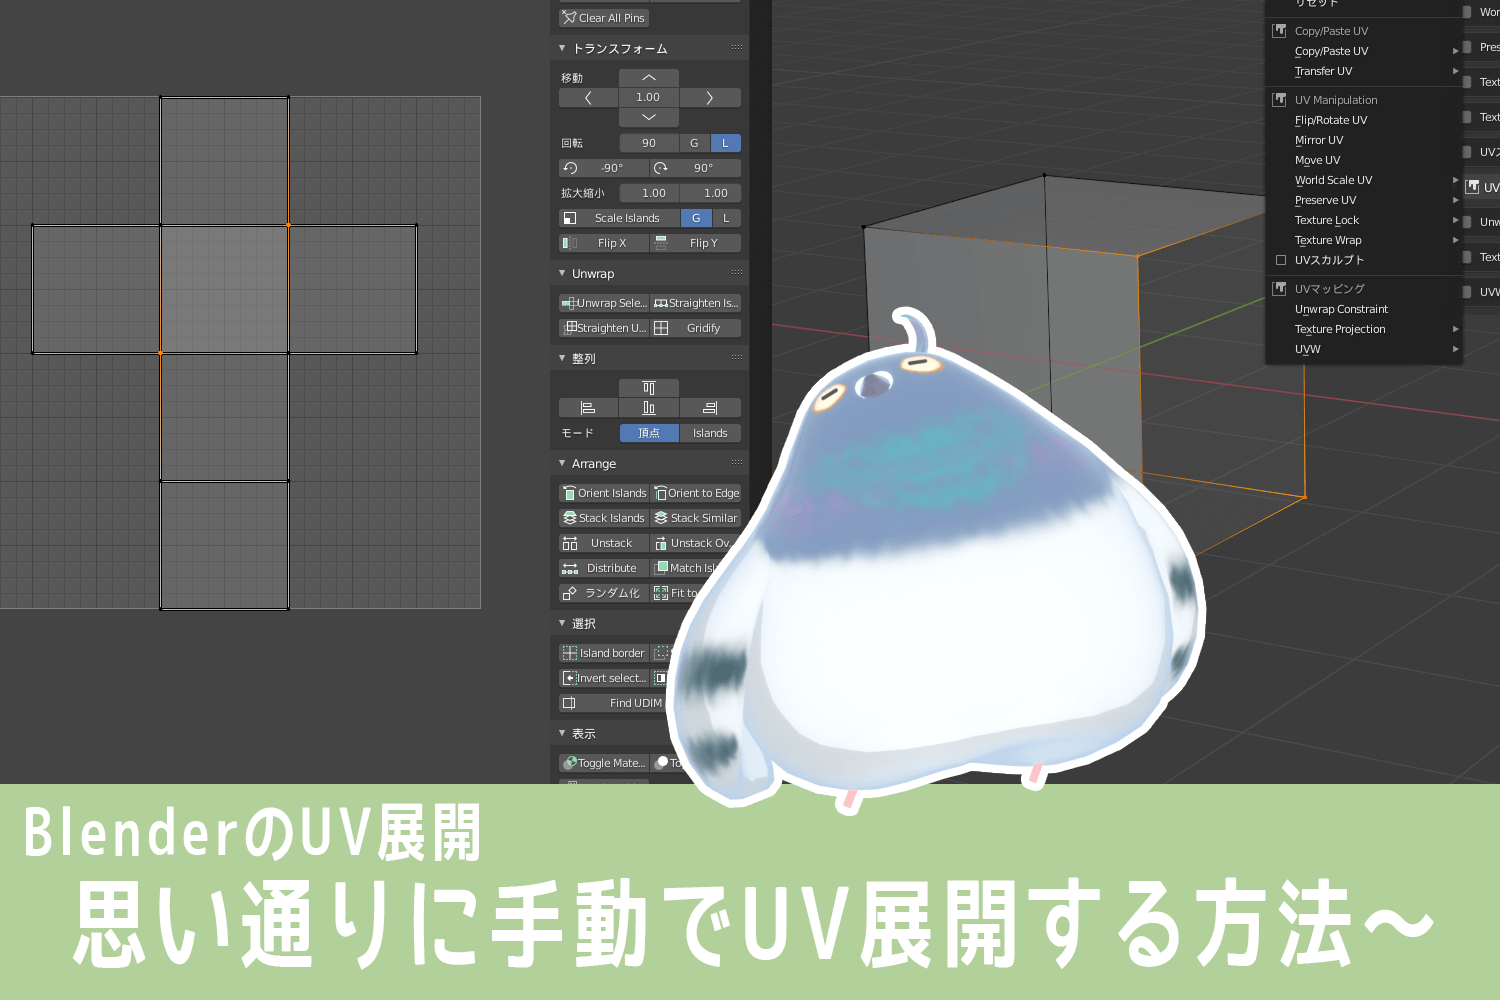
- Expand the object's UVs
*Please also refer to the UV expansion in Blender article when expanding UVs.
- How to bake gradients in Blender
- (1) Copy the object to be baked to create another object.
- (2) Open the UV of another object copied by projection from the view
- (3) Apply a gradient texture to another copied object
- (4) Specify the baking texture from the material of the object to be baked
- (5) Change render from Evee to Cycles
- (6) Change the bake type to diffuse and set the bake setting
- (7) Select objects in the order of bake source, then bake target, and start a bake
- (8) Open the baked texture from the UV editor and save the image
- Supplemental information on gradient baking with textures
- Extra: The applications for baking in textured colors are endless!
How to bake gradients in Blender
(1) Copy the object to be baked to create another object.
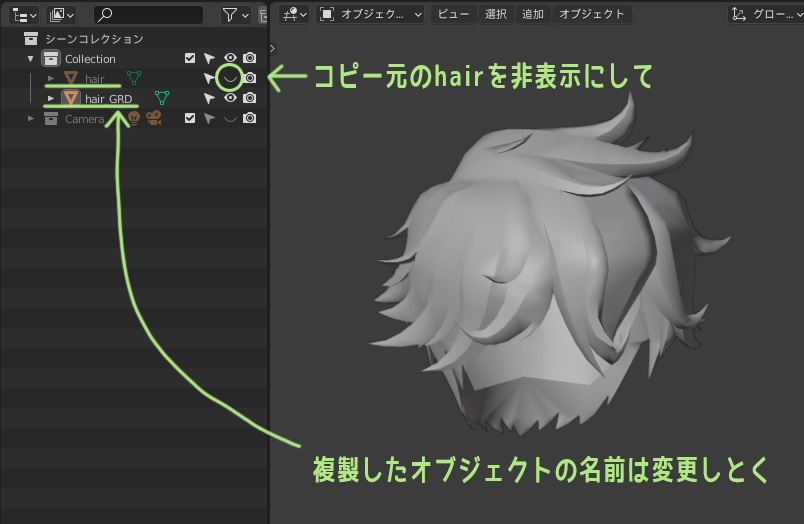
First, create a separate object by duplicating the object (hair) for which you want to bake the gradient color with Shift+D.

Change the name of another object to something easy to understand (in this case, hair_GRD). You can rename it by double-clicking on the object name in the outliner.
Copy the original object (hair) from the outliner. Hide it once.
(2) Open the UV of another object copied by projection from the view
Change the UV of another copied object (hair_GRD).
Open the UV editor from the workspace and select the 3D viewport's upper From the menu "View", select Viewpoint -> Front (or Right/Left). The viewport will be viewed from the front (or side).
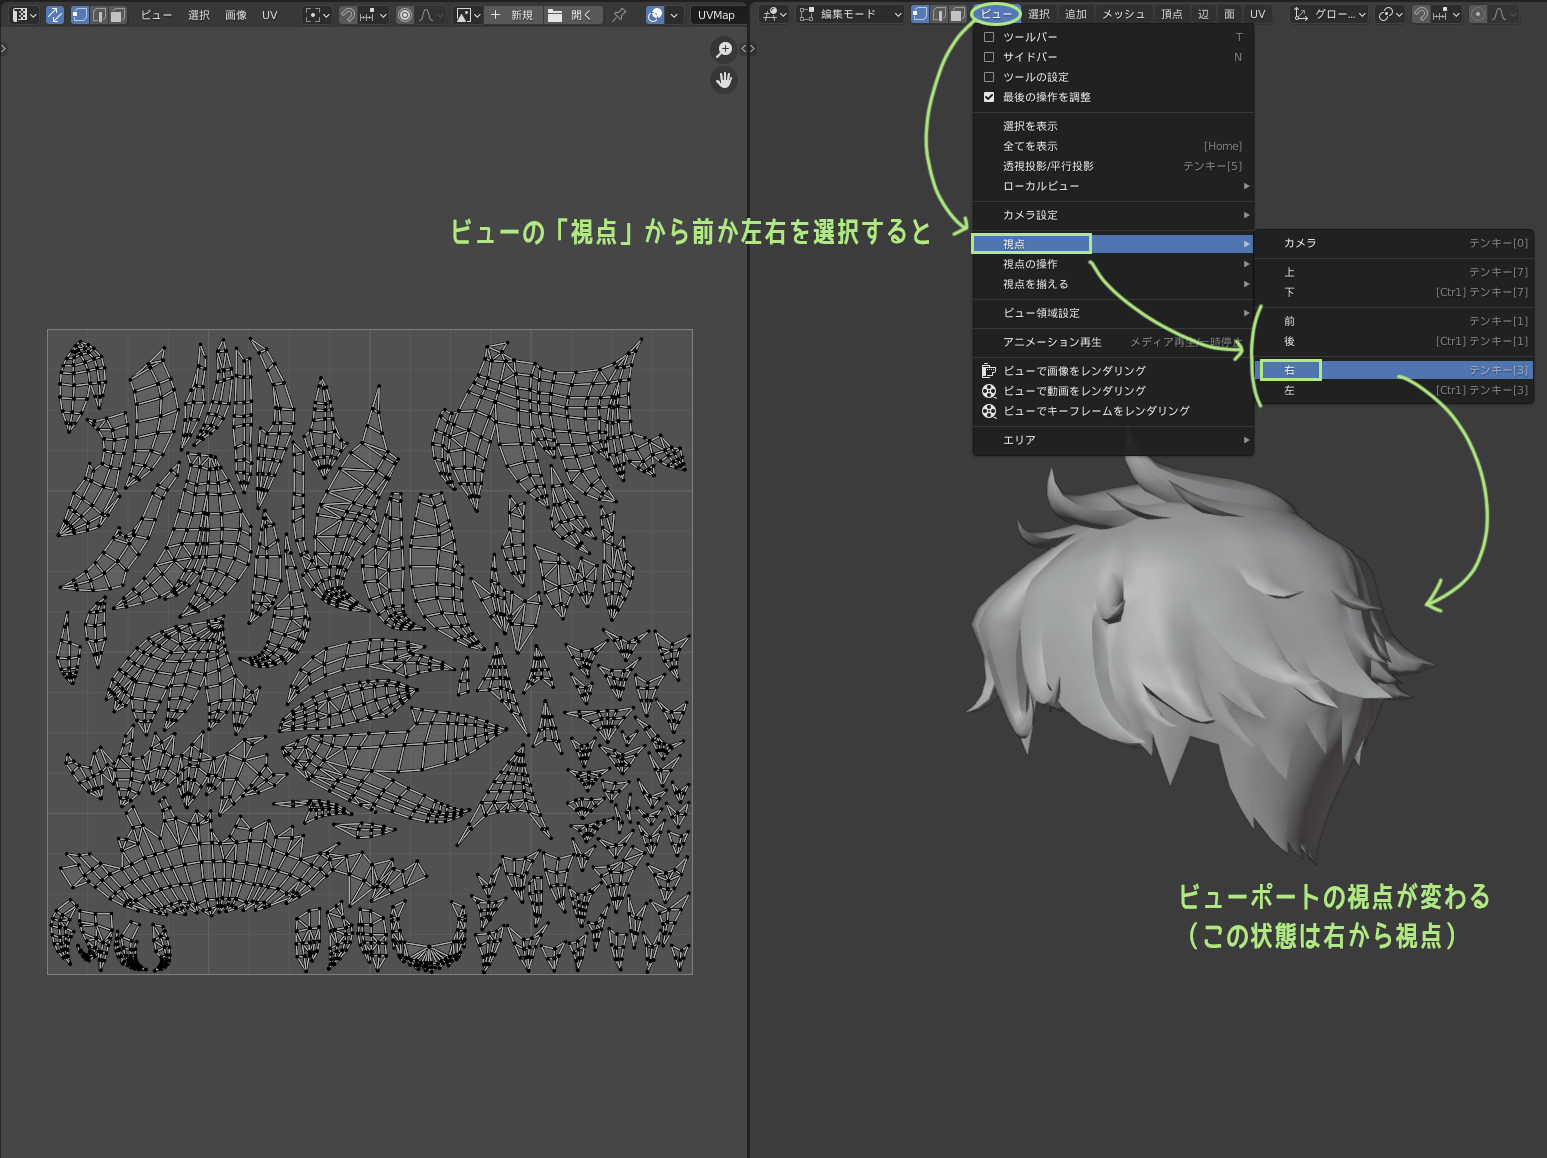
In this state, enter the object's edit mode, select all vertices, and then Open the menu "UV" at the top of the viewport and select "Project from View".

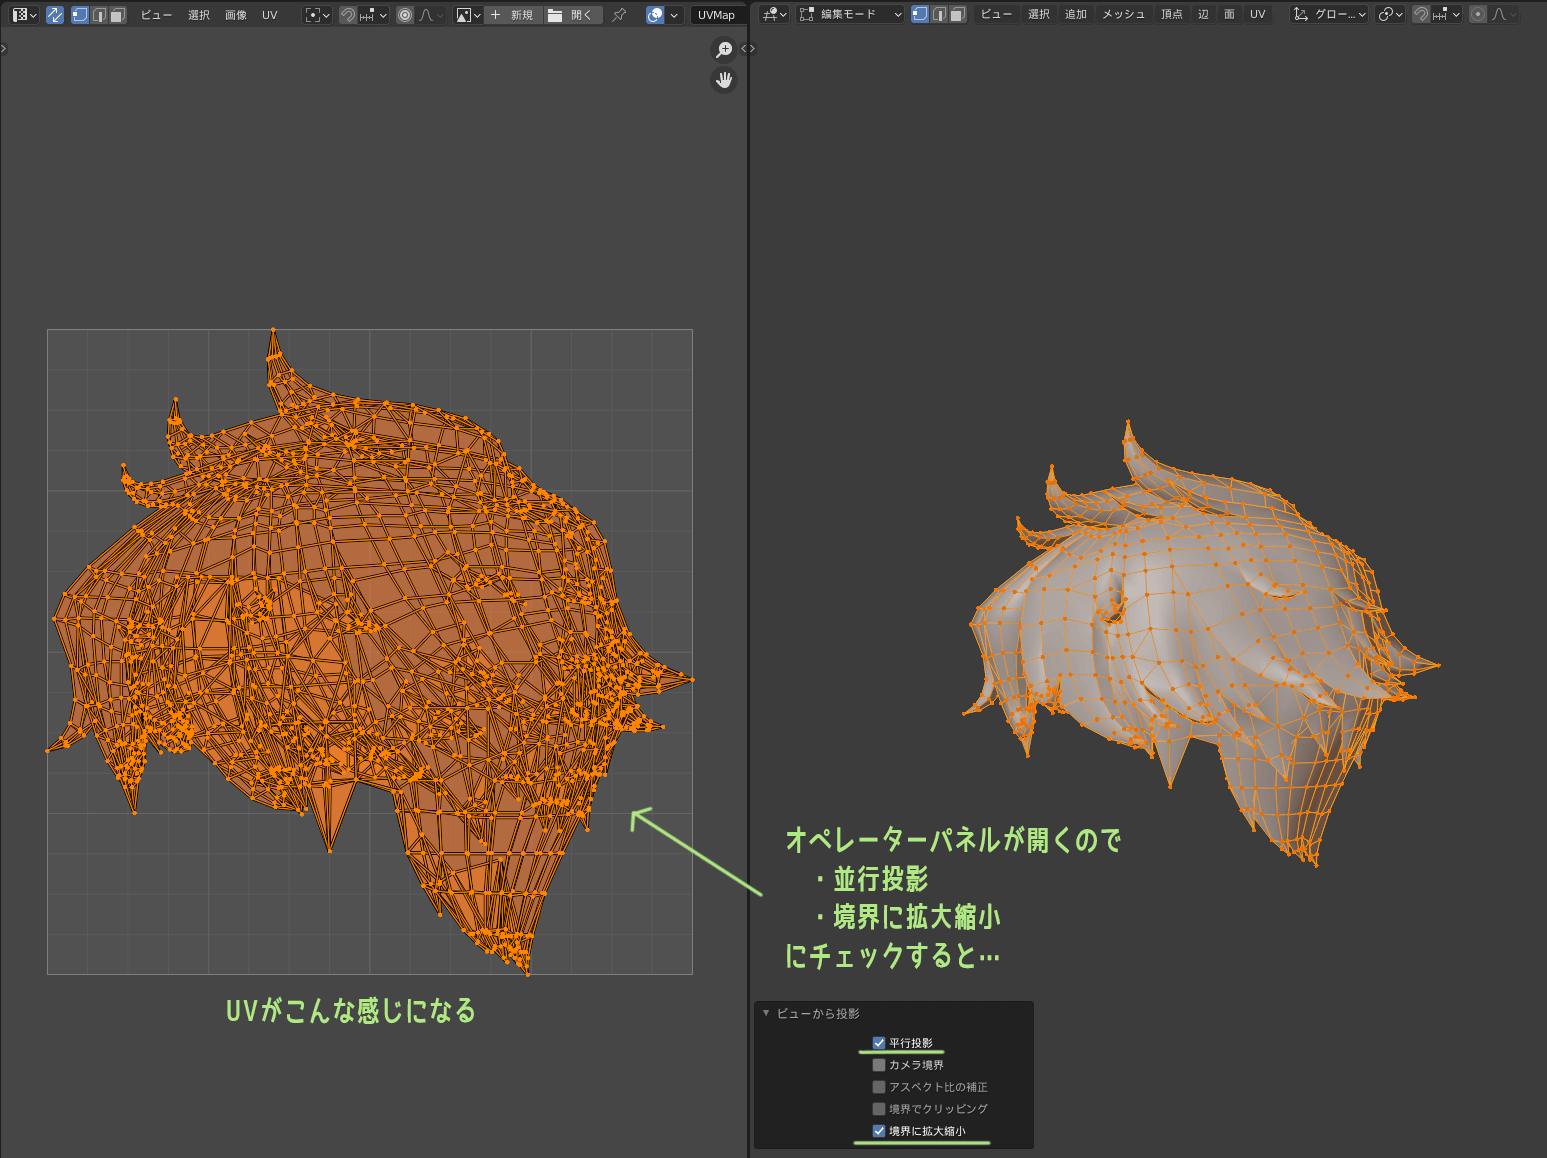
You will see an operator panel at the bottom left of the viewport. Check the following items from it.
- parallel projection
- Scaling to Boundaries
This will create a UV map of the state viewed from directly in front of (or directly beside) the camera.
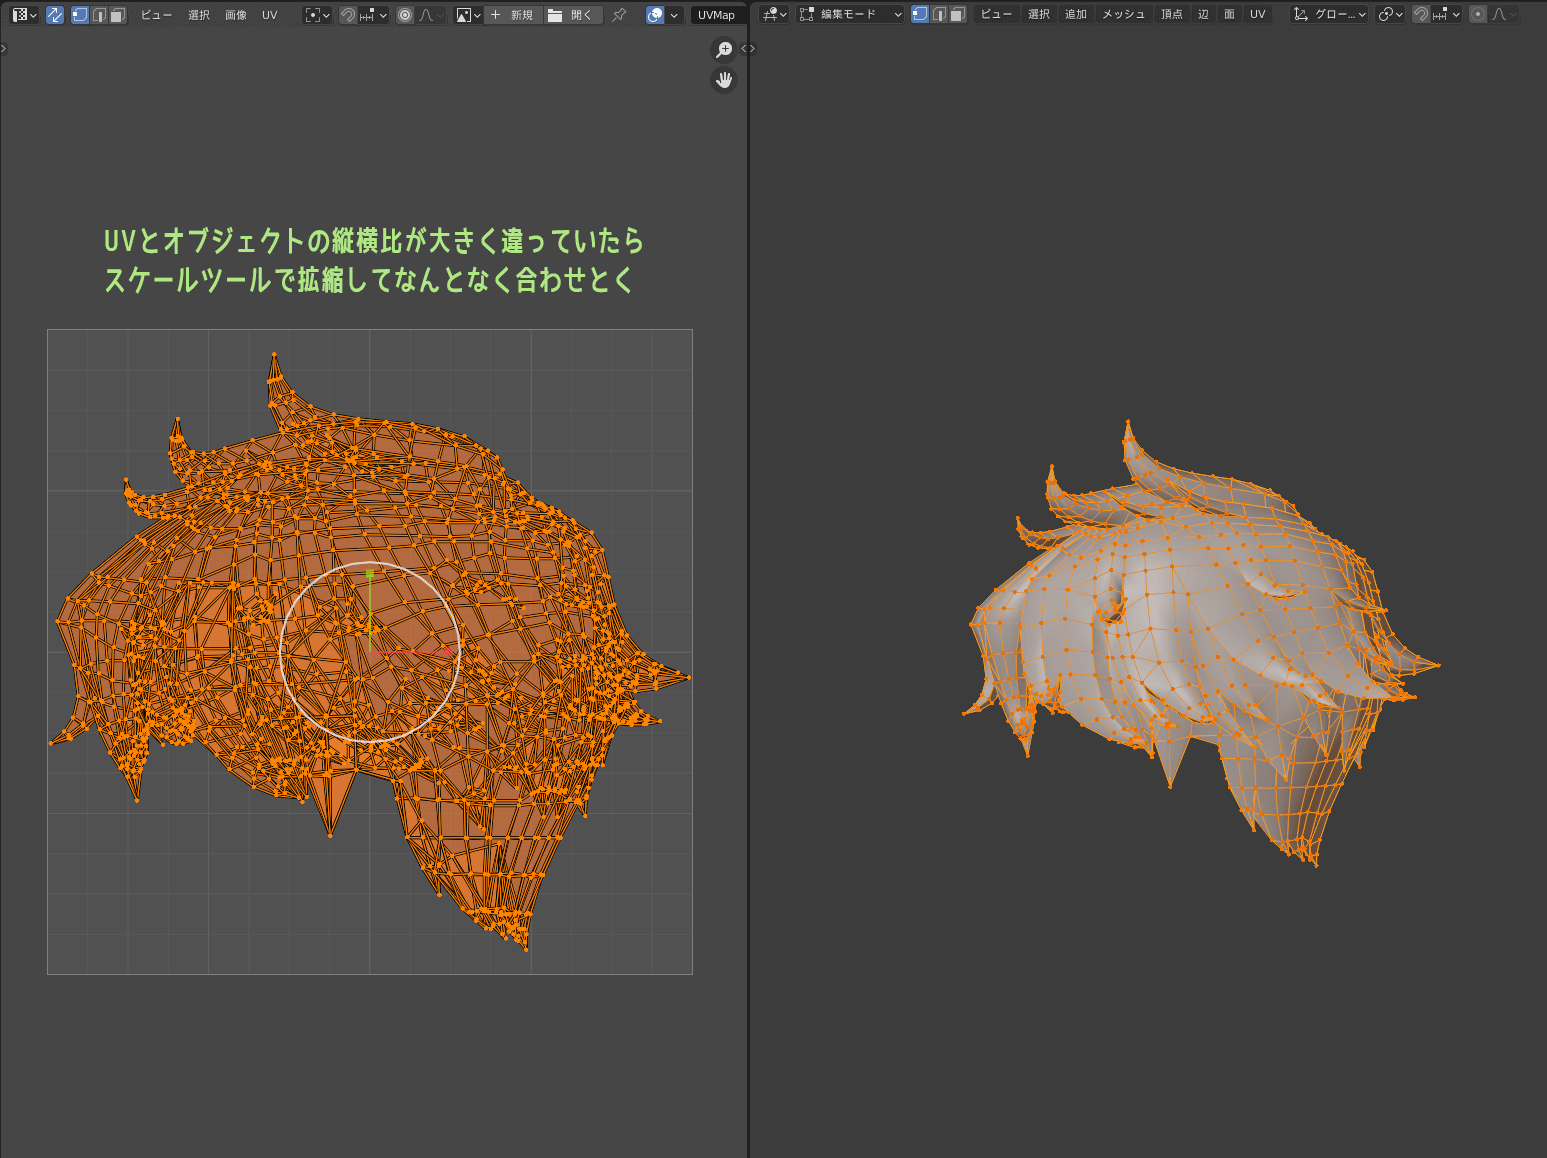
If the aspect ratio of the UV is significantly different from that of the object, scale the UV side in the UV editor to somehow match.
(3) Apply a gradient texture to another copied object
We will apply the gradient texture to another object (hair_GRD) that we copied.
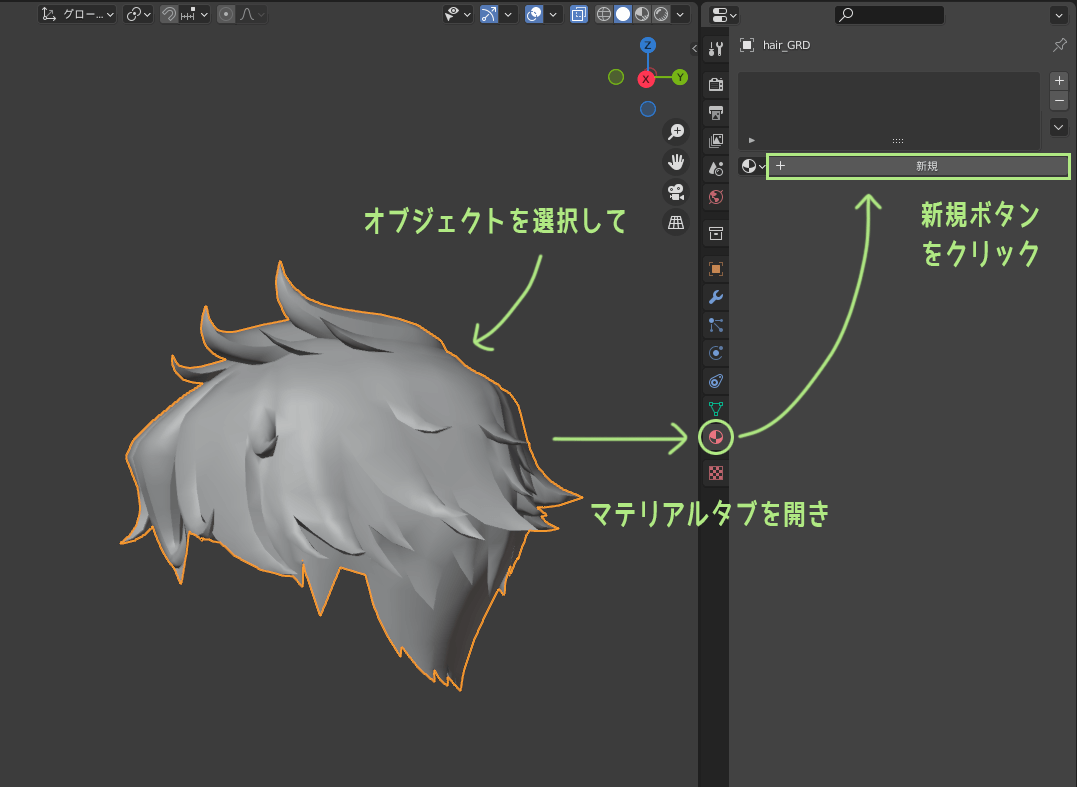
Return from edit mode to object mode, select the object and open the Material tab of the Property Editor and assign a new material with the New button.
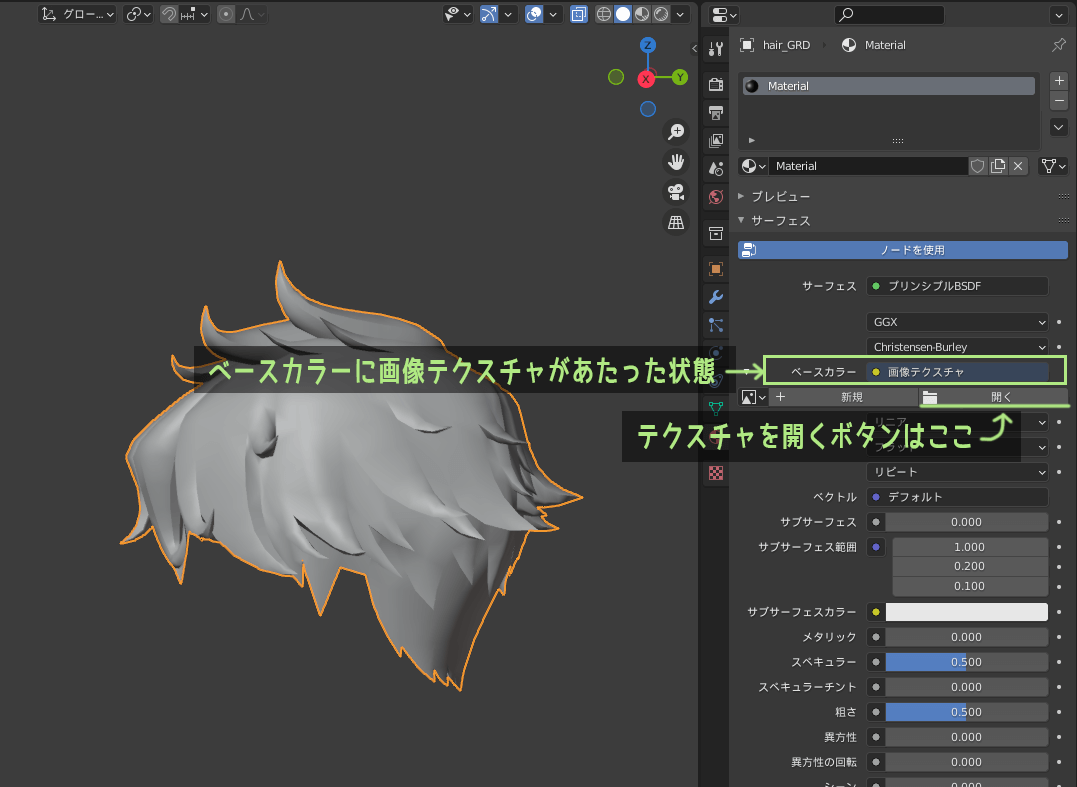
Click on the circle next to "Base Color" and select "Image Texture" from the window that opens.

Once the image texture is assigned, click the Open button below it to open and select the gradient texture (see below) to be used for baking.
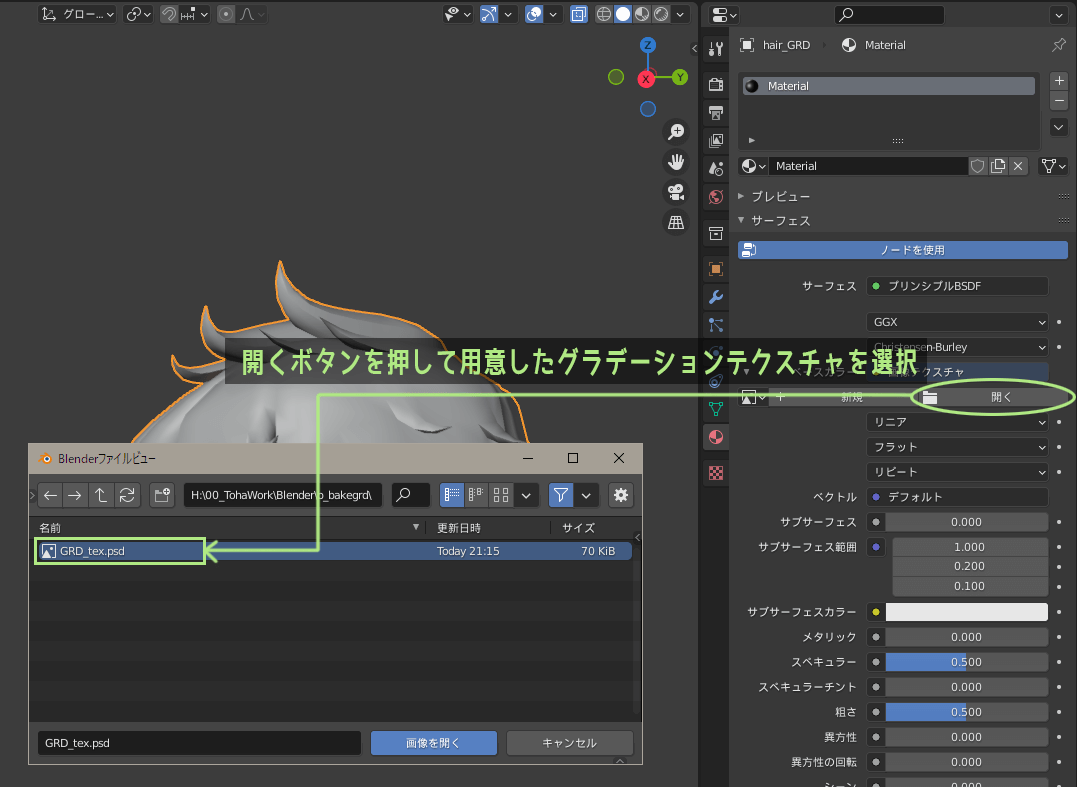
The gradient texture used for baking should be "an appropriately sized square filled with a gradient" as shown in the image below.

Here we use a color gradient, but if you create a black and white gradient and bake it, you can easily use it as a mask image in Photoshop or other software.
Press the "Open" button below the image texture and select the gradient texture you have prepared.
If you apply a gradient texture and display the texture in the viewport's 3D View Shading, the texture will look like this when the object is displayed.
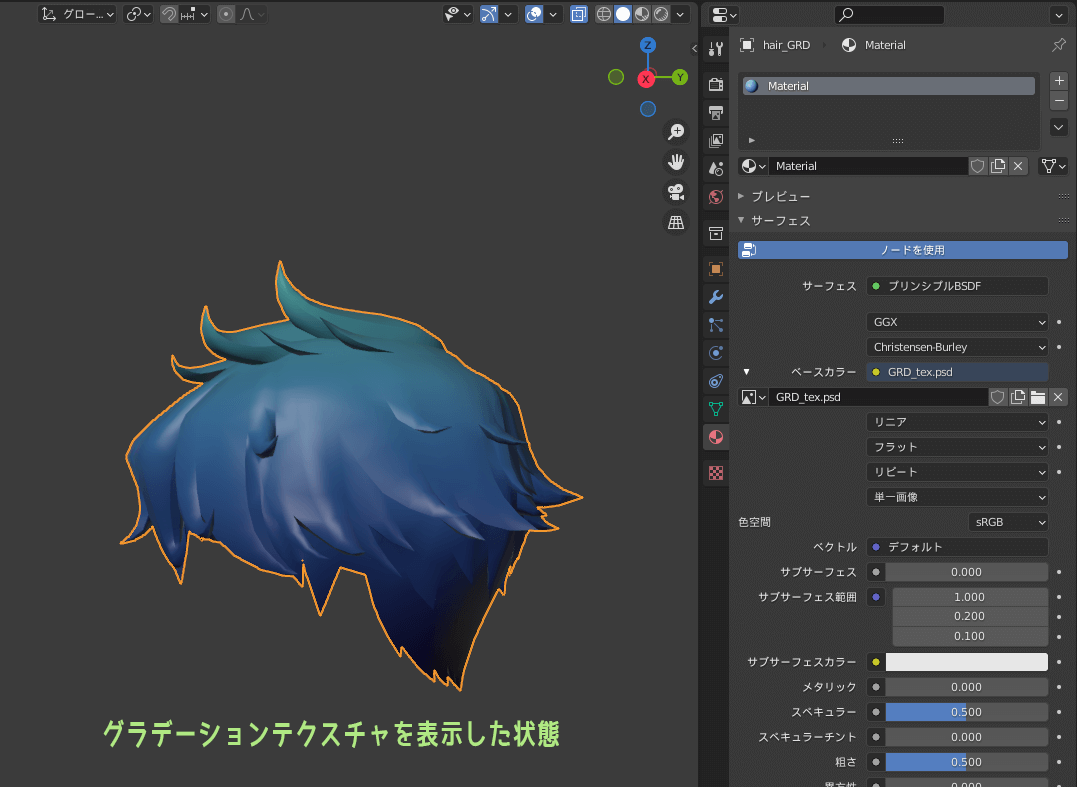
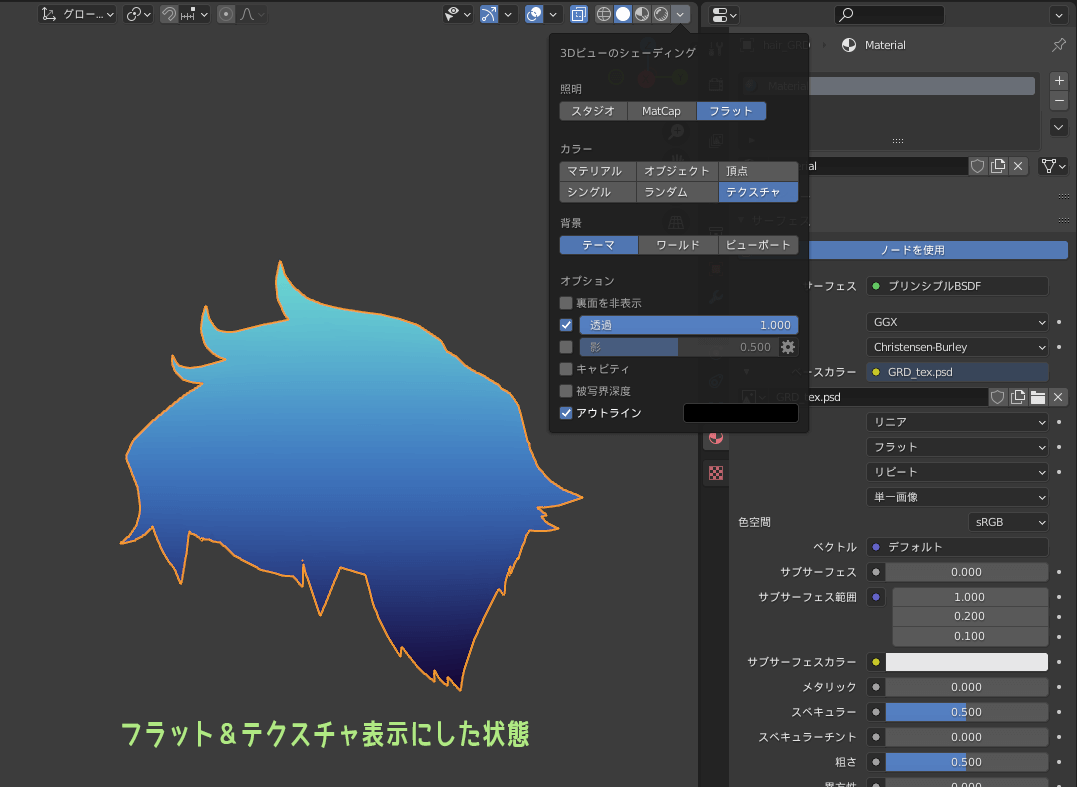
If you want to change the color, orientation, or shape of a gradient, you can adjust it by changing the gradient drawn directly on the texture, or by scaling, moving, or rotating the object's UVs.
(4) Specify the baking texture from the material of the object to be baked
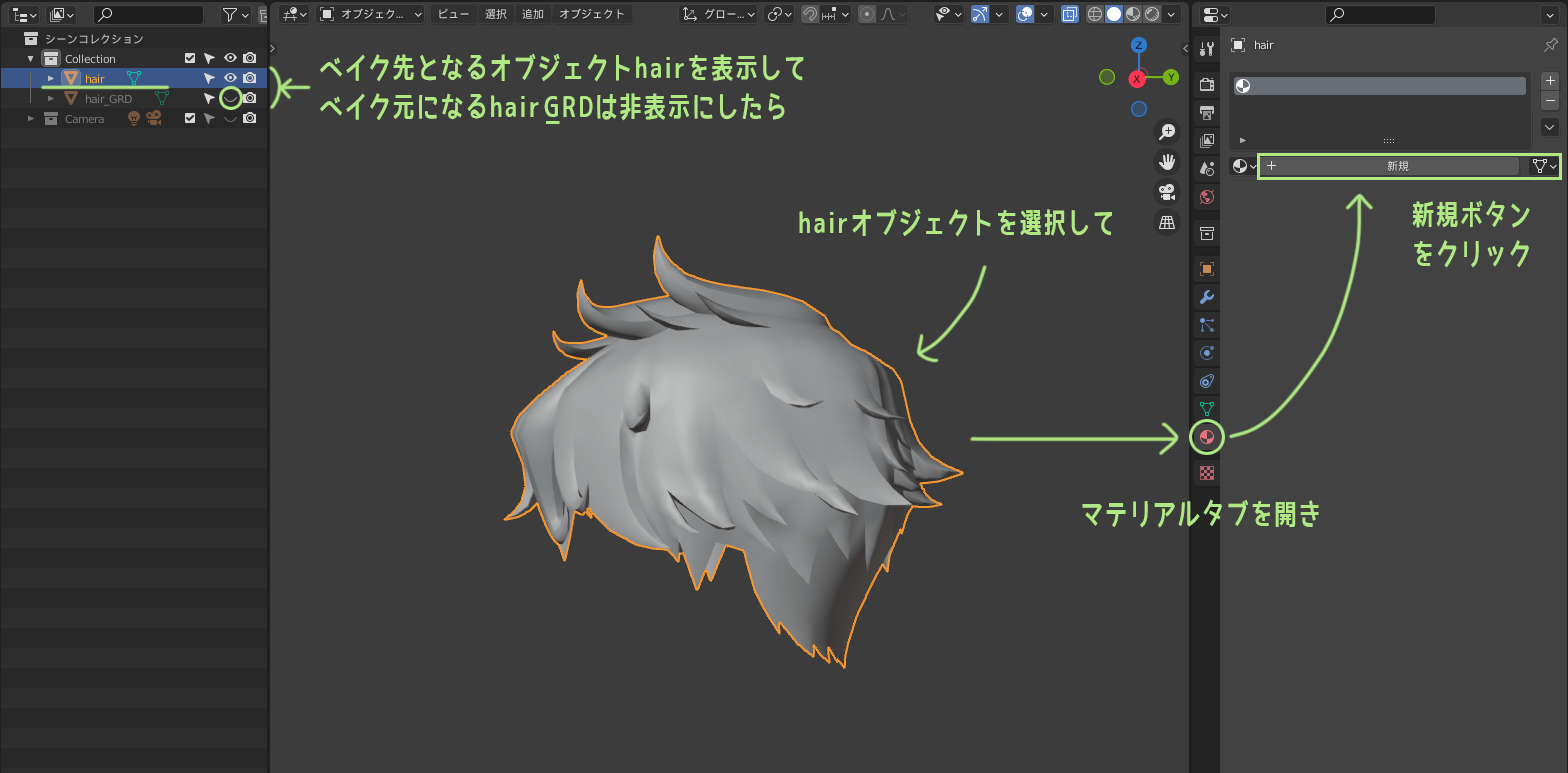
Now that the source object (hair_GRD) is ready, we hide it from the outliner and display the target object (hair) instead.
Select the object (hair) to be baked that you have displayed and From the Material tab of the Property Editor, assign an appropriate material by clicking New.
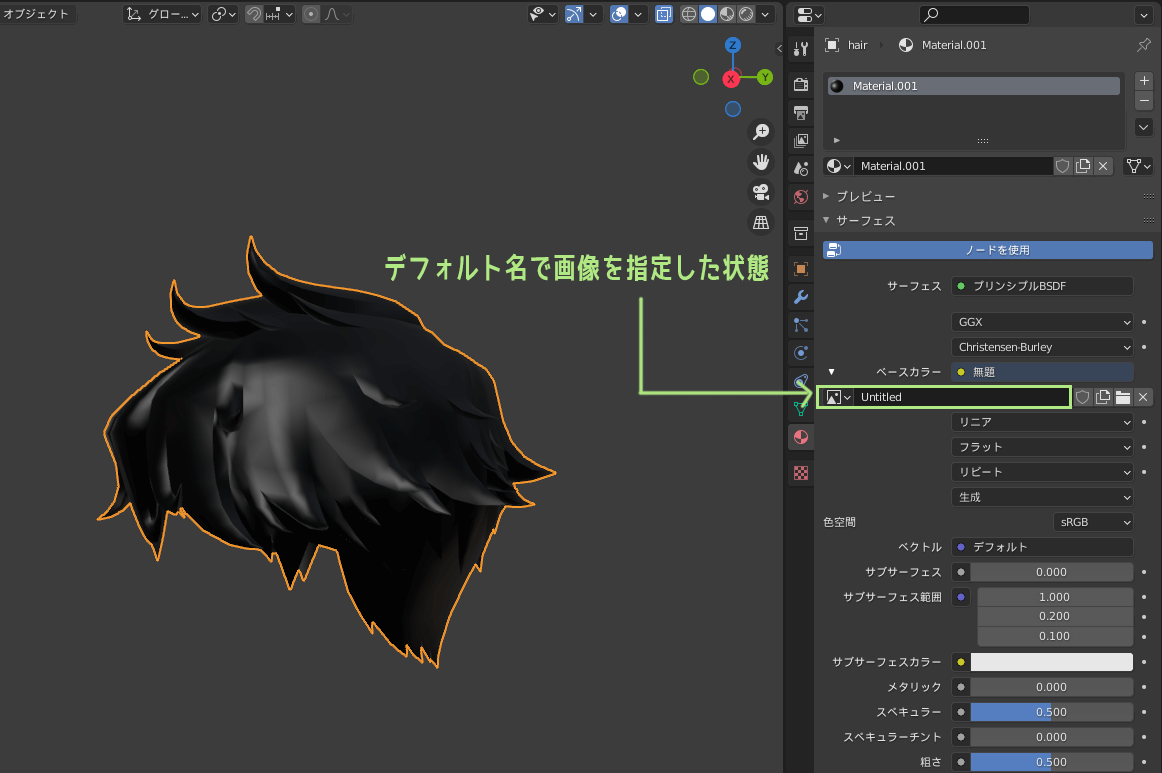
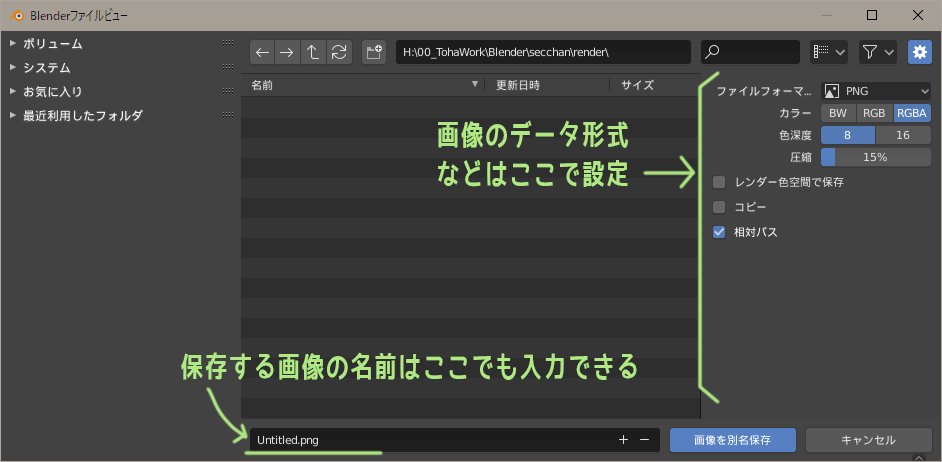
Using the method described in Specify image size by applying an image texture to the material Specify the name and size of the baked image. (*If you do not name the image, the default name will be "Untitled")
(5) Change render from Evee to Cycles
Blender's default render is Eevee, but Eevee cannot be baked, so change to Cycles.
*The method for changing is in the AO Bake article, Change render from Eevee to Cycles.
(6) Change the bake type to diffuse and set the bake setting
Click on "Bake Type" in the Bake item and select "Diffuse" from the list.
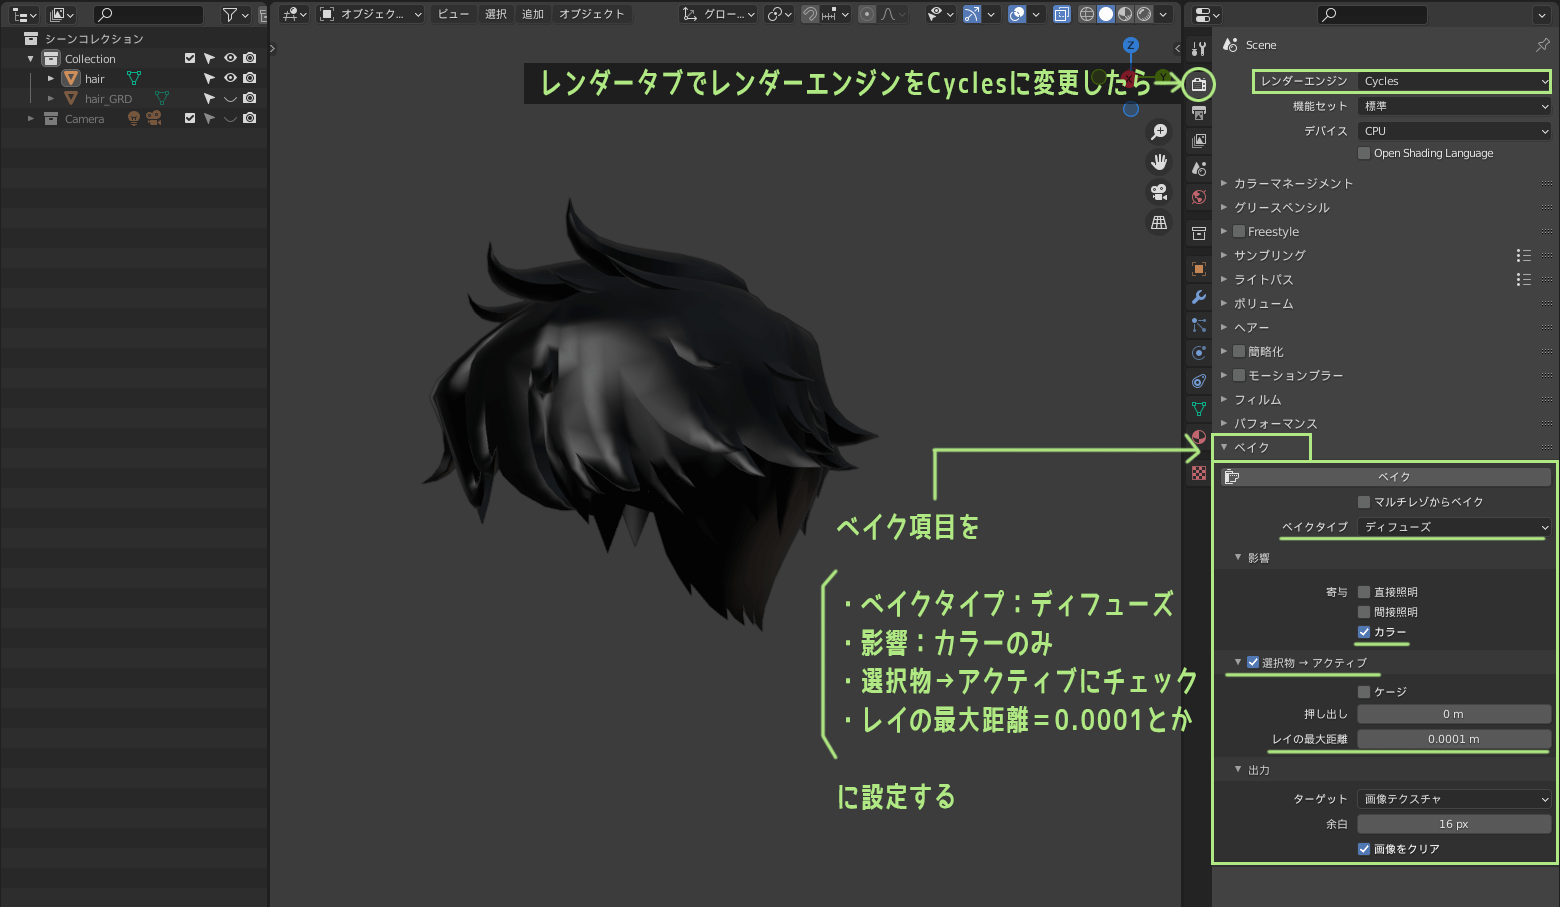
After changing the bake type to "diffuse," set the bake settings as follows.
- [Impact] : Check to color only.
- [Selection → Active] : Check.
- Option of [Selection→Active], [Max Distance of Ray] : set to 0.0001 or something like that.
Now you are ready to bake the gradient color.
(7) Select objects in the order of bake source, then bake target, and start a bake
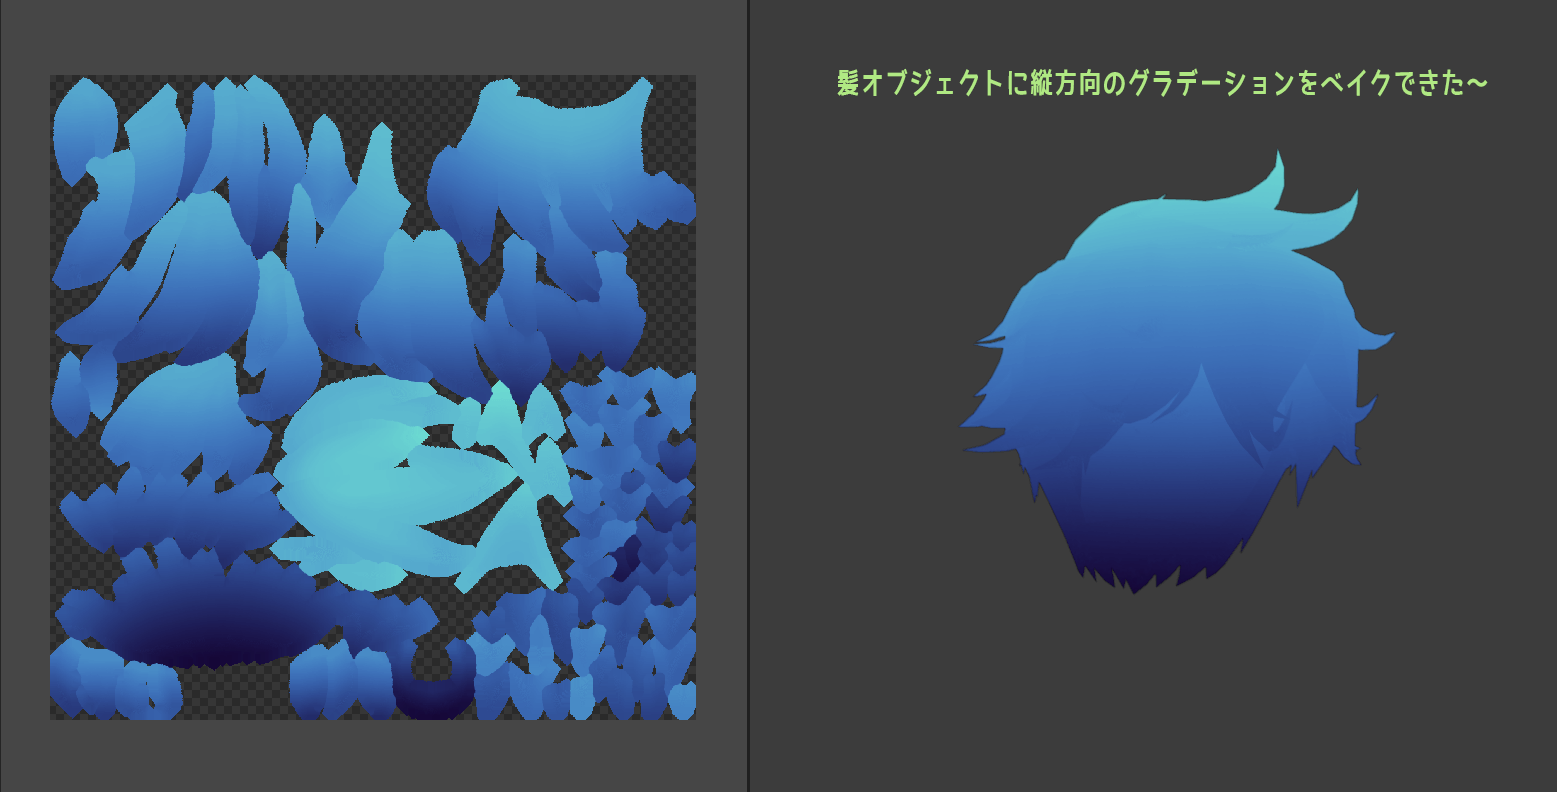
The gradient color of the source object is baked into the texture of the target object.
Basically, Blender makes the "last selected object the active object", so so selecting objects in the order "bake source → bake target", then baking "select → active".
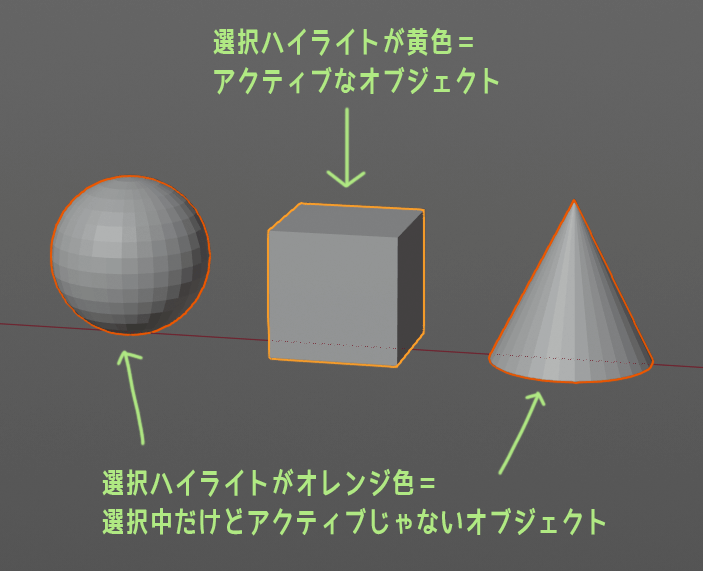
*For more information on active objects, see here.
However, it is difficult to select the two objects in sequence on the viewport because the source and target objects of the bake are exactly the same shapes and in the same location. So we will use the outliner to select them.
First, re-display the hair_GRD that was hidden earlier in the outliner. (*If it remains hidden, an error occurs and it cannot be baked.)
Since the outliner is set to "Sync Selection" by default, you can hold down the Shift key on the outliner and select "Bake From → Bake To (hair_GRD → hair)".

*How to check outliner settings see here~.
Once you have selected the objects in order, press the Property Editor press the "Bake" button from the render tab. Once pressed, wait for the baking to finish.
(8) Open the baked texture from the UV editor and save the image
After baking is complete, try to hide the source object (hair_GRD). If the object to be baked (hair) is correctly colored in the gradient, the baking has succeeded.

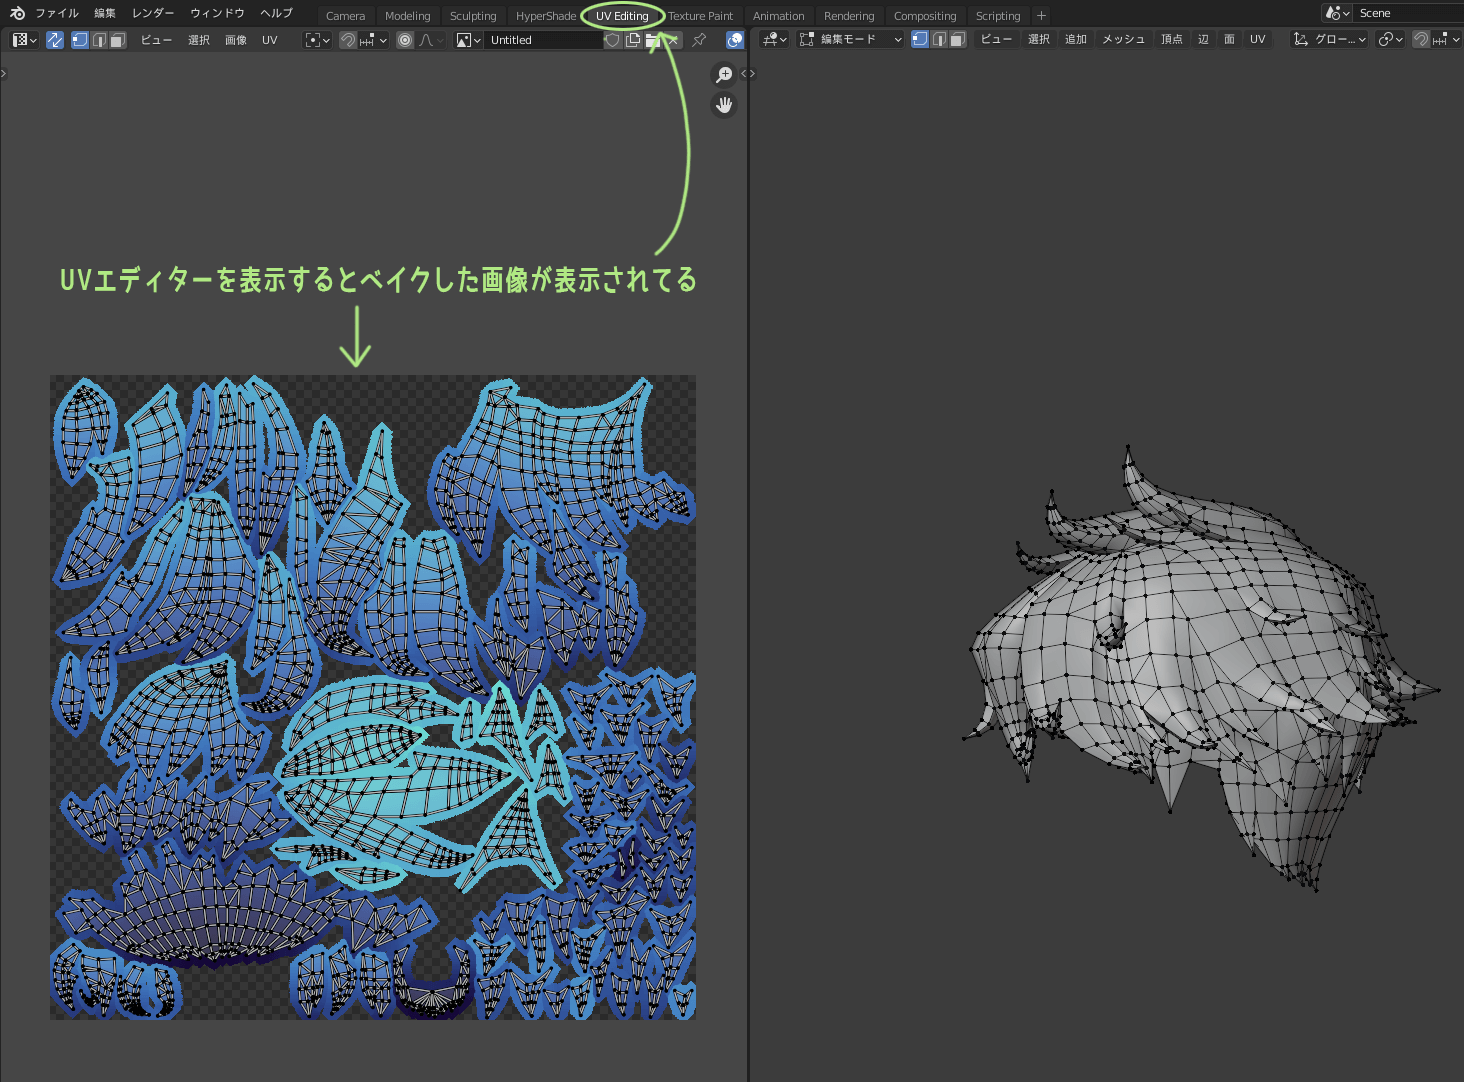
We want to save the baked image, so we need to change the workspace to "UV Editing" or " Texture Paint" and switch to "UV Editor" or "Image Editor".
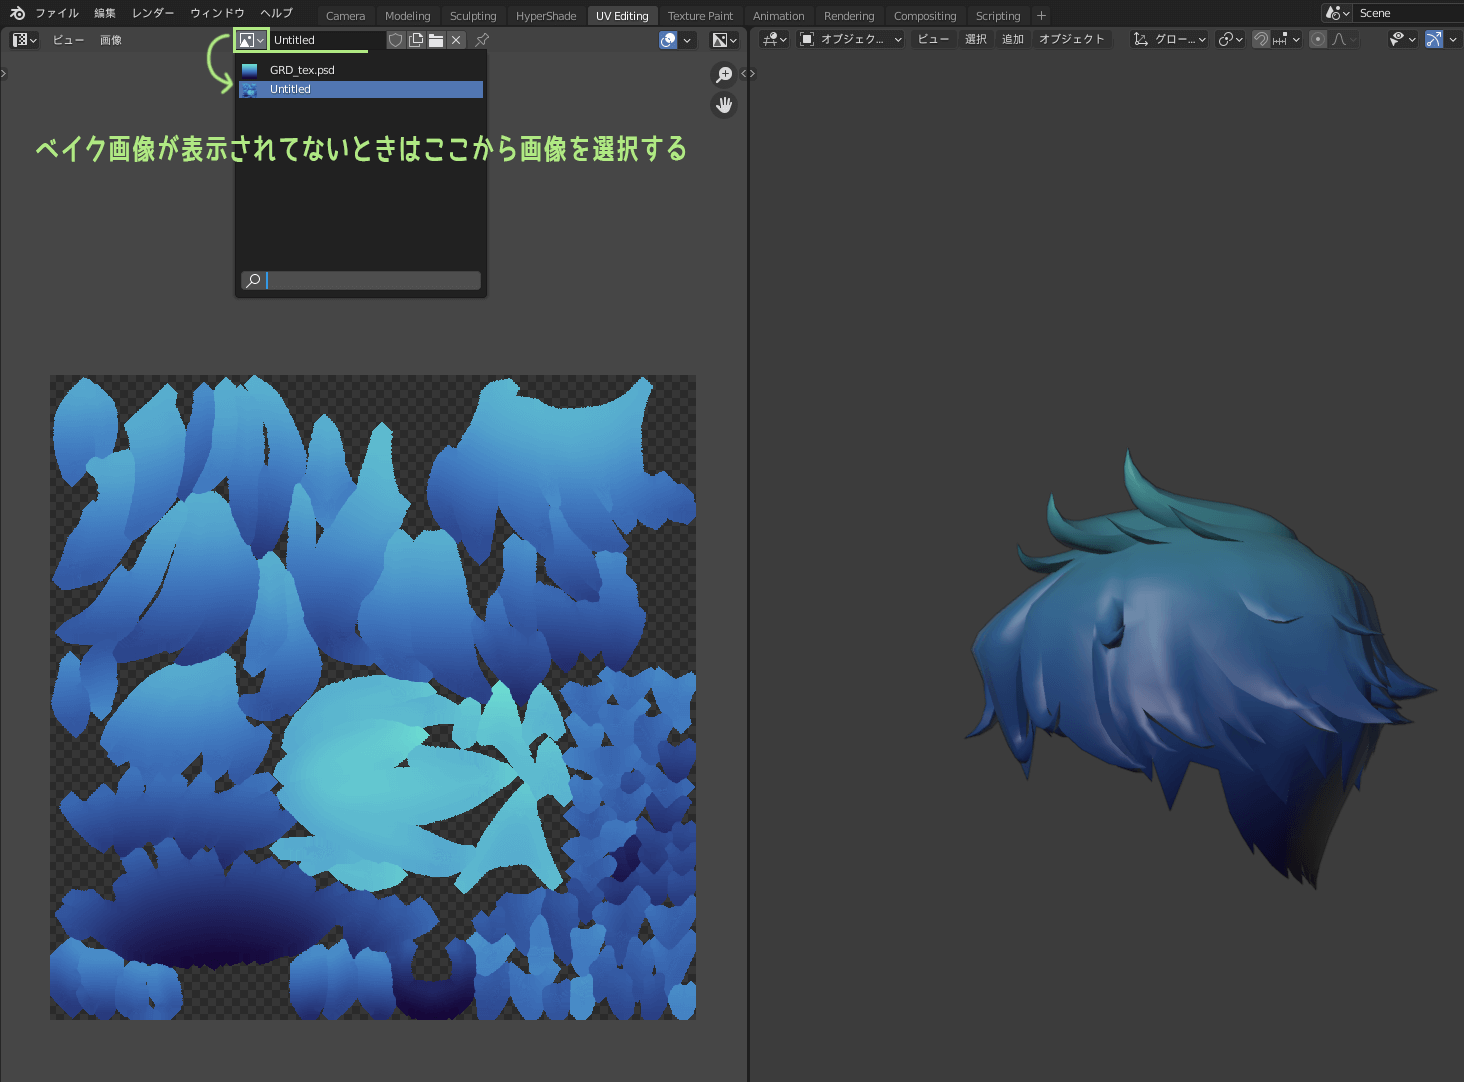
The image with the gradient color baked into the editor is displayed. If you do not see it, click the icon next to the image name and select the name you specified in Step 4. Select the name you specified and it will appear.
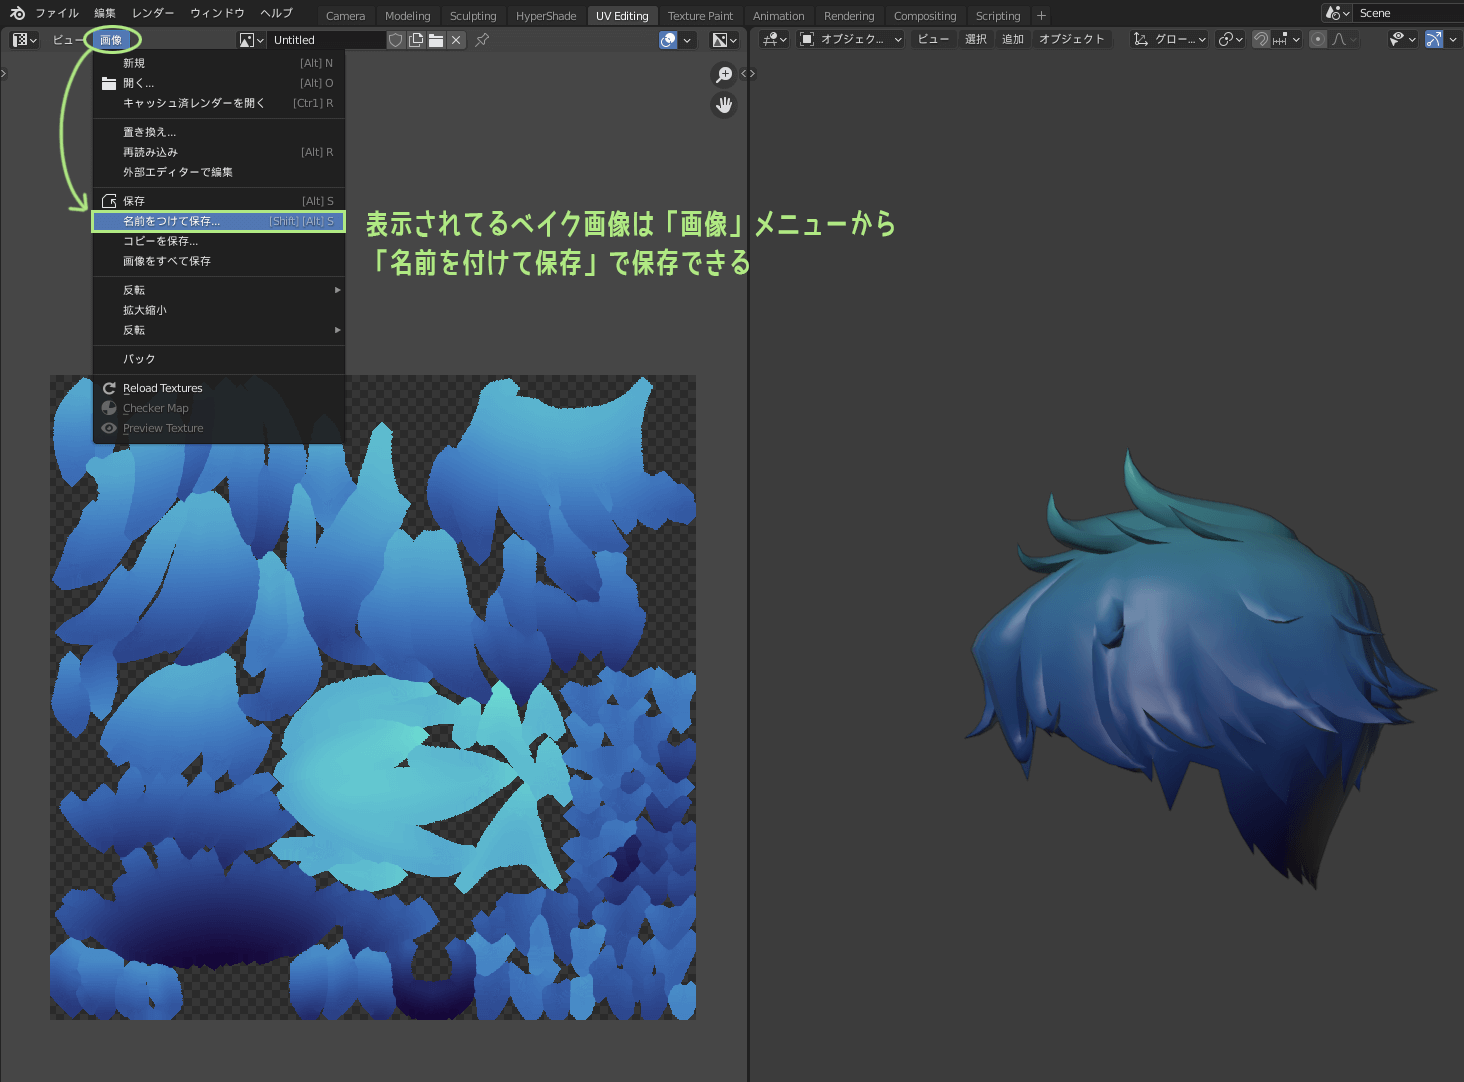
With the image displayed, click on "Image" in the editor's upper menu and "Save As" to save the baked gradient color to the image.
That's all for "Baking Gradient Colors in Blender!"
Supplemental information on gradient baking with textures
If baking results are not satisfactory, try changing the "maximum ray distance"
In the section of Change the bake type to diffuse, I specified the "Maximum Ray Distance" in the "Selection→Active" option item. The distance setting here changes the baking result considerably.
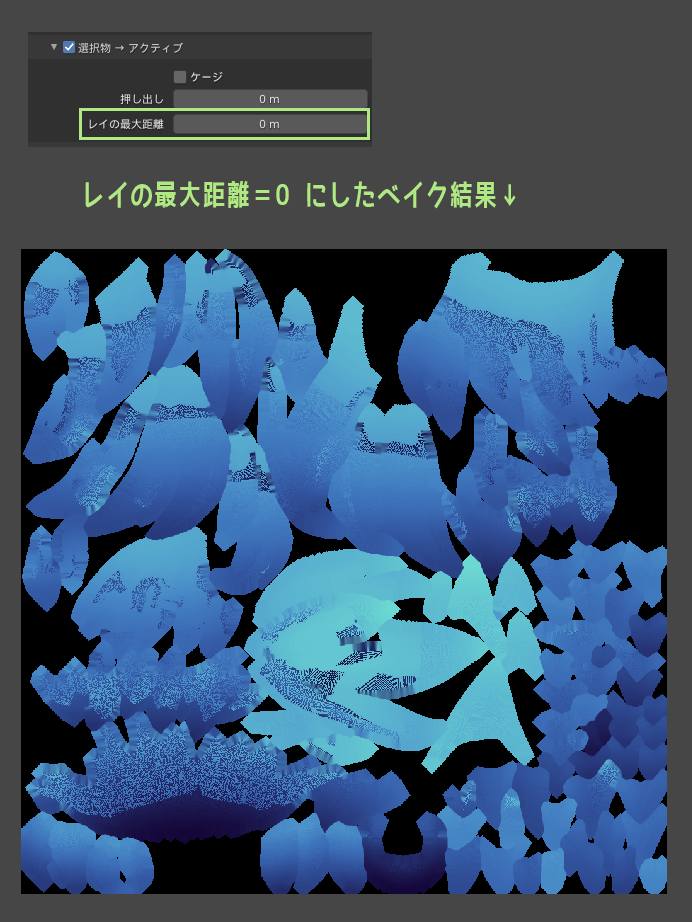
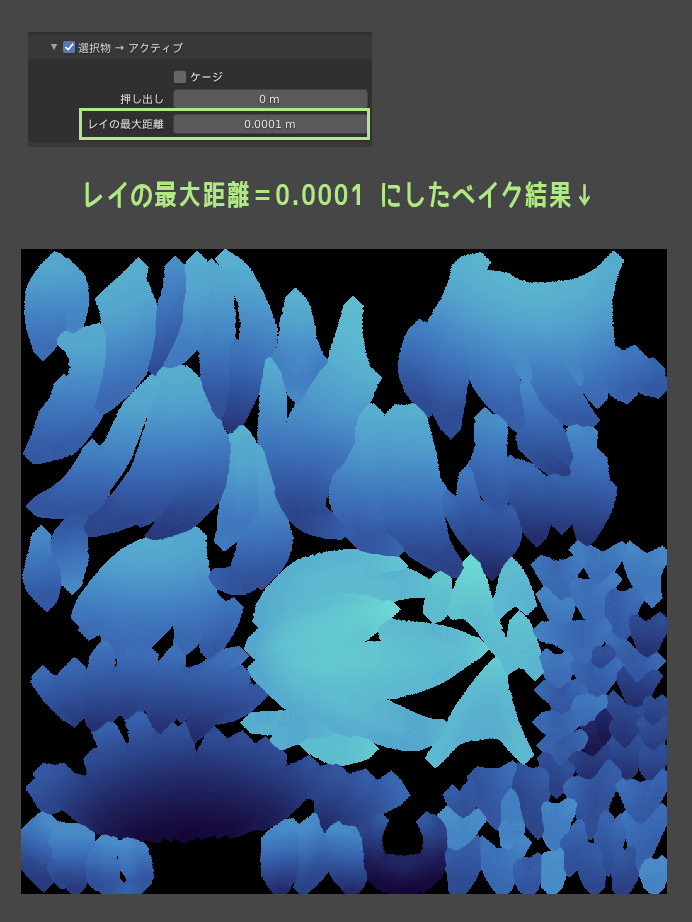

If you do not get a very good baking result, try changing the [Maximum Ray Distance] setting and baking again. Zero will not give good results, but too large a value will not give good results either.
The size of the object to be baked may have something to do with it, so please try it out!
Note Mach bands when using gradients

Gradients are an easy way to increase the amount of information in a texture and make it look richer, but you must be careful with Mach bands when using them.
mach band
When a surface with a gradient that changes brightness in steps is in contact with a surface whose brightness does not change, a dark band is seen at the position of the darker surface and a bright band is seen at the position of the brighter surface. These bands are called Mach bands.
I can see the band that should not be there! ~Mach band than
Mach banding is a kind of optical illusion, but it is also called tone jumping or banding, and exists as a technical term in the field of images and video.
Especially when dealing with 3D models in game engines such as Unity, Mach bands in gradients are often noticeable when textures are "compressed" to reduce data volume.
Below is an image comparing "high quality" and "low quality" texture compression in Unity.

The stripes are a bit visible even in high quality, but the stripes are more noticeable in low quality.
Although it is possible to intentionally add noise to a gradient to blur its borders and reduce it, I hope you will keep in mind that gradients can cause these problems.
Other
I write in Supplementary Information on the AO Bake...
- Flat + texture display if you want to see the baking result in 3D viewport
- Margin (padding) settings
item is also relevant to texture color baking. Please check them together~.
Extra: The applications for baking in textured colors are endless!
In this article, I wrote about how to bake "gradients" as one example of "texture color baking.
However, as I mentioned at the beginning, "texture color baking" can be applied to various texture patterns other than gradation.
For example, when drawing textures for clothing with complex patterns, separate the UVs for the production UVs and the UVs for the patterns, which are easier to draw, and bake the patterns for the production UVs later...etc.
I think we can do many other things depending on our ideas.
The prototype for this technique was taught to Toha by an instructor when he was at a 3DCG school.
At that time, I was taught one of the "ways to neatly connect the texture of a UV break".
The method is to draw a texture with unbroken UVs on another object and then bake it onto the joints.
This was about 15 years ago! Since then, I have applied it to other patterns, and when I taught it to my colleagues at work, they improved it, and it has been passed down through the generations while evolving among various people.
That's why.
If you have learned one of these tricks today after reading this article, I hope you will appreciate the wisdom and ingenuity of your predecessors and continue to apply and improve it to develop it into new tricks.
If you come up with a better and more convenient trick, please share it with us.
By all means!
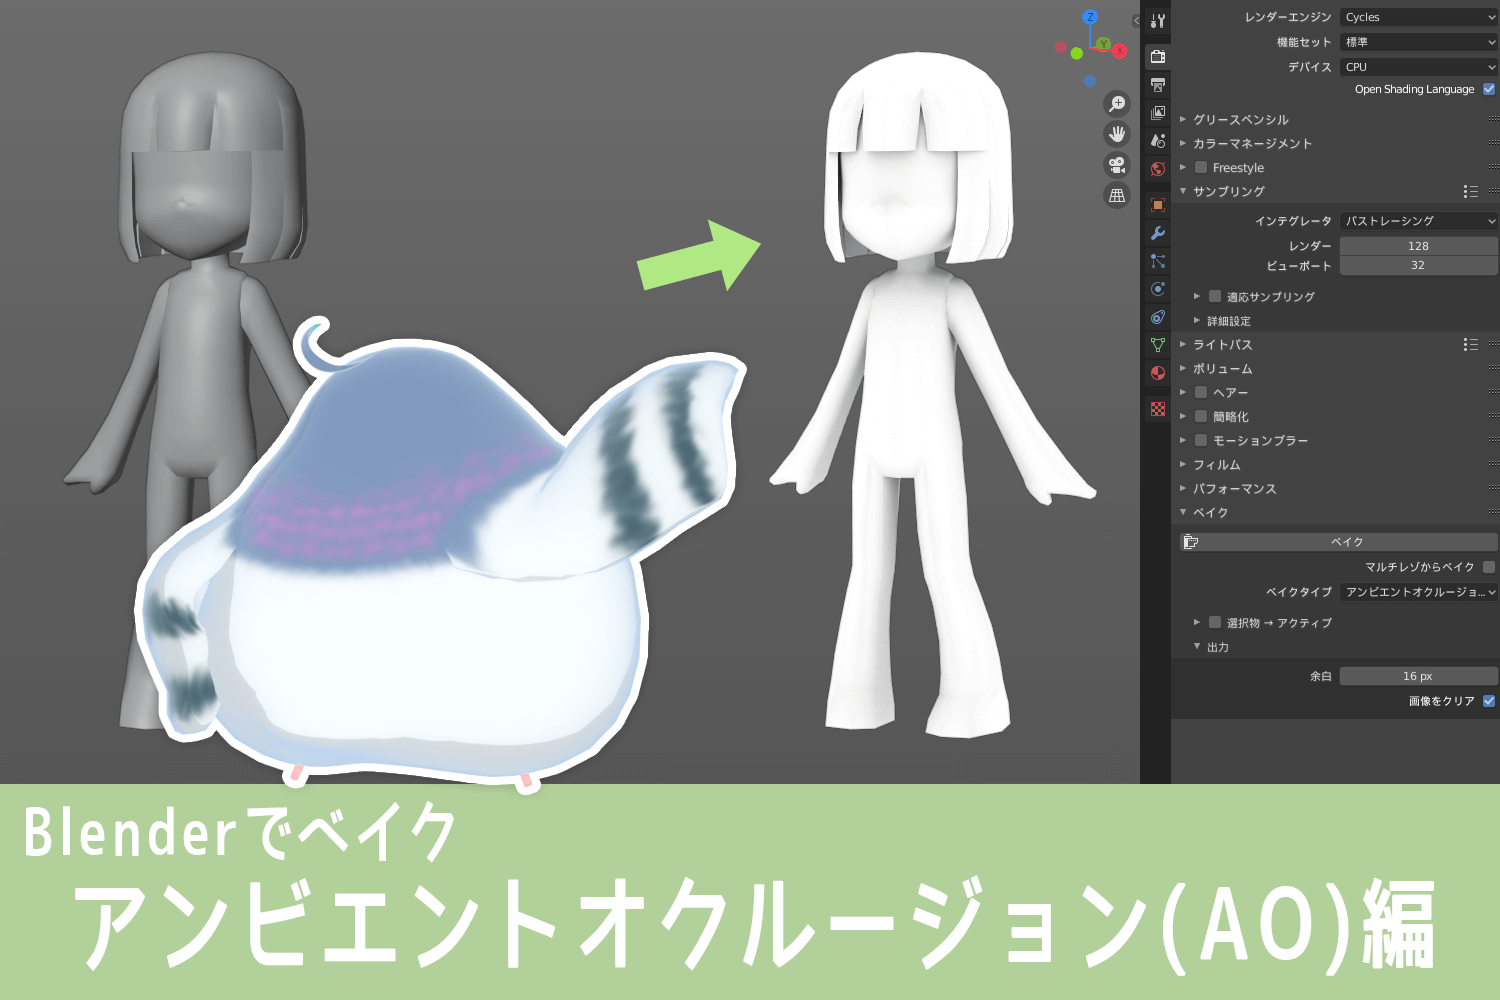
● Bake IN Blender AO version is here.
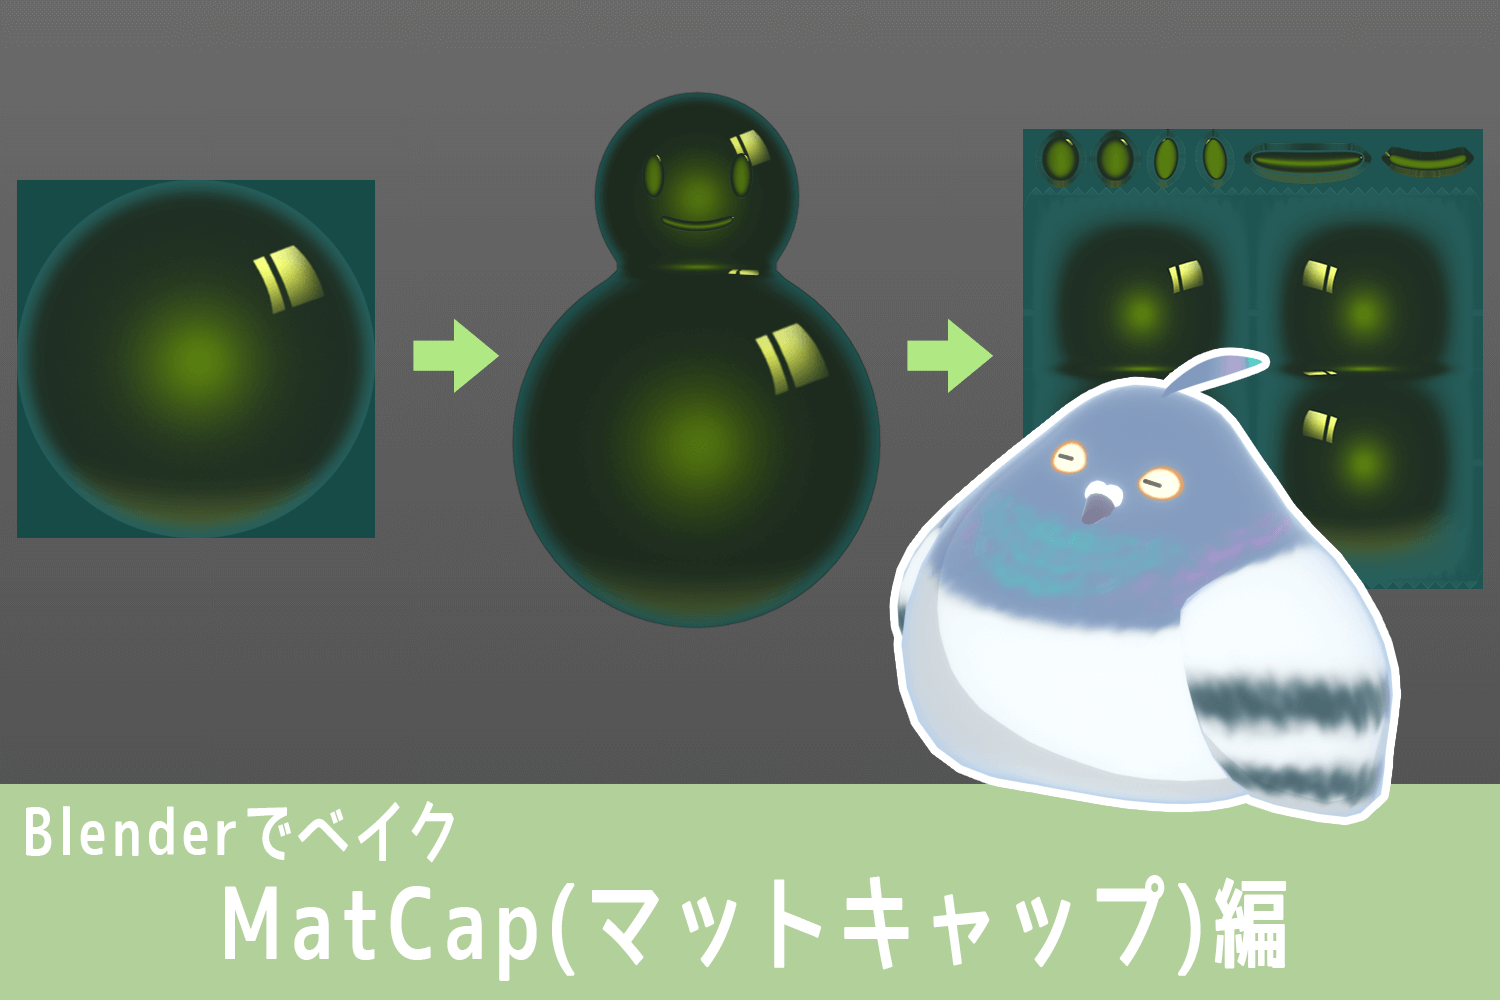
● Bake with Blender MatCap version is here.

List of comments