
I want to bake a Matcap into a texture in Blender!
So, here is a summary of the procedure for baking MatCap in Blender. I’ll try to keep it as brief as possible.
- Prepare objects to be Matcap baked
- Expand the object’s UVs
- Prepare the MatCap image you want to bake
*Please also refer to the UV expansion in Blender article when expanding UVs.
- Steps to bake Matcap in Blender
- (1) Change Blender viewport to Matcap display
- (2) Installed Matcap images in Blender
- (3) Create a material that will look the same as Matcap in rendering
- (4) Specify the size of the texture to be baked
- (5) Change render from Evee to Cycles
- (6) Change the bake type to radiant, select an object, and start baking
- (7) Save the baked image as named from the image editor
- Supplemental Information of MatCap Bake
- Extra: What is Matcap?
Steps to bake Matcap in Blender

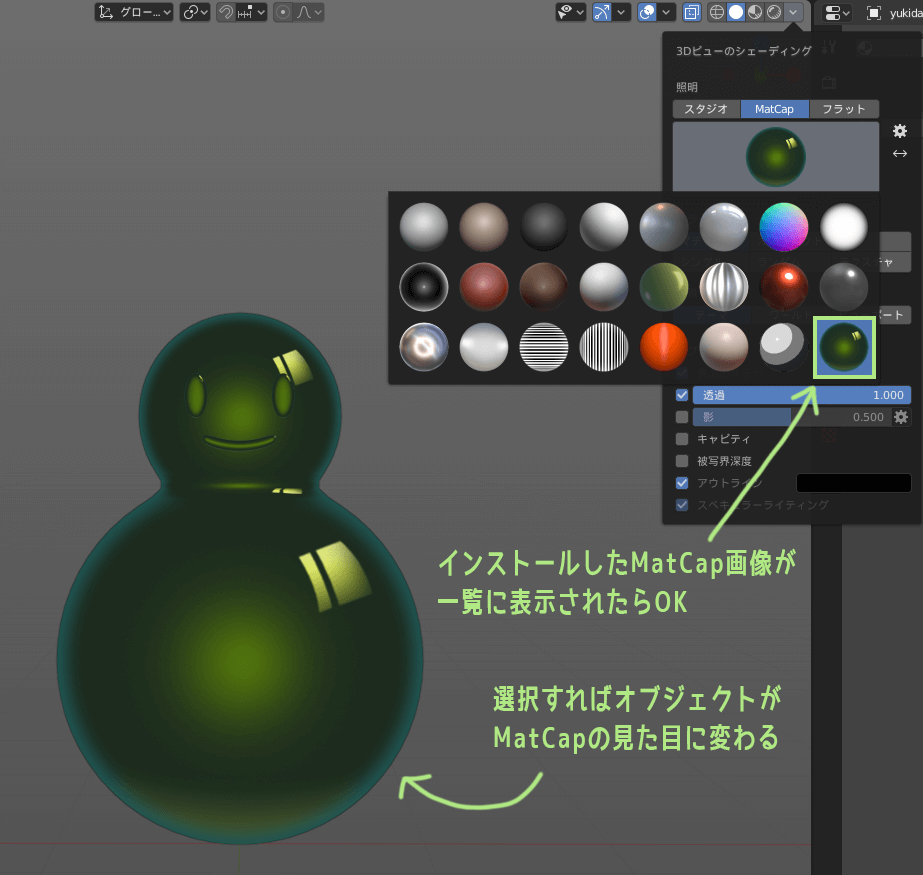
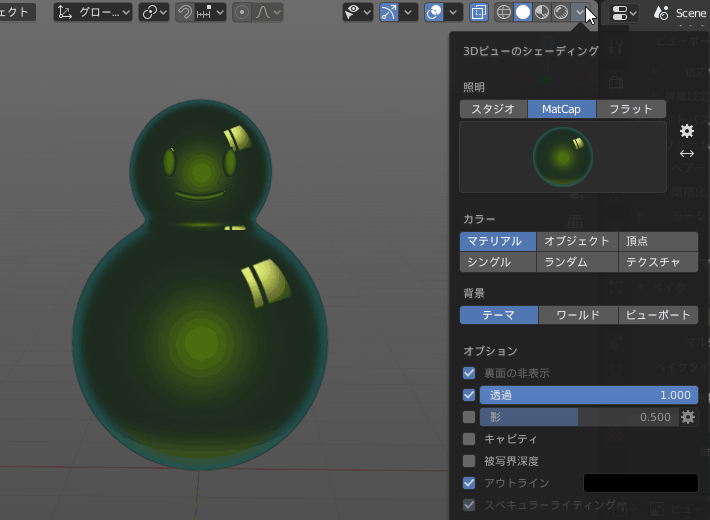
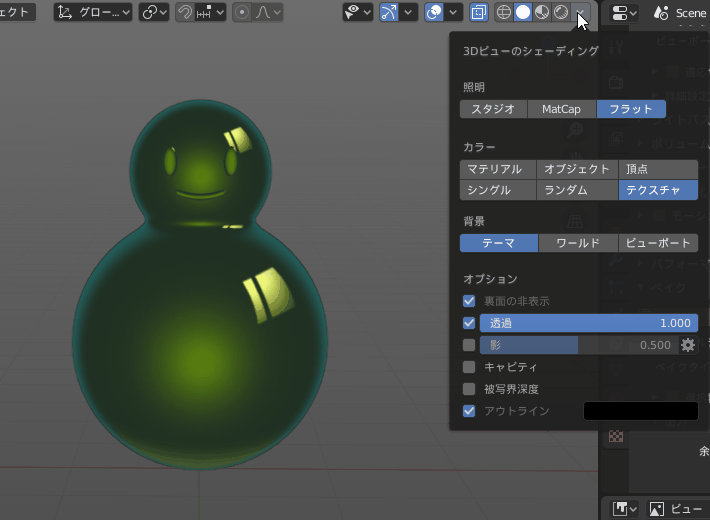
(1) Change Blender viewport to Matcap display
First, change the Blender viewport to Matcap view.
viewport shading to solid display and click on the “▽” area.
There are three buttons in a row: [Studio], [MatCap], and [Flat], so select [MatCap].
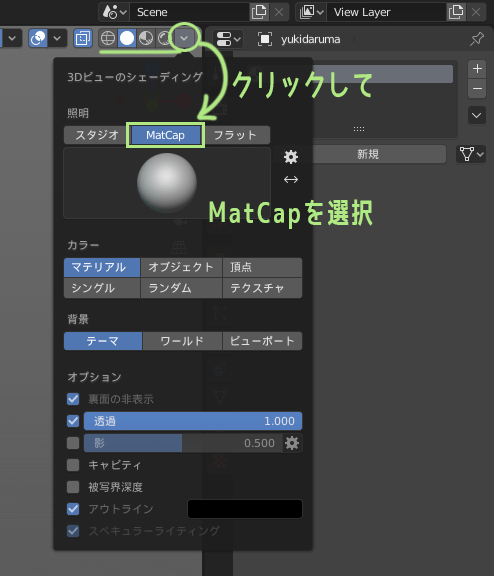
The viewport will now be in Matcap view. Clicking on the sphere thumbnail below the [Matcap] button will display the Matcap image that is provided by default. You can change the appearance by selecting it.

(2) Installed Matcap images in Blender
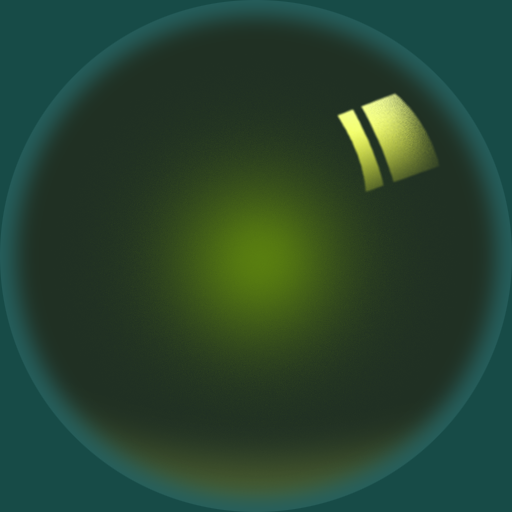
You can create your Matcap images and install them in Blender.
Prepare a 512 x 512 sized image, saved as jpg or png. In this case, we will use this image.
To install MatCap images, use the viewport shading click on the “▽” area to open it, then click on the gear symbol next to the sphere thumbnail.
A preference window will then open, and click “Install” next to the word Matcap.

When the file selection window opens, select the Matcap image you wish to install.
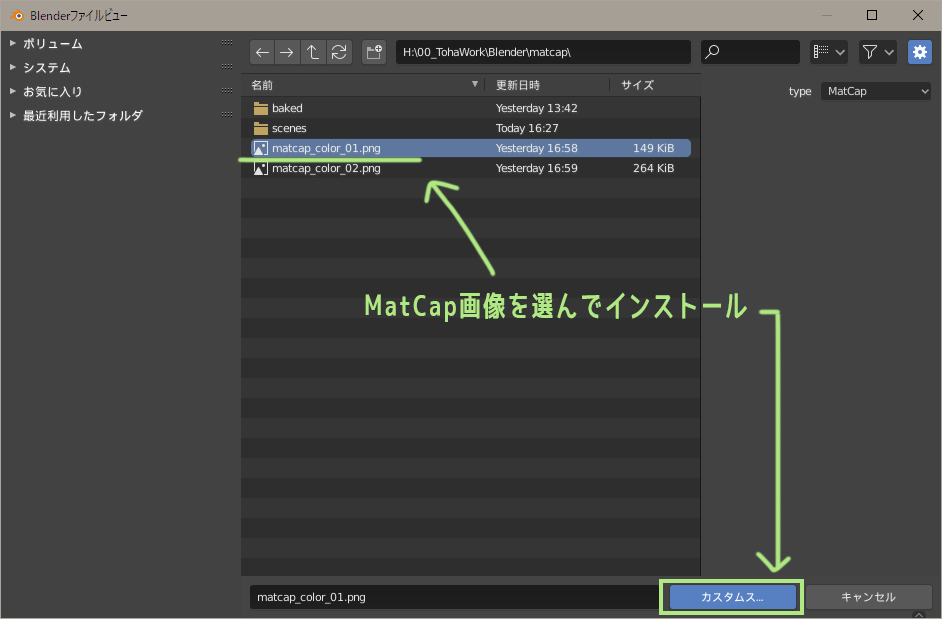
It is OK if the Matcap image you installed appears in the Matcap list.
Since Blender 4.2, the configuration files for the portable version of Blender are saved in a manually created folder called “portable”, which is also where MatCap images are saved when newly installed.

Location: portable Blender folder/portable/datafiles/studiolights/matcap
(3) Create a material that will look the same as Matcap in rendering
Blender’s Matcap view is useful for easily changing the texture of a model, but it is only temporarily changing the appearance, so this texture cannot be baked into a texture as is.
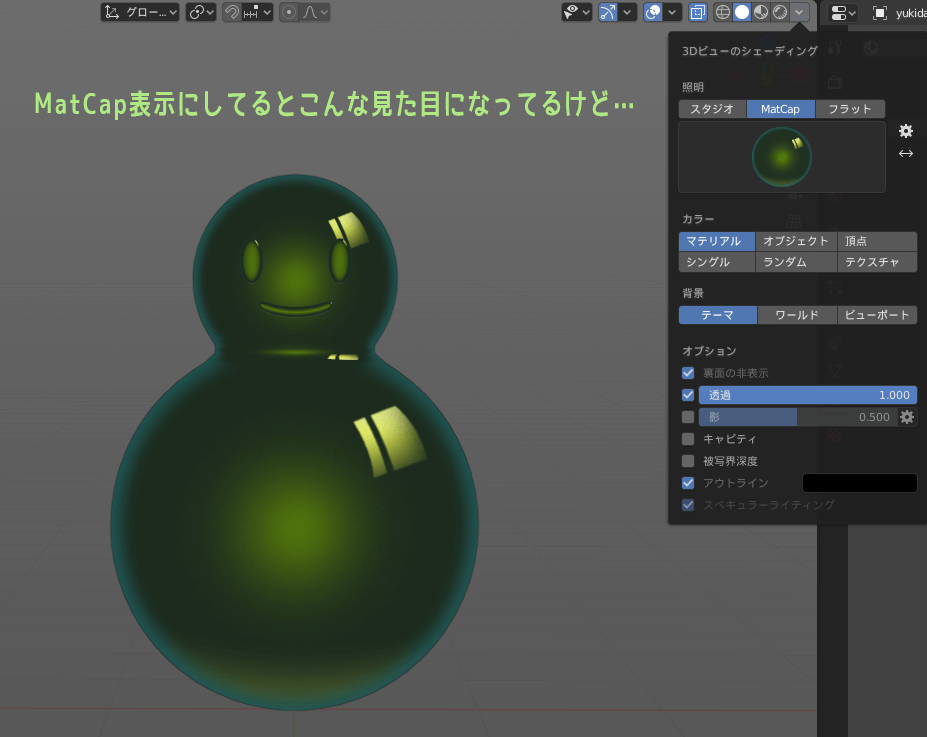
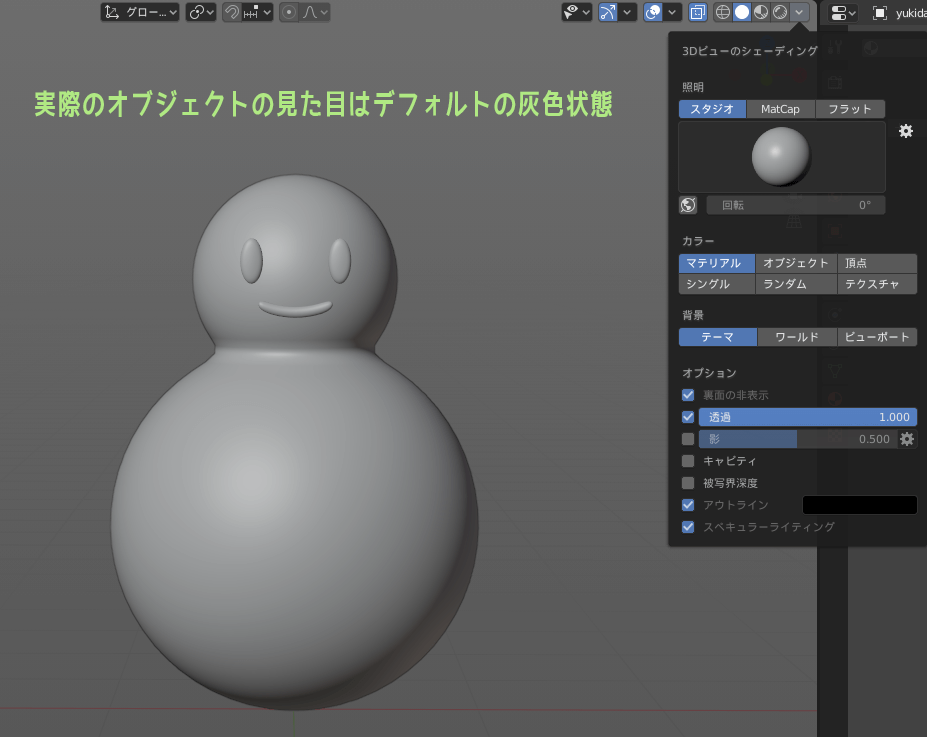
Since the bake function bakes the result of rendering you must create a material that will look the same in the rendered view as in the MatCap view and assign it to the object.
So, we will create the material.
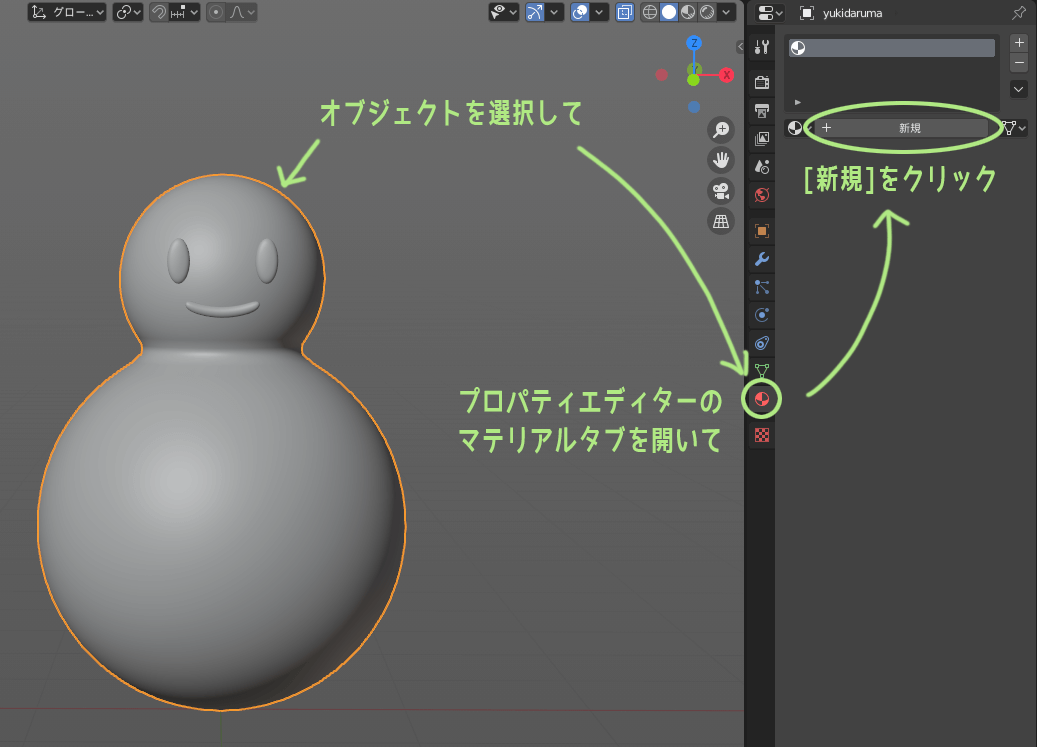
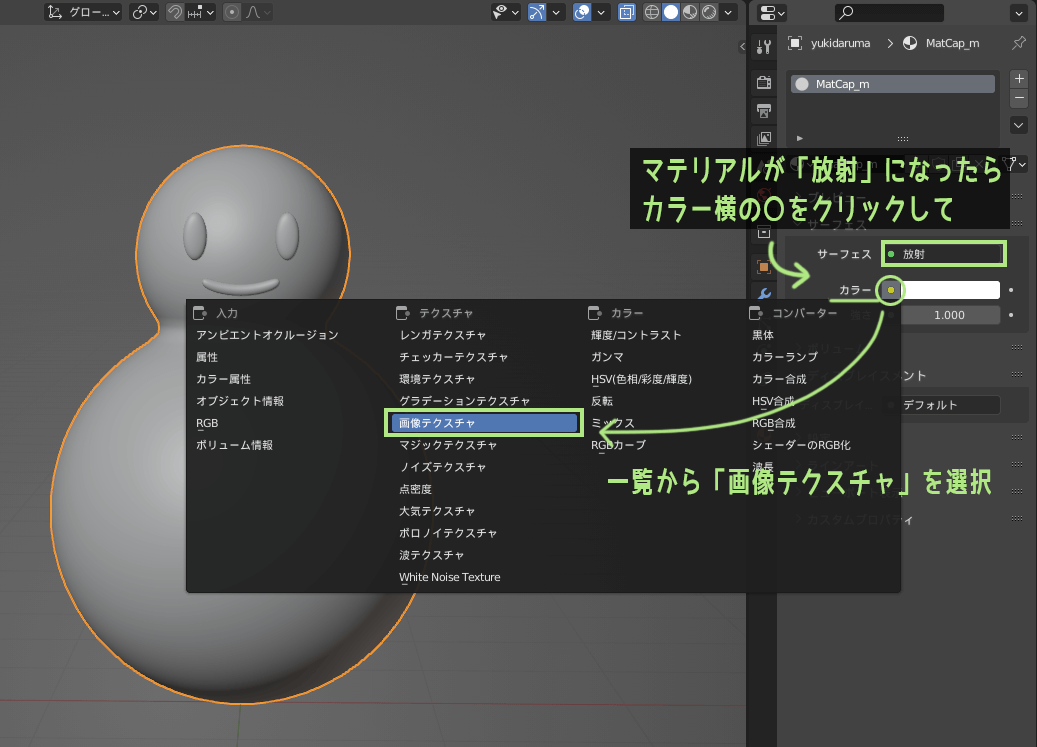
After giving the assigned material an appropriate name, click on the surface and change the material type to “radiant.

Click on the circle next to the color and select “Image Texture”.
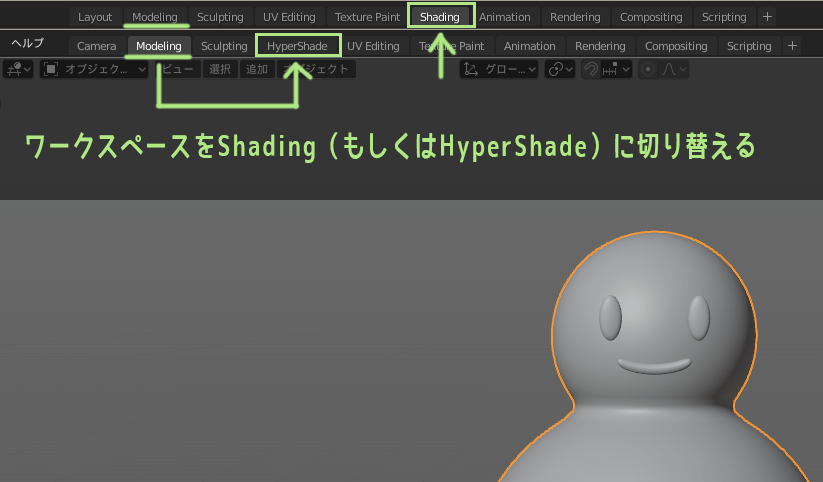
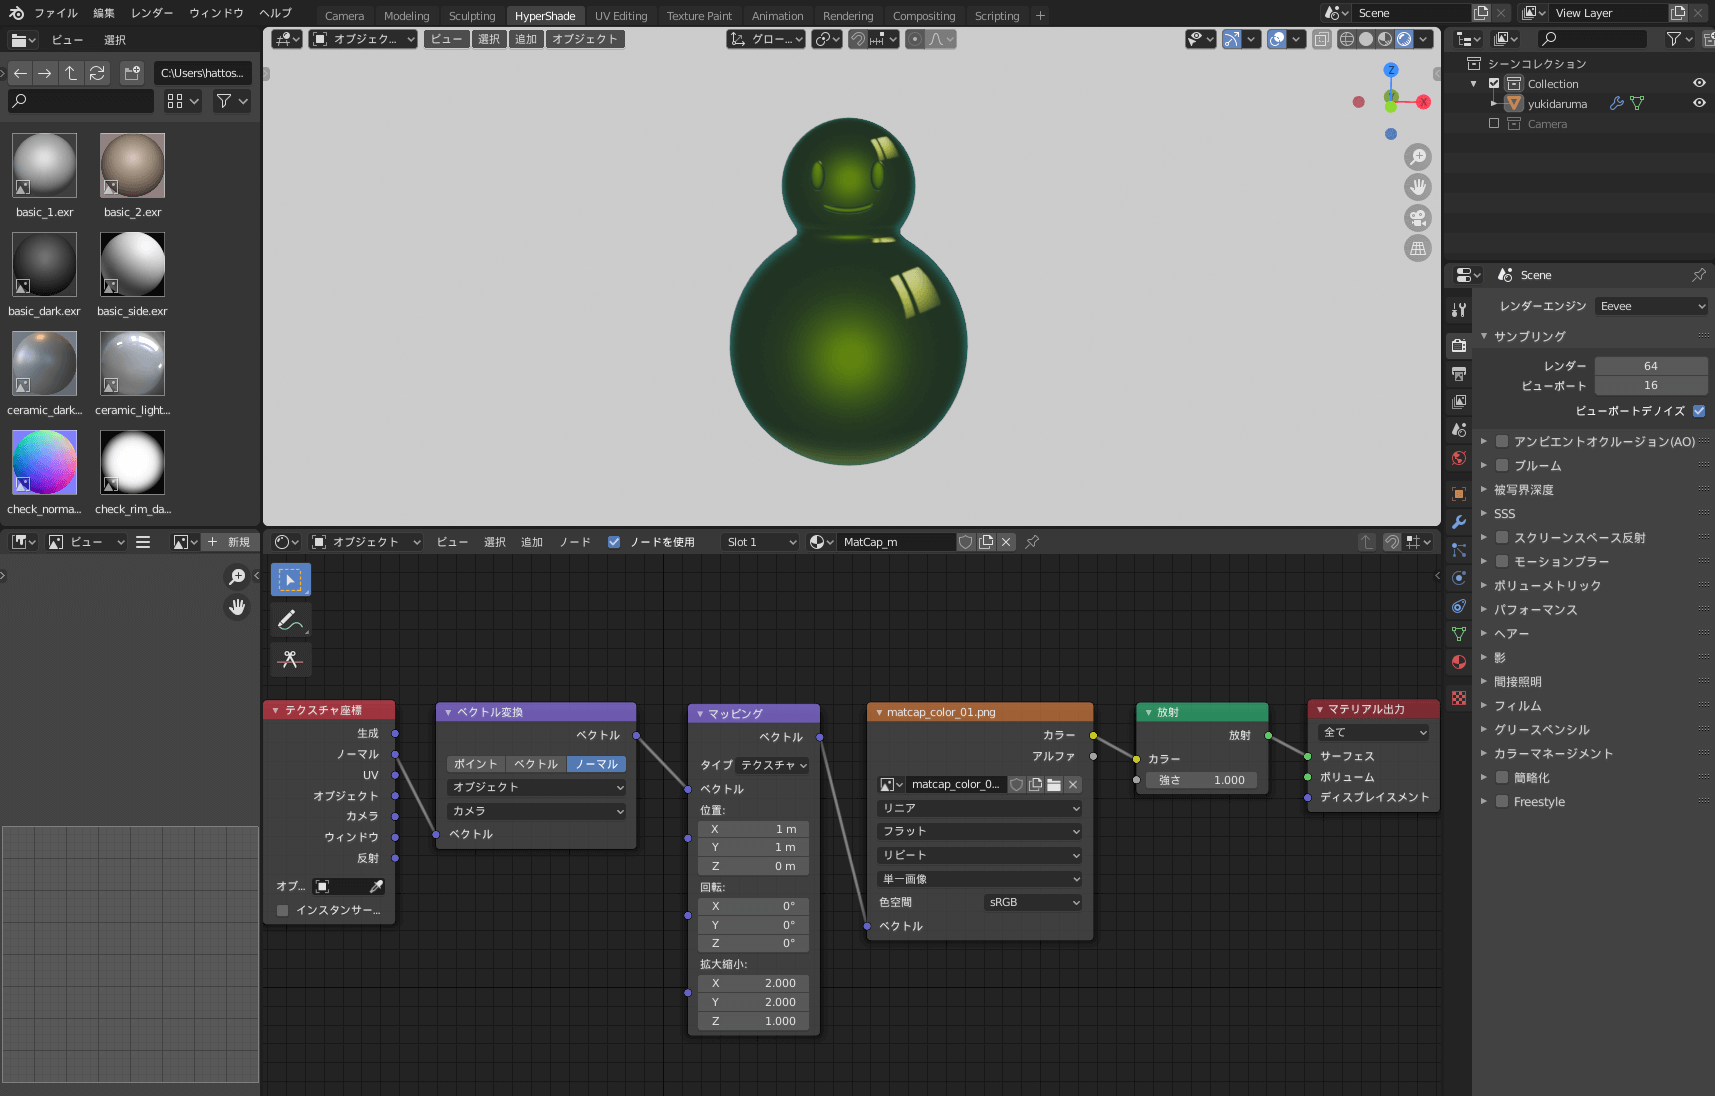
Once you have done this, switch the workspace to “Shading”. (If you have installed the Maya Config Addon For Blender, it will be called ” HyperShade”.)
If you switch workspaces, you will see three nodes in the shader editor: “Image Texture,” “Radiation,” and “Material Output. Add three more nodes here.
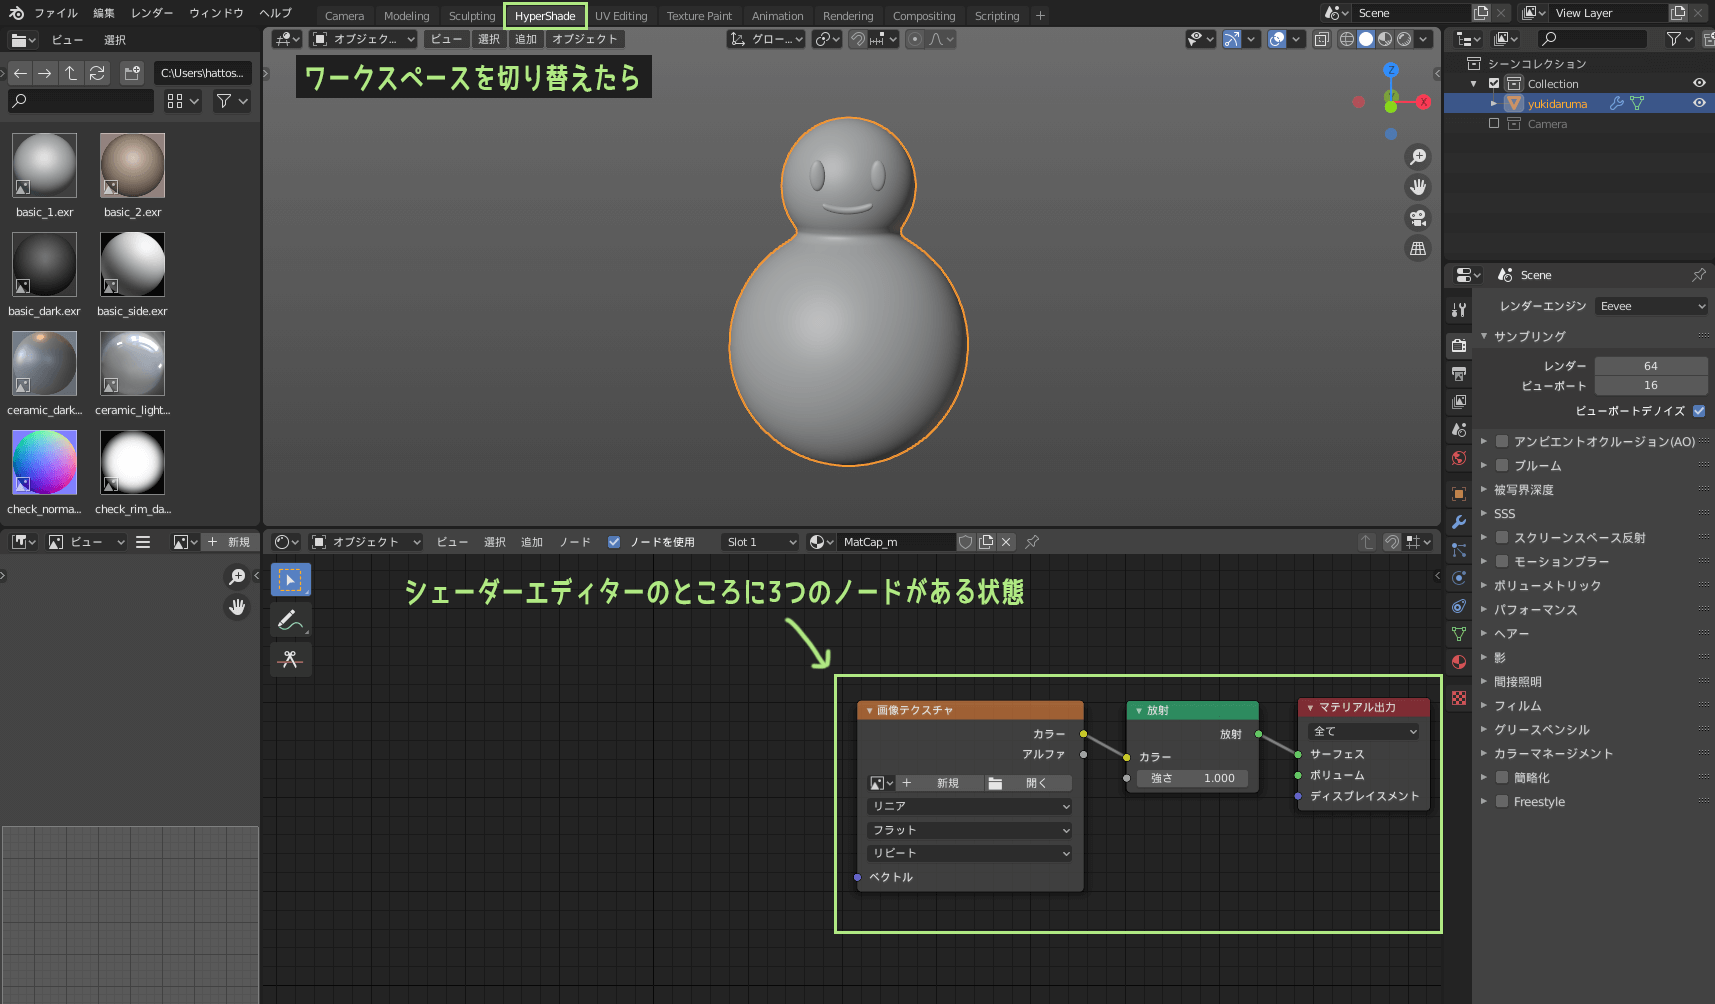
Nodes are added from the menu “Add” at the top of the shader editor.
The procedure for adding the three nodes is as follows.
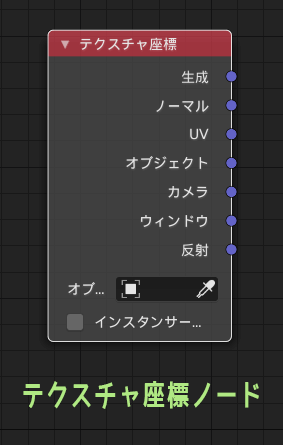
- Node 1texture coordinates
Add -> Input -> Texture Coordinates
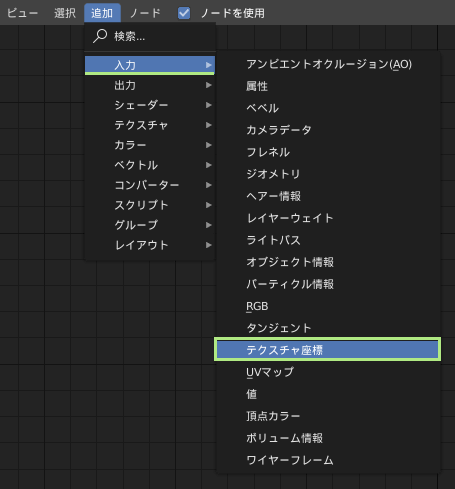
- Node 2vector transformation
Add -> Vector -> Vector Transform
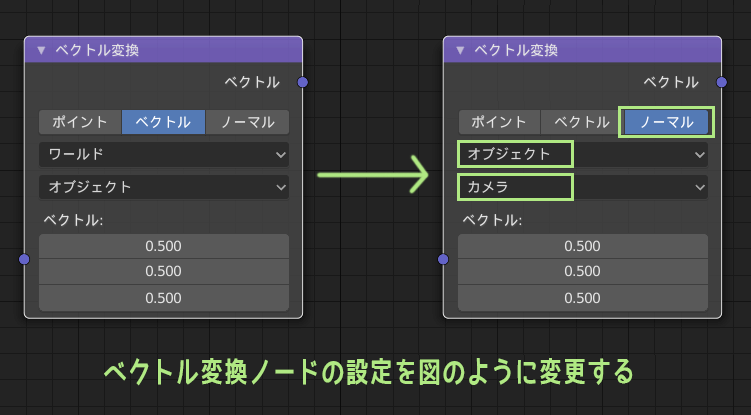
*Change the settings of the added vector transformation node as shown in the figure.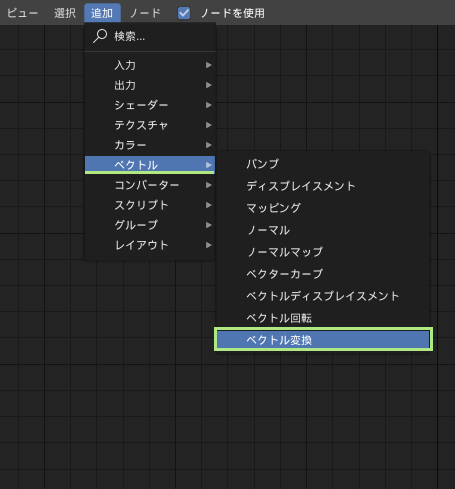
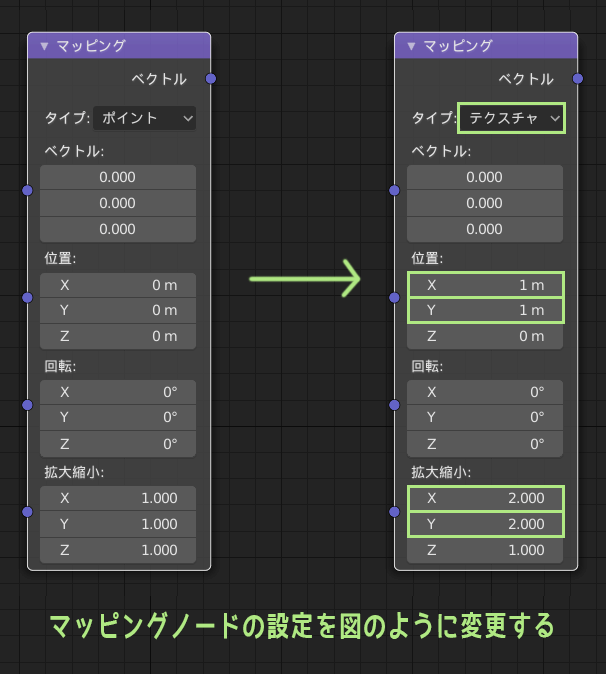
- Node 3mapping
Add -> Vector -> Mapping
*Change the settings of the added mapping node as shown in the figure.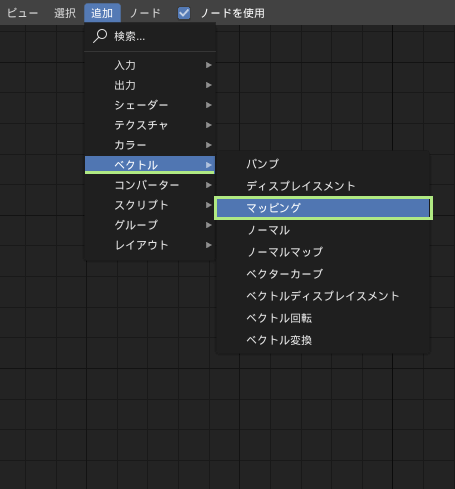
After adding nodes and changing settings, connect the nodes by mouse click-and-drag as shown below.
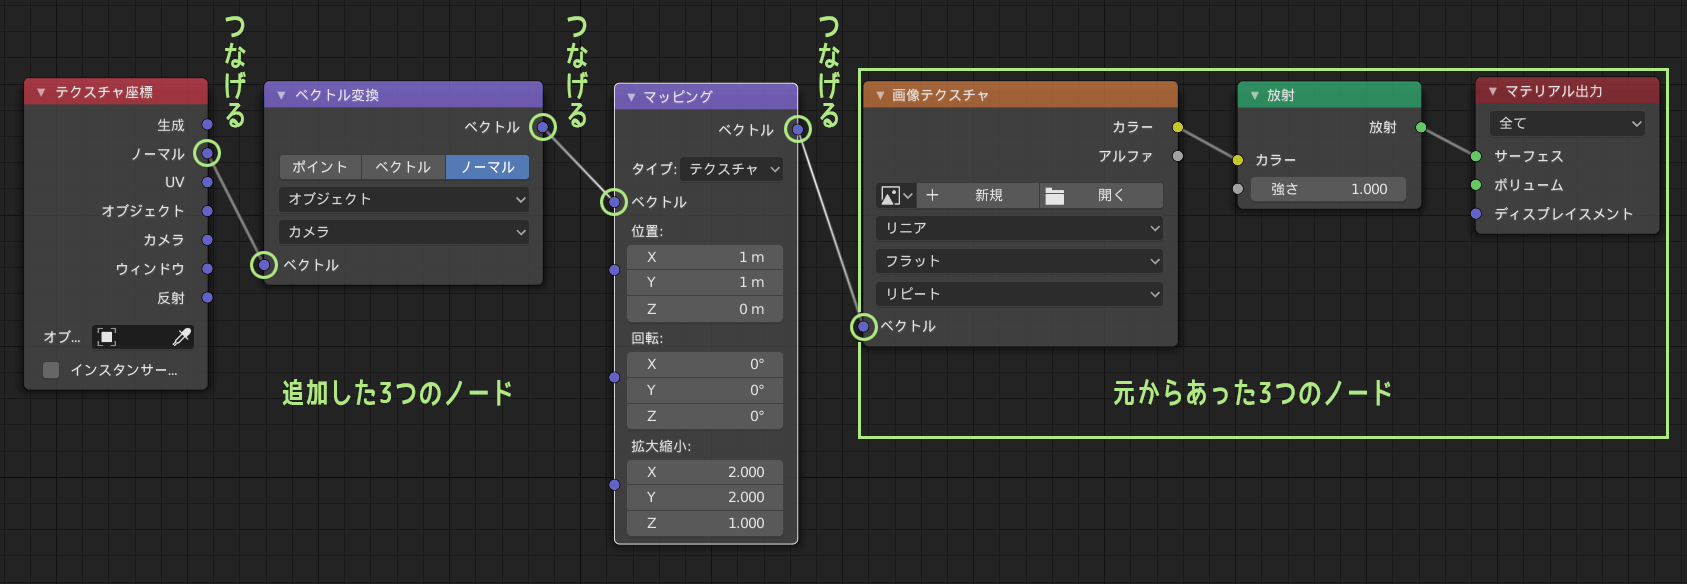
Finally, click the Open button on the Image Texture node to assign the Matcap image.
![画像テクスチャノードの[開く]をクリックしてMatCap画像を割り当て](https://tohawork.com/wp-content/uploads/2020/12/b_bakematcap_21.png)
Now you have a material that looks the same in the rendered view as it does in Matcap view.
Check the shading in the 3D viewport by setting it to Matcap or render view. If you just want to render the Matcap look in Blender, this is all you need to do.
If you look online at MatCap baking in Blender, you will often find that the vector transformation node is set to “Vector” instead of “Normal”.
When I tried it, I got exactly the same result whether the node setting for the vector transformation was “Normal” or “Vector”.
So, I think the vector conversion can be set to “normal” or “vector”!
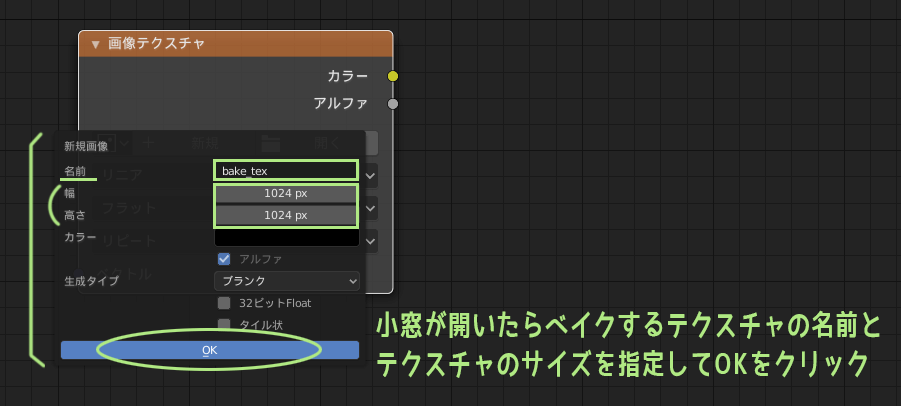
(4) Specify the size of the texture to be baked
In this case, we want to bake the look of Matcap into a texture, so we will prepare for that.
First, add an image texture node in the node editor by going to Add -> Texture -> Image Texture. This node should not be connected to any other node, just leave it there.
![画像テクスチャノードを追加して[新規]ボタンをクリック](https://tohawork.com/wp-content/uploads/2020/12/b_bakematcap_27.png)
Click the “New” button on the added image texture node, and when a small window opens, specify the size of the texture to be baked. Give the texture a name that is easy to understand, such as “bake_tex”.
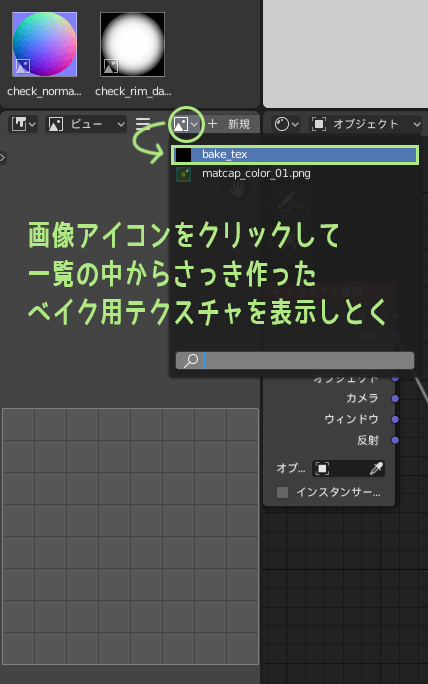
You will see the image editor next to the shader editor, so click on the icon next to the image name to display “bake_tex”.
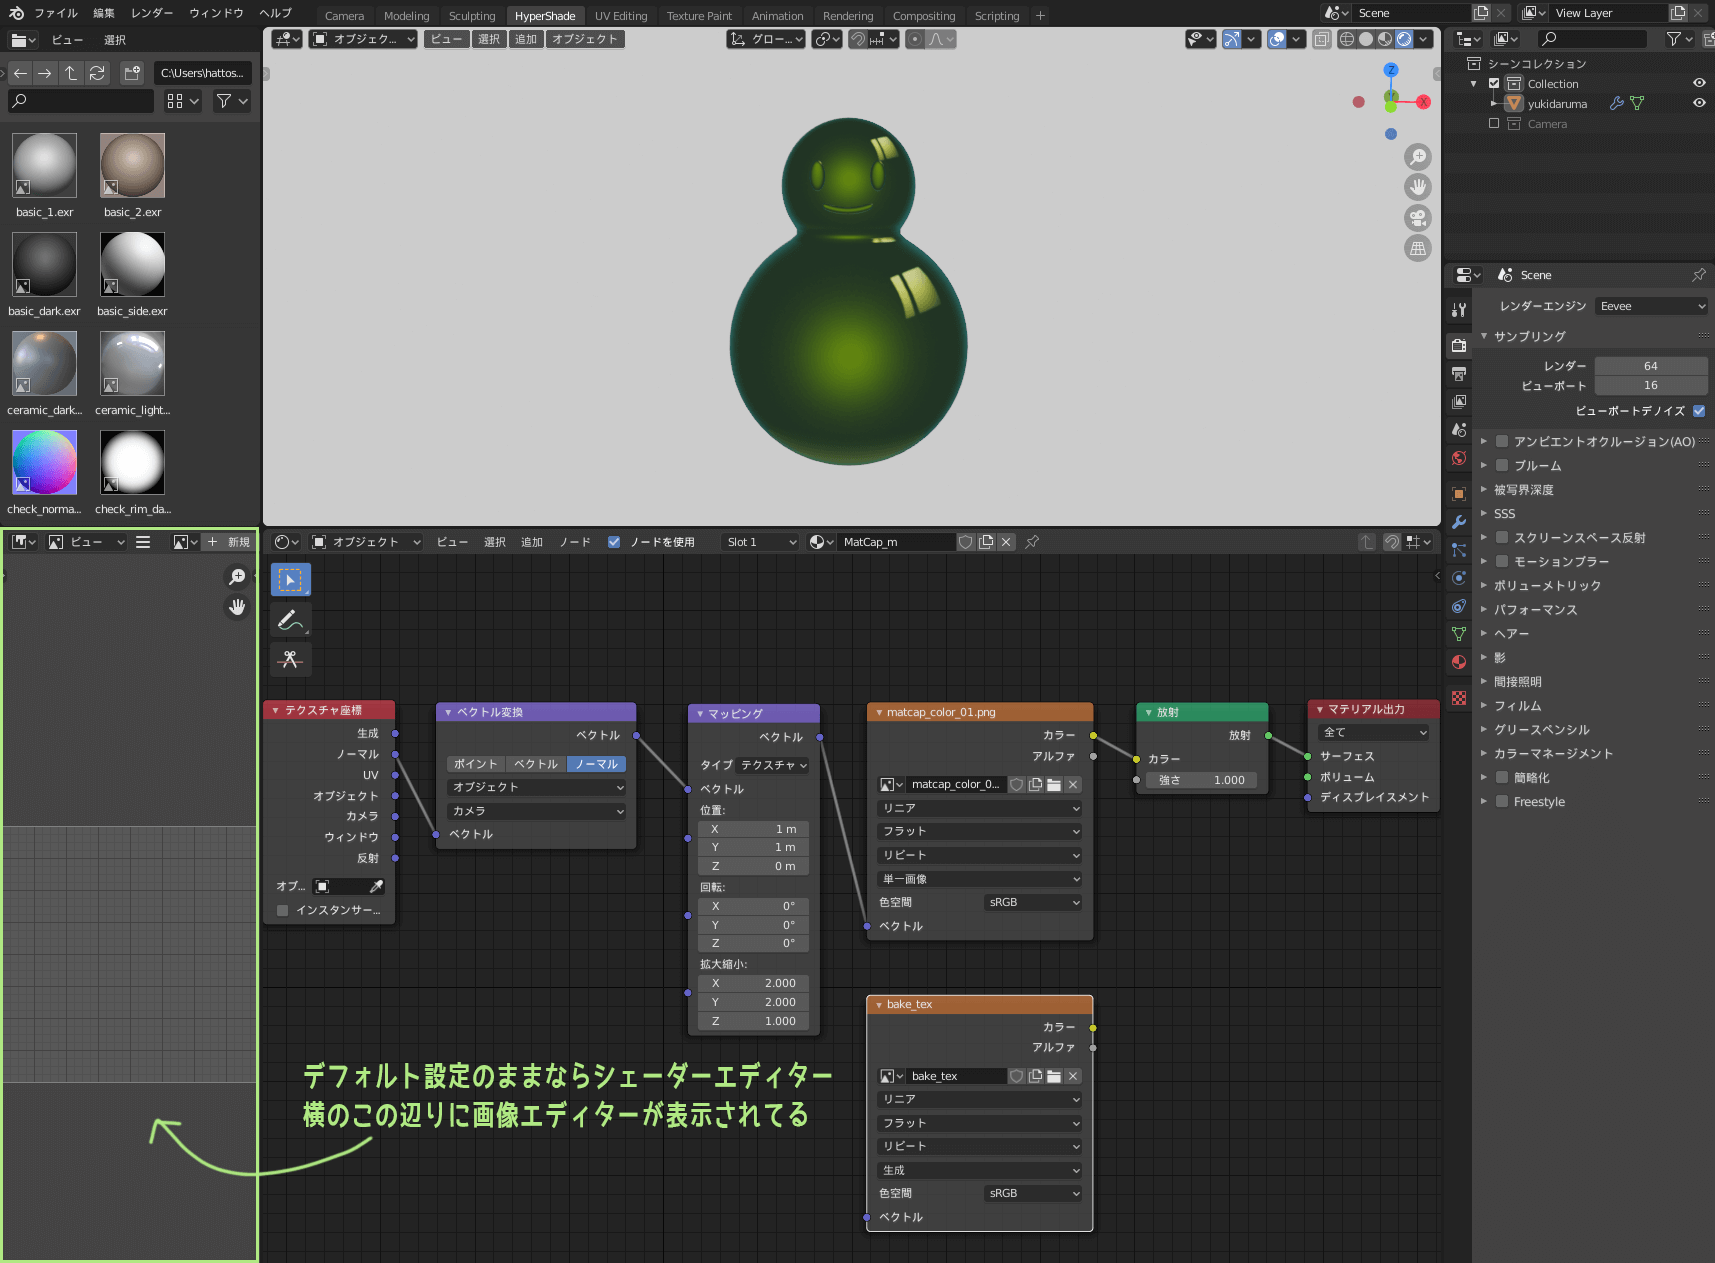
*If you do not see the image editor, try to display the image editor refer to Display a window of your choice in a divided area.
(5) Change render from Evee to Cycles
Blender’s default render is Eevee, but Eevee cannot be baked, so change to Cycles.
*The method for changing is in the AO Bake article, Change render from Eevee to Cycles.
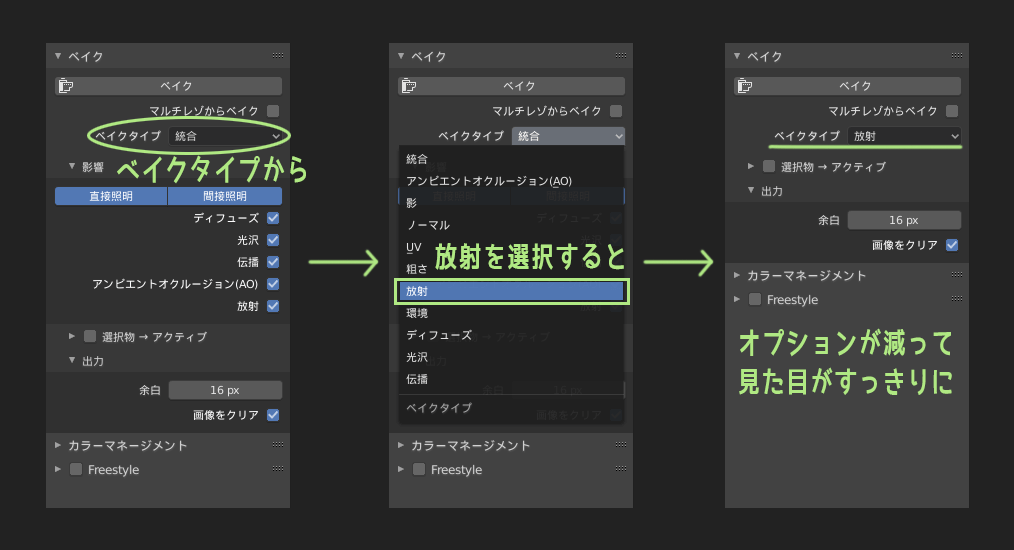
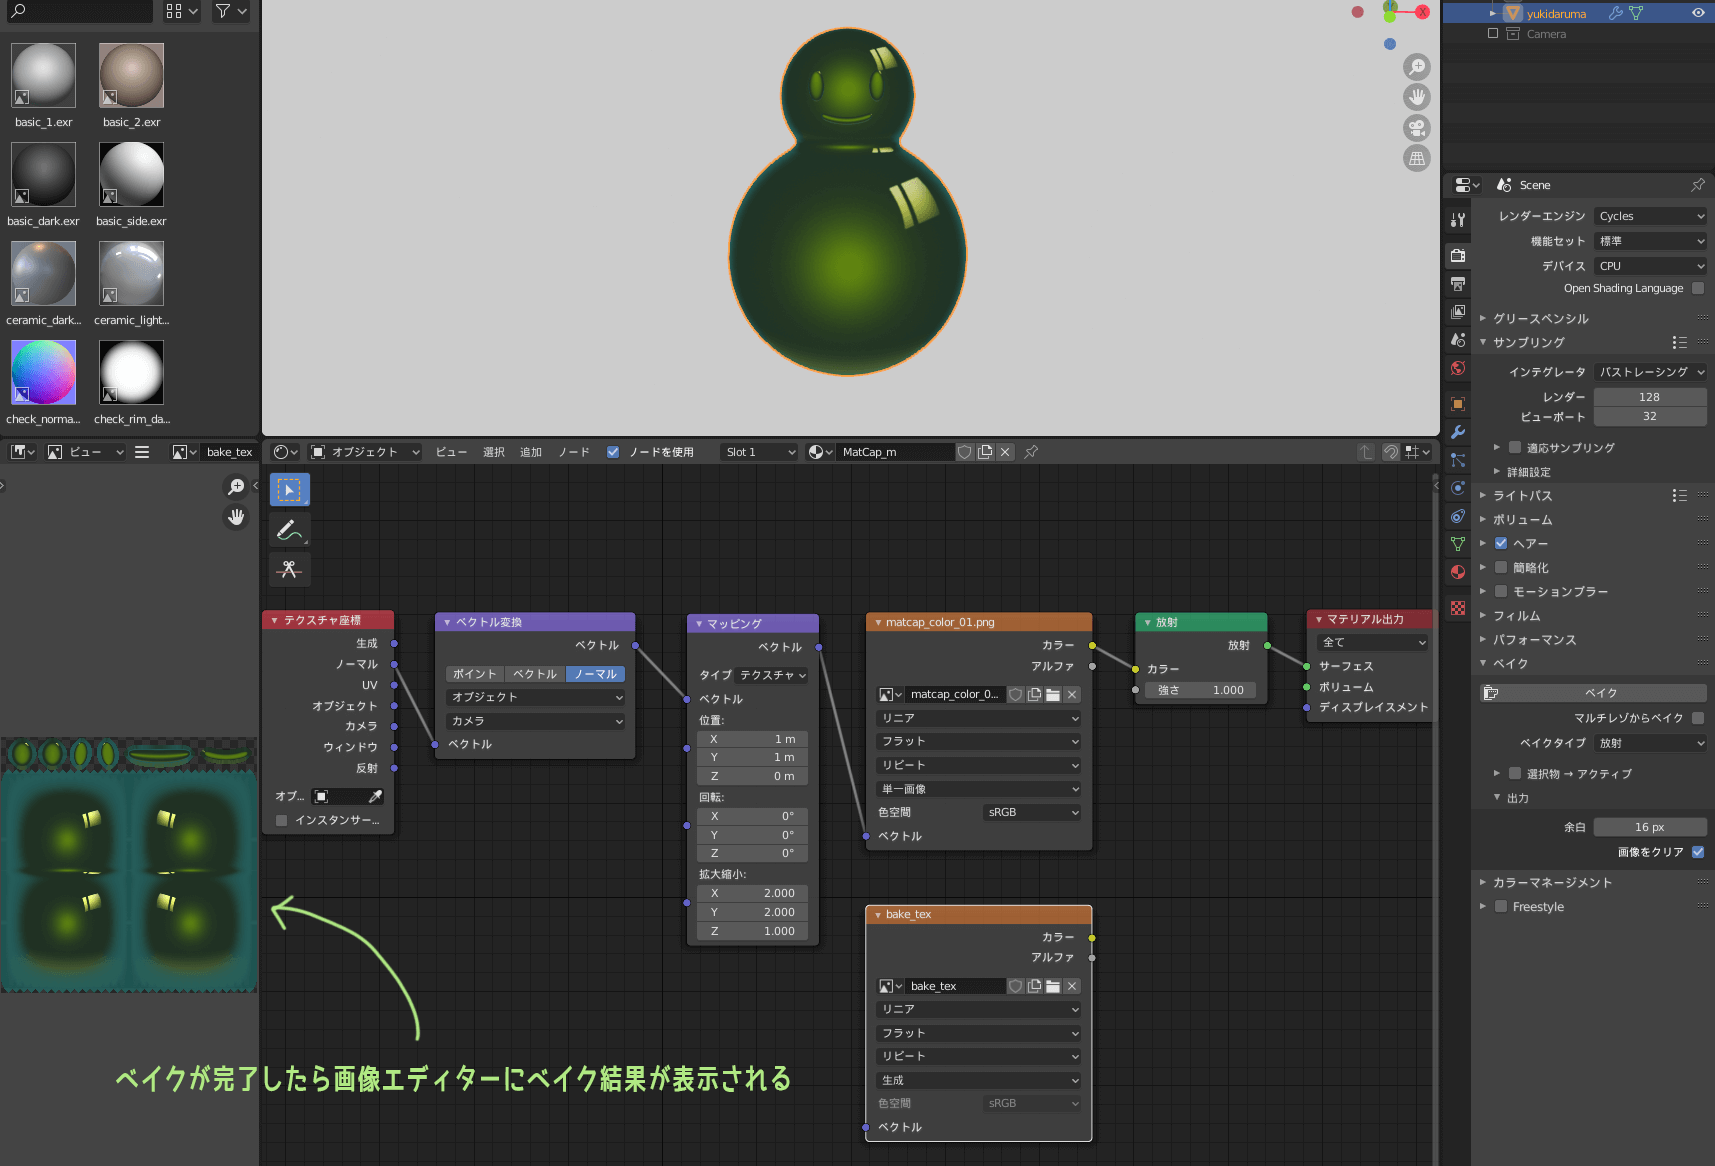
(6) Change the bake type to radiant, select an object, and start baking
Click on the Bake item “Bake Type” and select “Radiation” from the list.
Setting the bake type to “radiant” reduces the number of optional items and gives a cleaner look.
Now that the Matcap bake is ready, select the object you want to bake the Matcap to and click the Bake button. Wait until the baking is finished.
![MatCapベイクしたいオブジェクトを選択して[ベイク]ボタンを押す](https://tohawork.com/wp-content/uploads/2020/12/b_bakematcap_32.png)
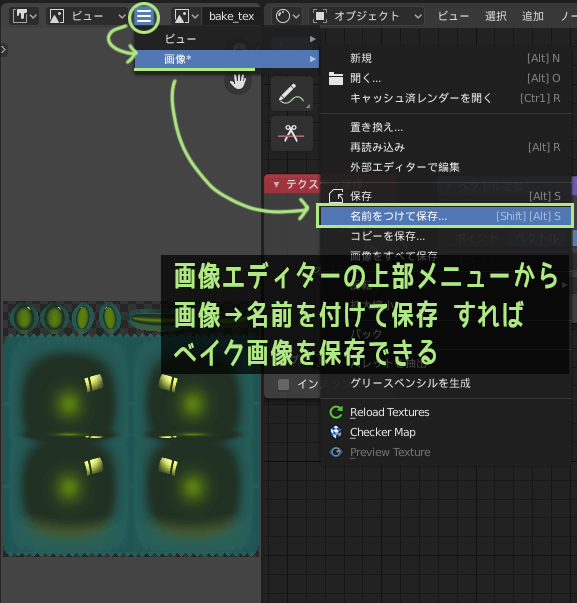
(7) Save the baked image as named from the image editor
When baking is finished, you will see the baking results in the image editor.
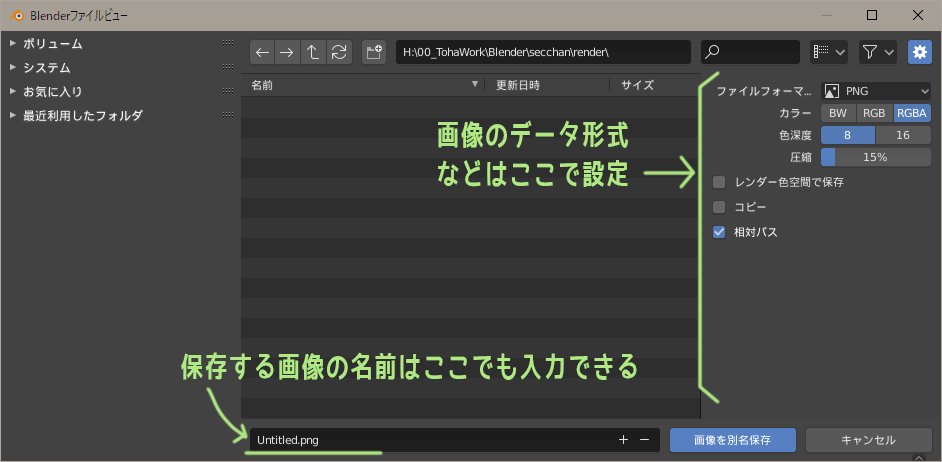
You can save a baked image from the top menu of the image editor under Images -> Save As.
Now we can bake Matcap’s look and feel into the texture~!

That’s all for “Matcap baking in Blender!”
Supplemental Information of MatCap Bake
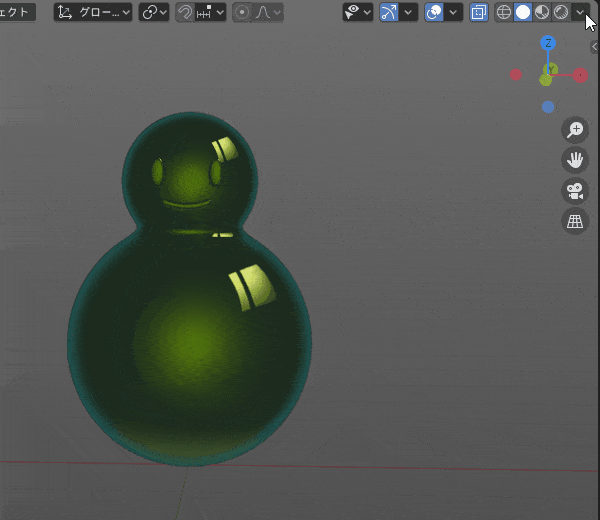
MatCap bake results depend on the camera angle
The Matcap will look good from any angle in the viewport, but when baked into a texture it will be baked “as seen from the angle of the rendering camera”.
Therefore, the original Matcap view and the baked result will look different from different angles.
In this case, the render camera was set to show the object from the front, so the baked result looks almost the same from the front as it does in MatCap, but from the side, it looks strange.
Because of the nature of baked image data, it is impossible to bake the image so that it is the same as the Matcap display when viewed from any angle.
How to use Matcap Bake

What good is Matcap Bake then?
You may think that this is a good idea, but it can be useful in many ways, depending on how you use it.
If you have a specific camera angle, such as a small model in the background, you can use it without any problem.
Another common use is as a base for hand-drawn textures, where the result of Matcap baking is not used as-is but retouched in Photoshop or other software.
Depending on the model, there may be cases where you want to express skin or metal textures only by drawing in textures, but it is sometimes easier to use Matcap baking or other methods rather than drawing the entire model by hand.
Matcap is especially useful when you want a fantasy-like expression or a unique texture rather than a purely realistic one.
Other
I write in Supplementary Information on the AO Bake…
- Flat + texture display if you want to see the baking result in 3D viewport
- Margin (padding) settings
- Smooth shade/Flat shade affects bake results
items are also relevant to the MatCap Bake. Please check them together.
Extra: What is Matcap?
MatCap (Material Capture) is…
In brief, A method of pseudo-reproducing the material + lighting of a sphere from a single image depicting the sphere.
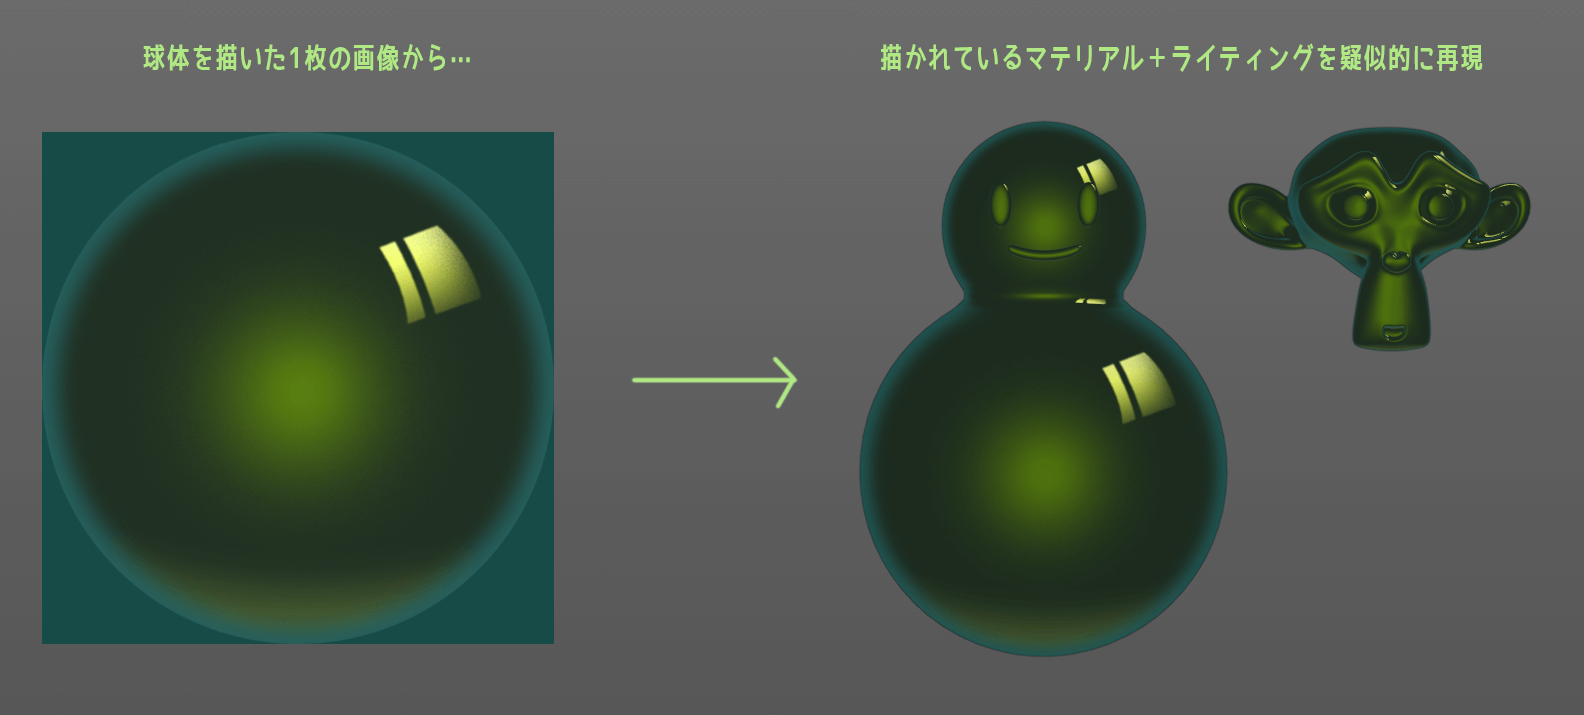
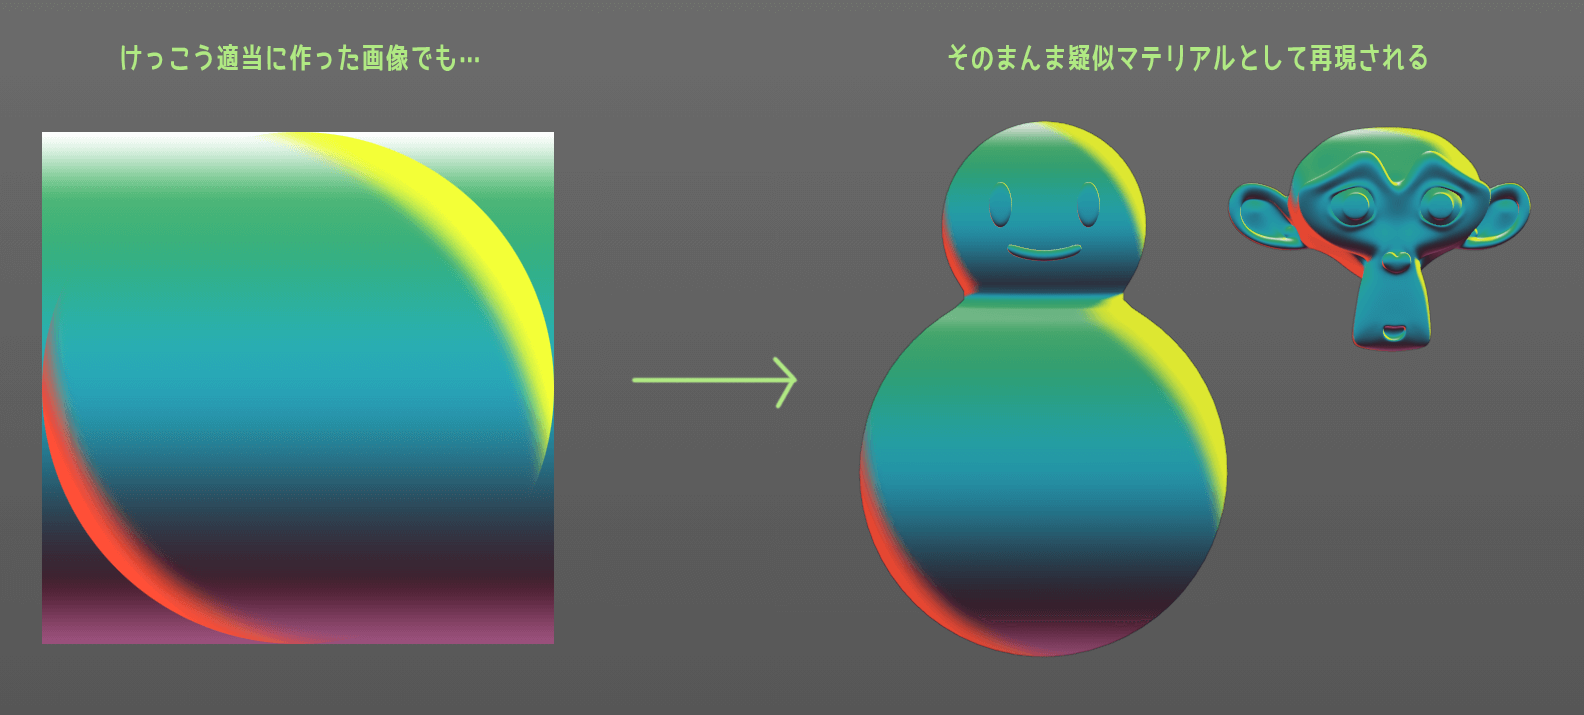
MatCap is highly flexible and anything you draw on a MatCap image can be made into a pseudo-material.
For example, with MatCap images with a hand-drawn touch like this…
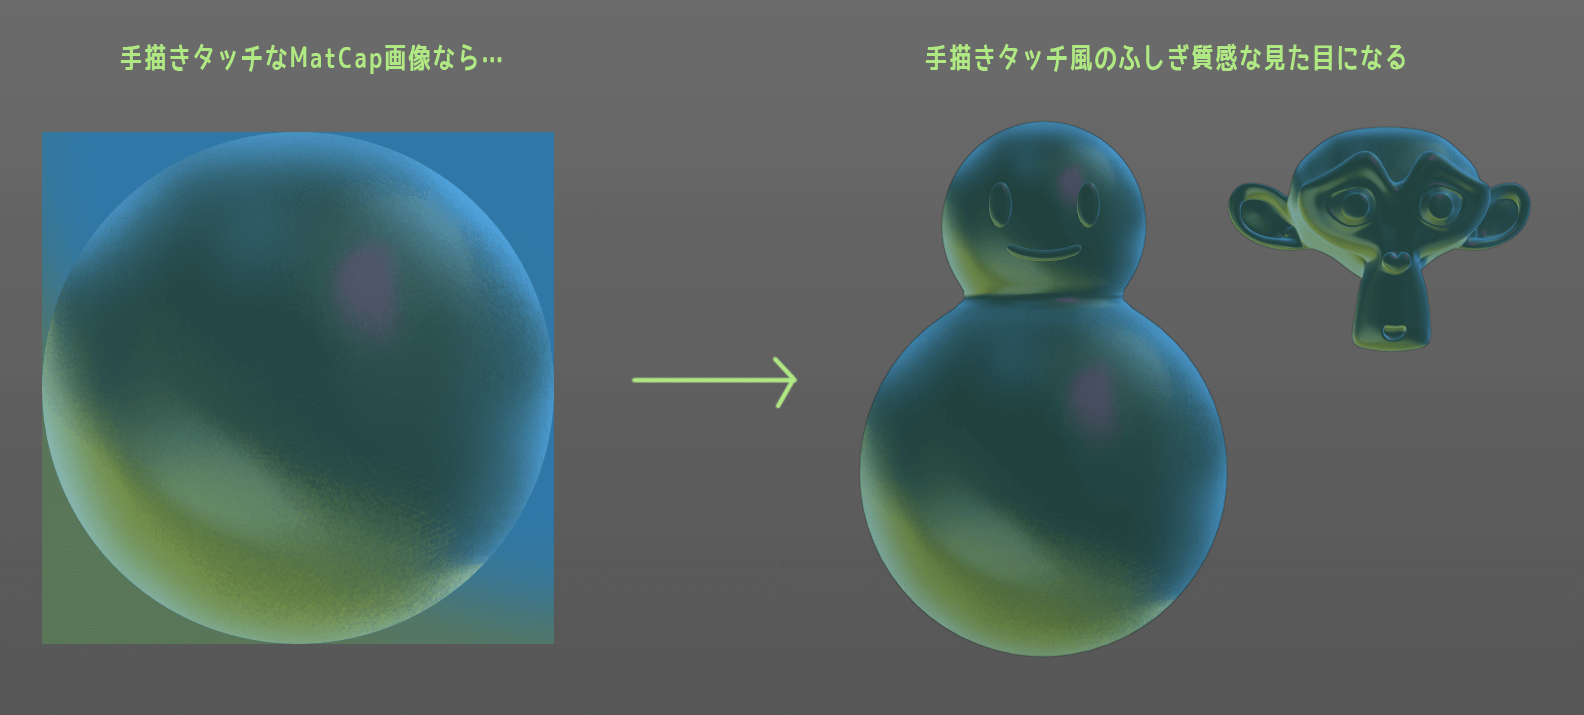
It’s an interesting and good thing about MatCap.
It is better to use a MatCap image that properly represents a sphere so that it looks physically correct. However, even an image that is not properly represented can be used as a pseudo-material.
You can create your own MatCap images as you wish, or some sites provide free MatCap images.
It is easy to try MatCap in Blender, so if you are interested, please try it!
Seeing is believing!
Bake in Blender AO version is here.
Bake in Blender for the gradient version is here.

- Coments - コメント一覧