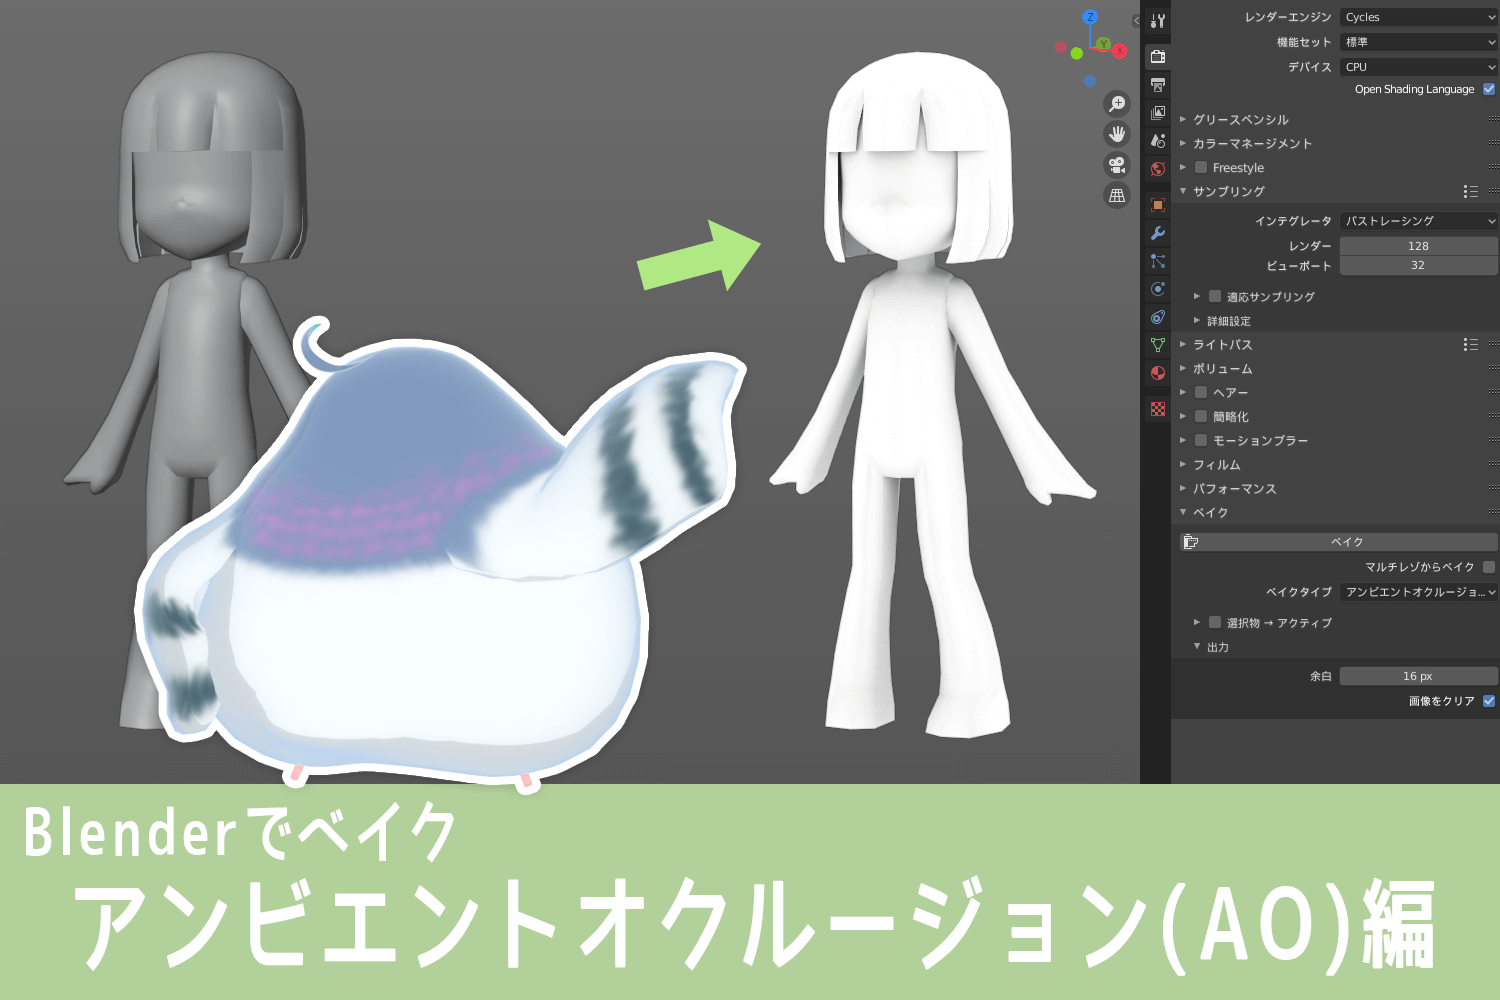
I want to bake ambient occlusion into a texture in Blender!
So, here is a summary of the procedure for AO baking in Blender. I’ll try to keep it as brief as possible.
- Prepare objects to be AO-baked
- Expand the object’s UVs
*Please also refer to the UV expansion in Blender article when expanding UVs.
(For more information about the free add-on TexTools, which allows for easier AO baking UV article.)
- Procedure for AO baking in Blender
- (1) Apply the appropriate material to the object to be AO-baked
- (2) Apply image texture to material and specify image size
- (3) Change render from Eevee to Cycles
- (4) Change the bake type of the bake item to AO
- (5) Select an object and press the Bake button
- (6) Save the image as named from the UV Editor or Image Editor
- Supplemental Information of AO Bake
- Extra: What is Ambient Occlusion?
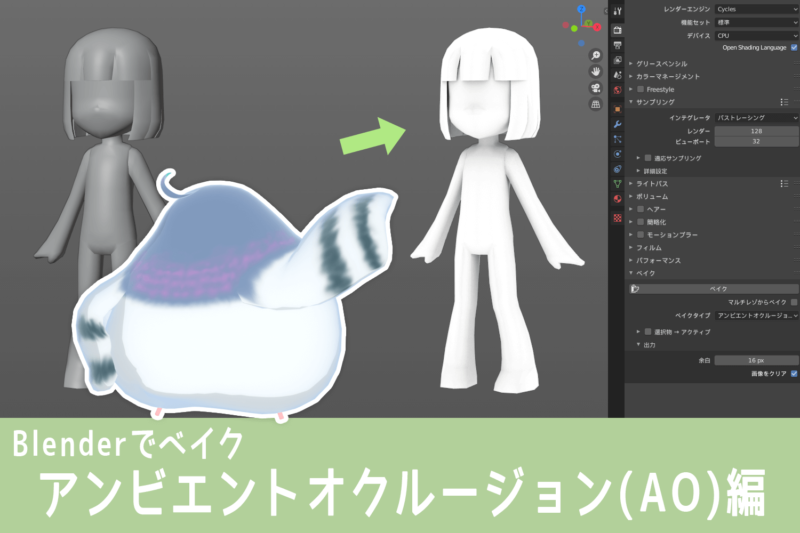
Procedure for AO baking in Blender
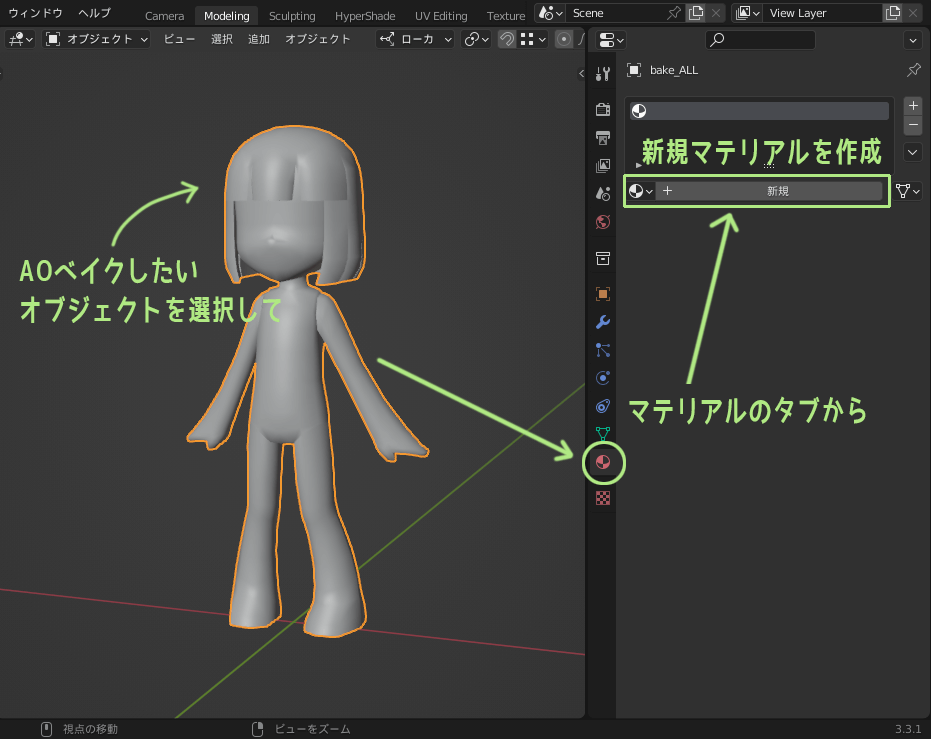
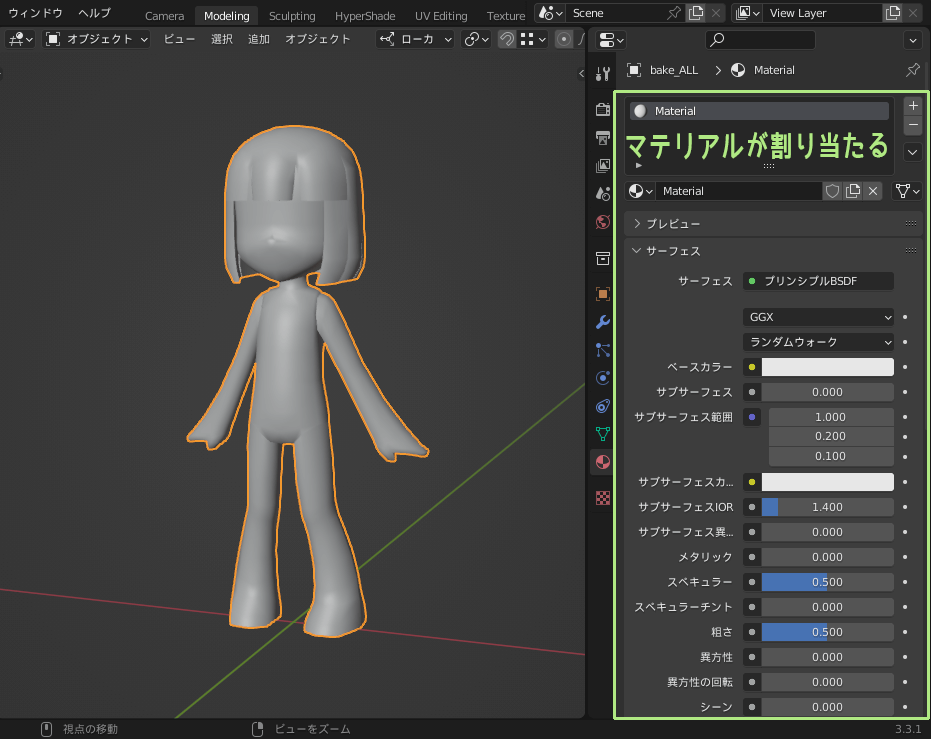
(1) Apply the appropriate material to the object to be AO-baked
Select the object to be AO-baked select the Property Editor and select the Material tab.
Click [+New] to assign a material. (If you have already assigned material, you can leave it as it is.)
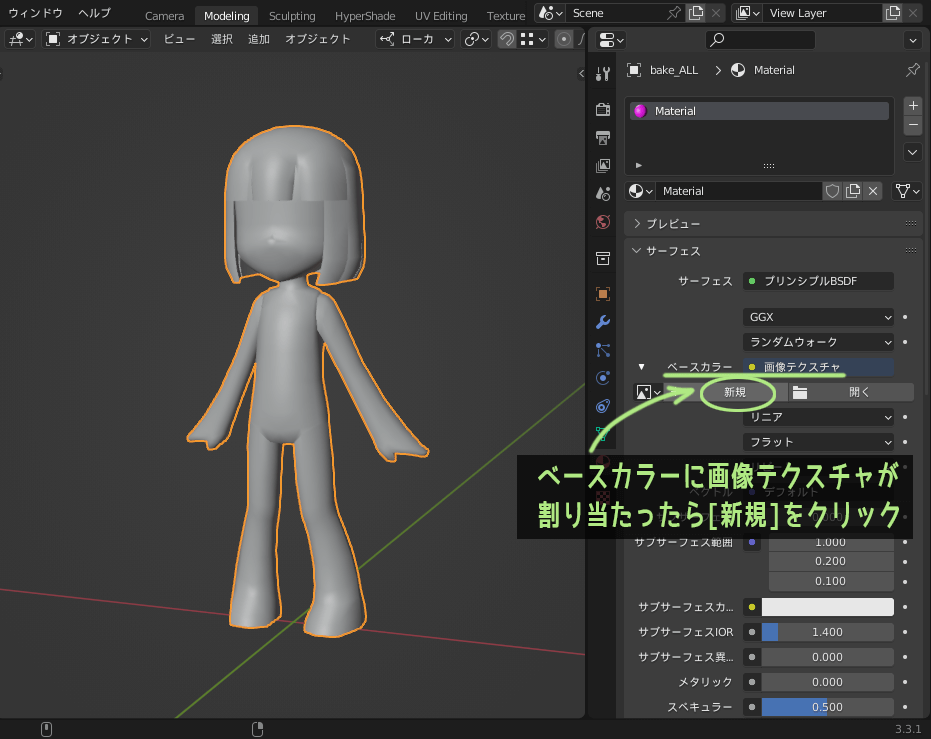
(2) Apply image texture to material and specify image size
Click on the circle next to “Base Color” in the Material item and select “Image Texture” from the pop-up window that opens.

When an image texture is assigned to the base color, click [+New] below it. (If another texture is assigned and there is no [+New], click the icon next to the texture name.)
![カラーの下に[+新規]ボタンがないときは新規作成のアイコンをクリック](https://tohawork.com/wp-content/uploads/2020/11/b_bakeao_02add.png)
A small window will then open where you can specify the size of the image to be AO-baked. You may also decide on the name of the image here. (You can also leave the default name)

When completed, press the OK button.
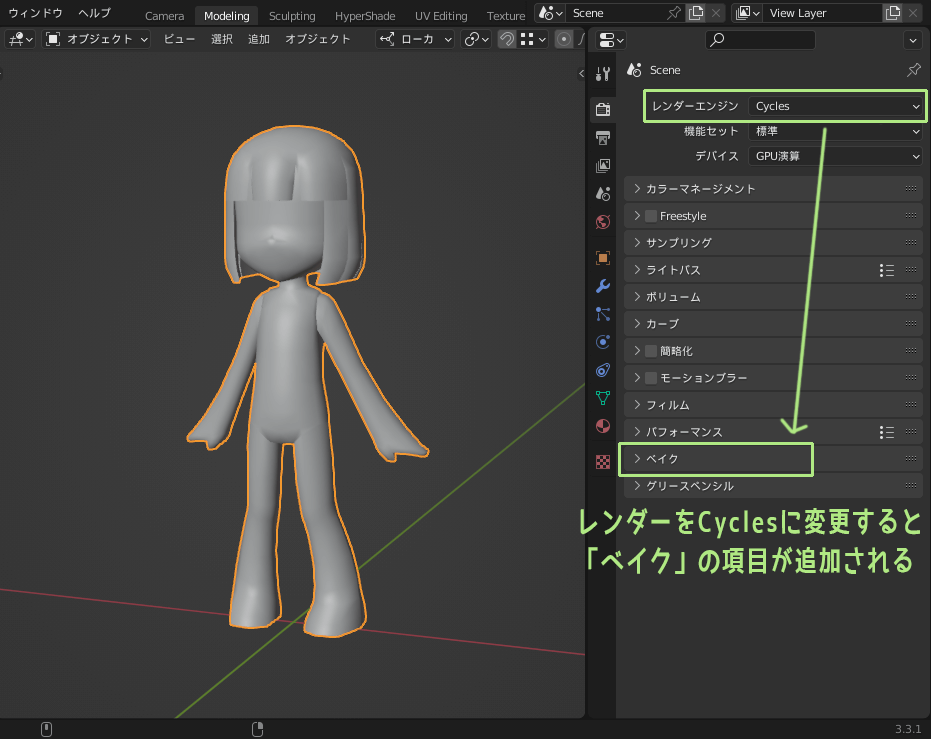
(3) Change render from Eevee to Cycles
Blender’s default render is Eevee, but Eevee cannot be baked, so change to Cycles.
Select the render tab in the Property Editor and click on ” Click on “Render Engine”. Select “Cycles” from the list displayed.
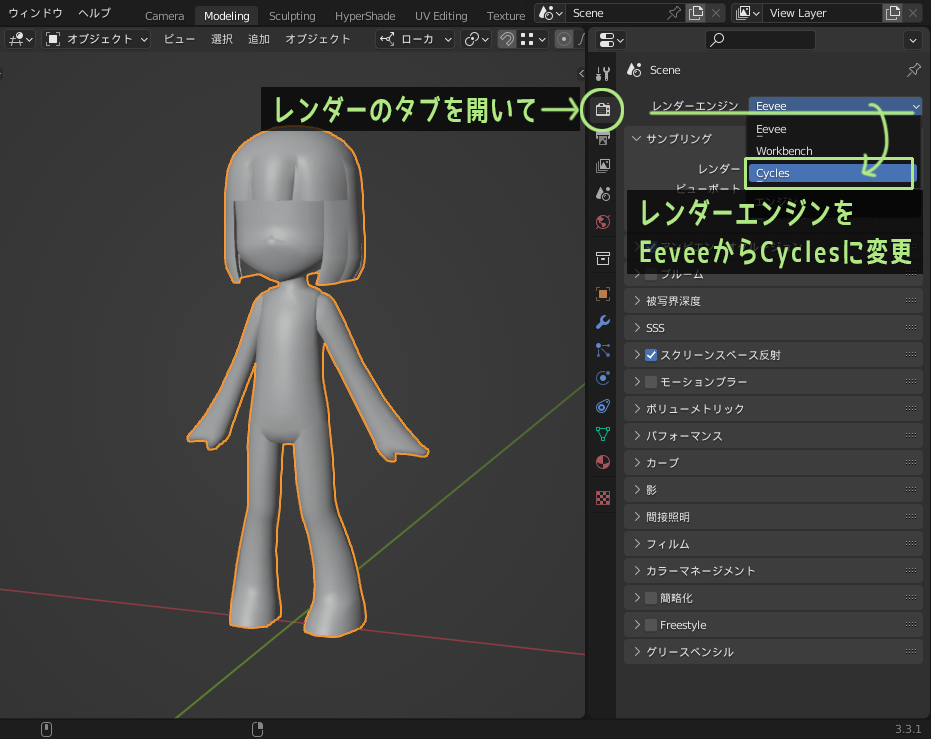
When the render is set to Cycles, “Bake” is added to the list of items in the Render tab.
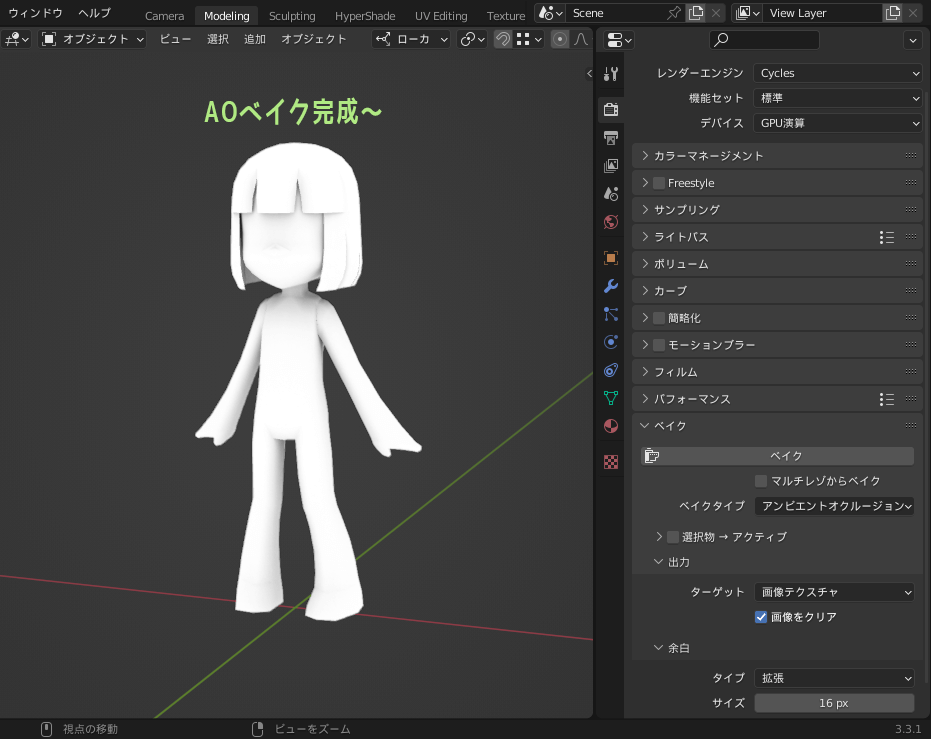
(4) Change the bake type of the bake item to AO
Open the Bake section and click on “Bake Type”. Select “Ambient Occlusion (AO)” from the list displayed.
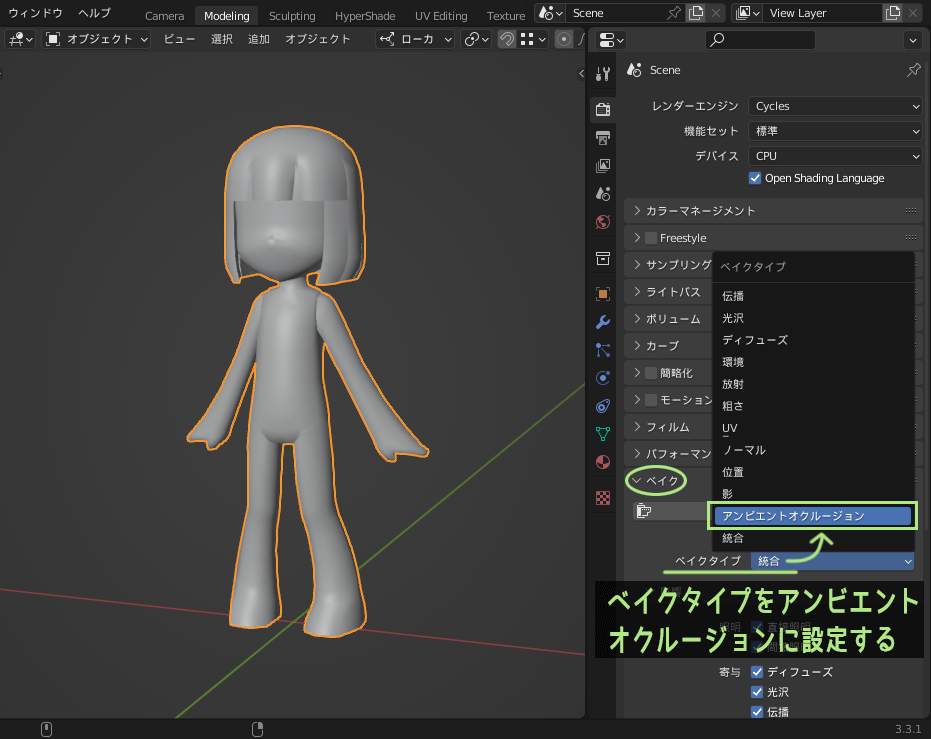
Bake type to AO will reduce the number of options and give a cleaner look.

(5) Select an object and press the Bake button
Now that the AO is ready to be baked, select the object you wish to AO-bake and press the “Bake” button in the Bake item.

AO baking will start and a progress bar will appear at the bottom of Blender. Wait until it finishes.
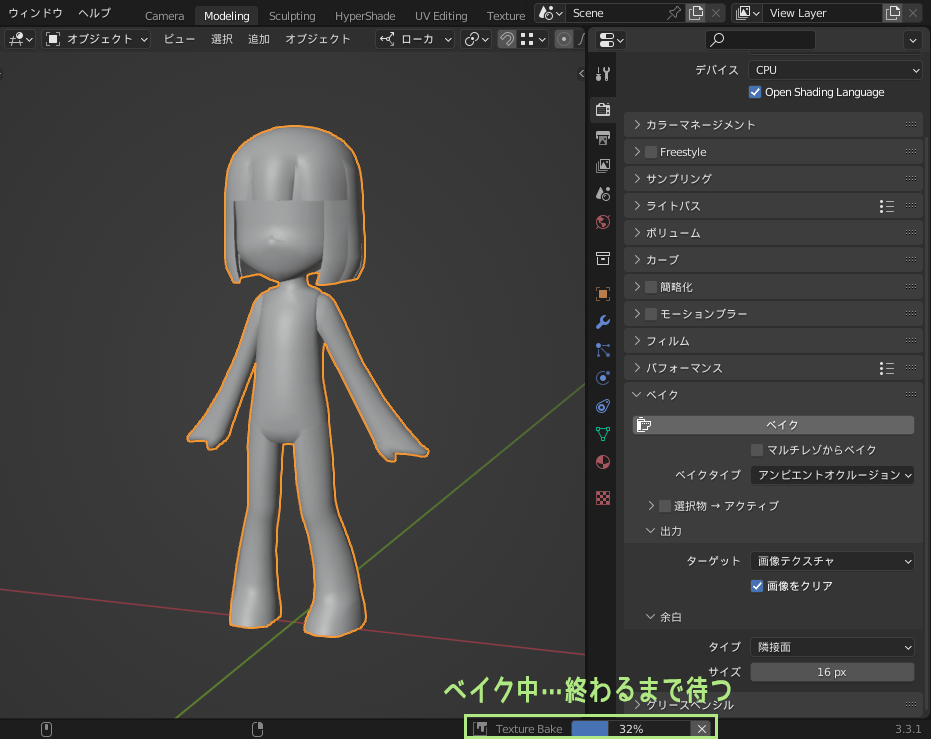
Baking is complete when the progress bar disappears.
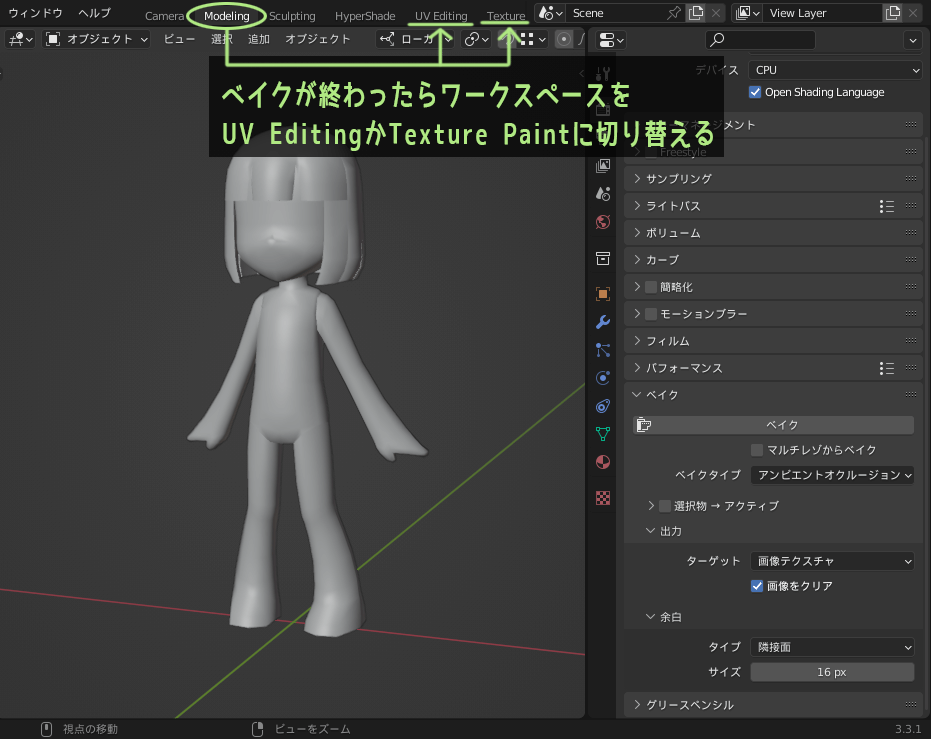
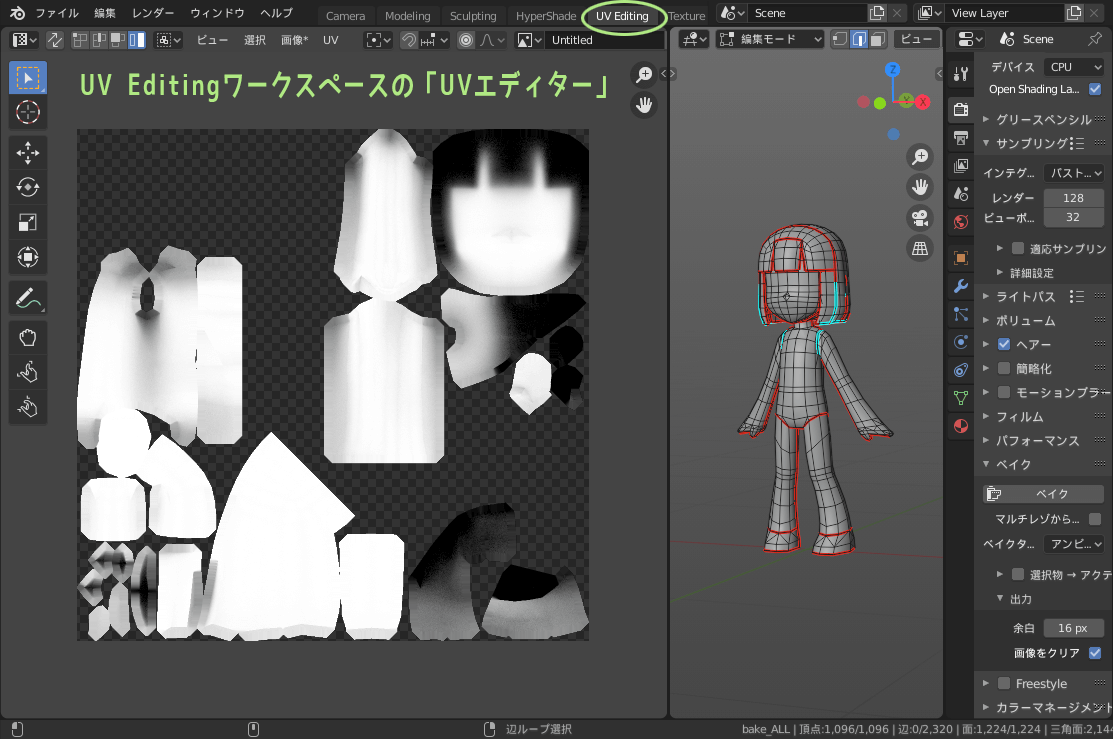
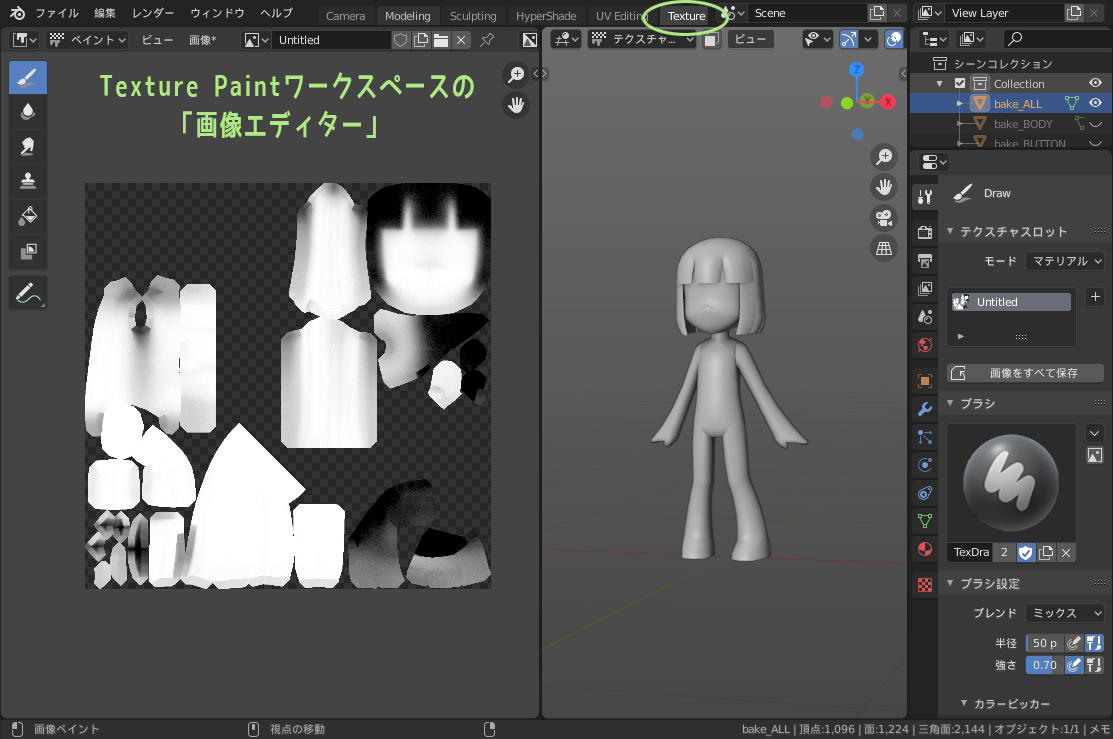
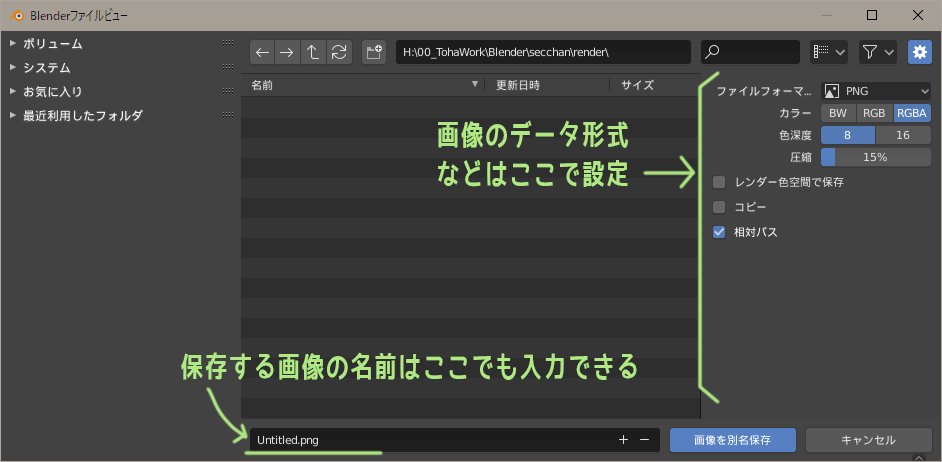
(6) Save the image as named from the UV Editor or Image Editor
Switch Workspace to “UV Editing” or “Texture Paint”, and display the “UV Editor” or “Image Editor”.
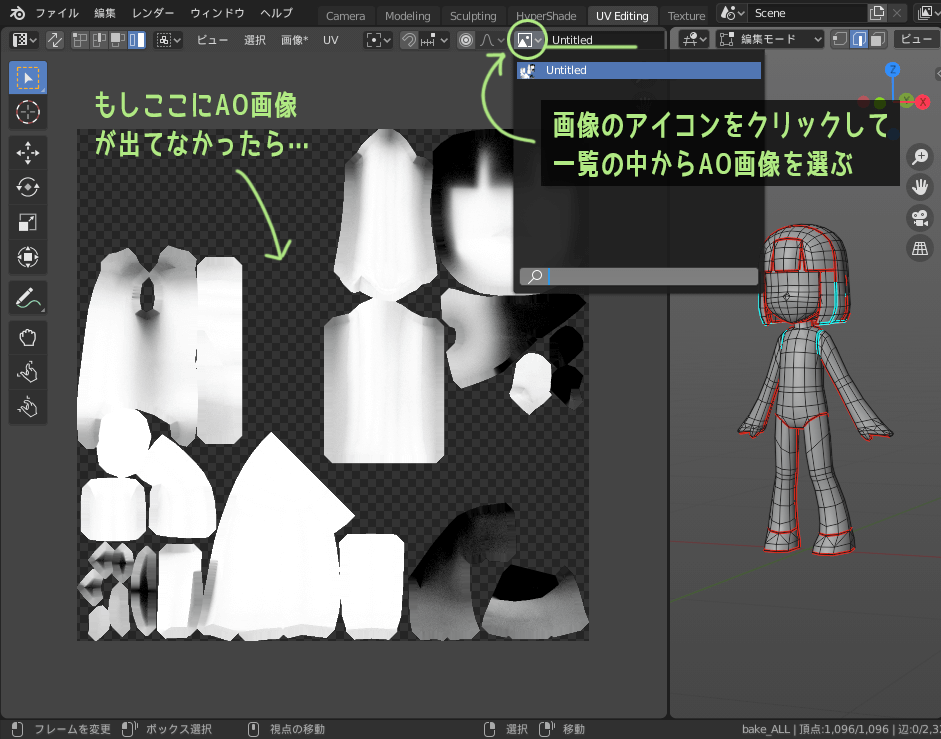
When you bring up the UV editor or the image editor, you will see a black and white AO image.
If it is not displayed, click the icon next to the image name and the image will be displayed when you select the name of the image created in step 2).
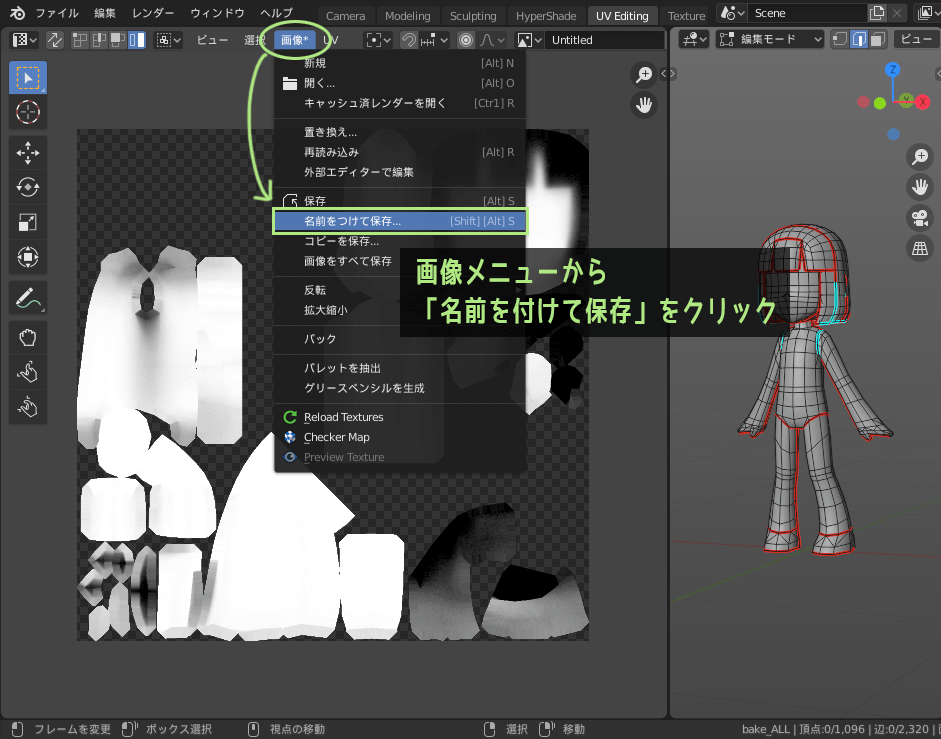
With the AO image displayed, click on “Image” in the editor’s upper menu, then “Save As” to save the baked AO image.
That’s all for “AO Baking in Blender!”
Supplemental Information of AO Bake
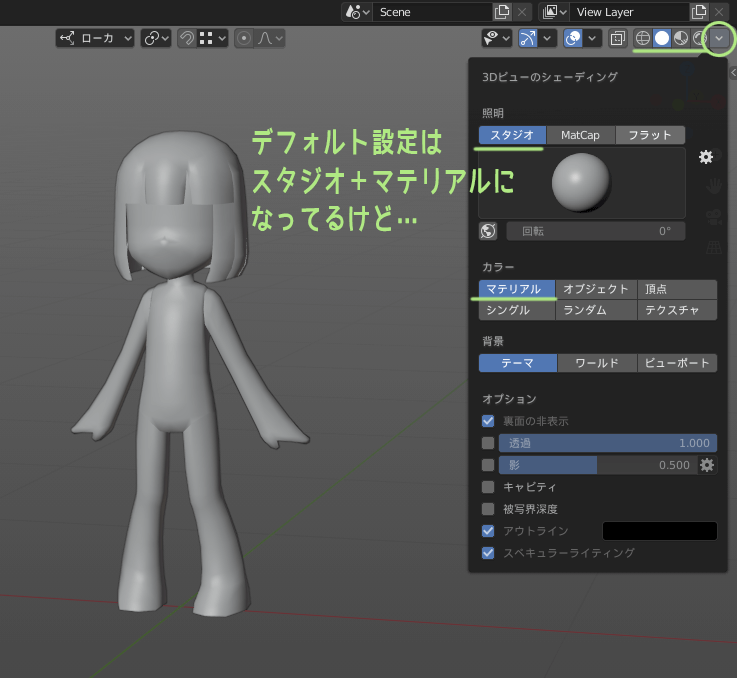
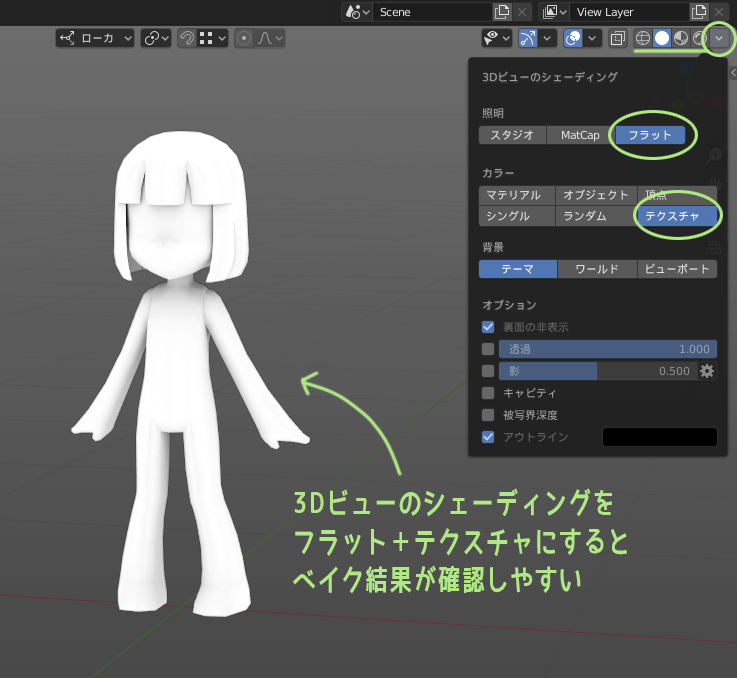
Flat + texture display if you want to see the baking result in 3D viewport
If the AO bake is successful, the baked AO image is automatically assigned to the object, but it cannot be seen in the viewport until the texture is displayed.
viewport shading from the “Flat + Texture” section, it is easy to check the result of AO baking by setting it to Flat + Texture.
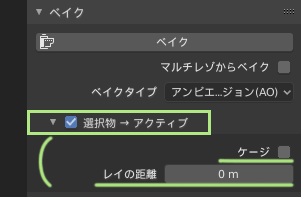
Selection object -> Bake using active
The Selection->Active option can also be used to bake AOs from other models into the active model.
*For more information on active objects, see here.
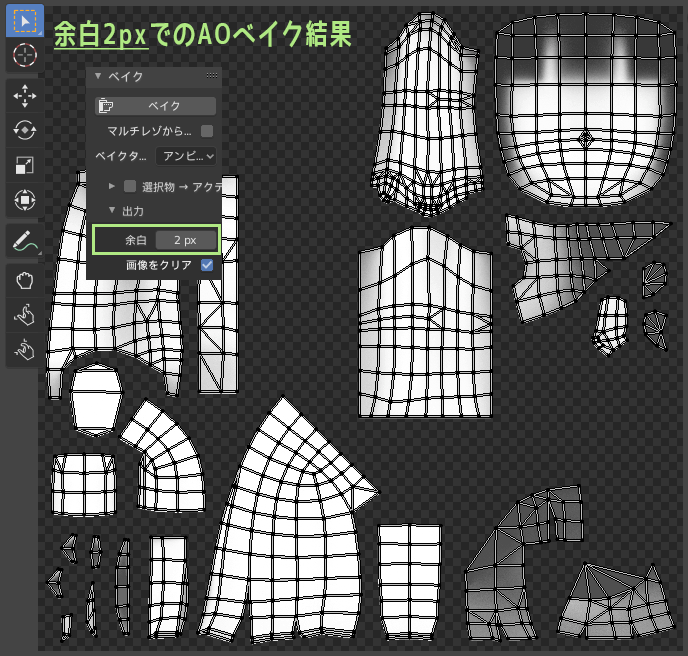
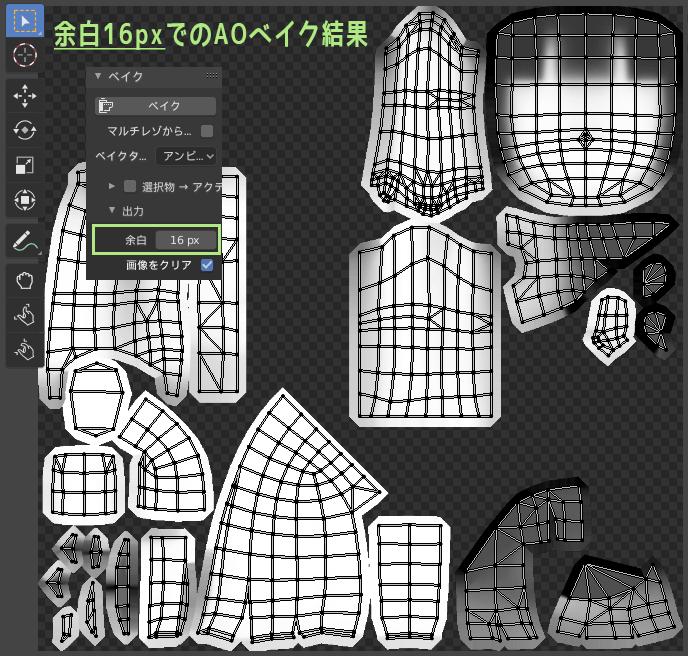
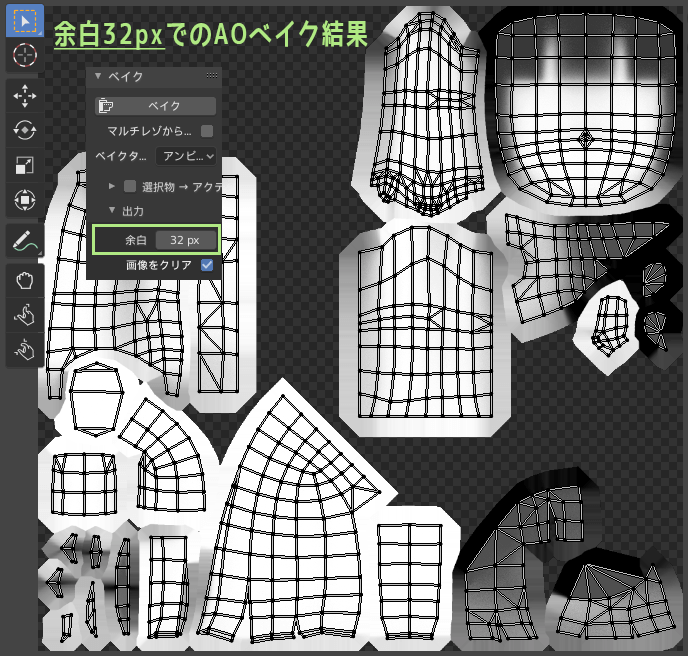
Margin (padding) settings
In the “Output” section of the Bake item, there is a “Margins” field.
This margin (also called padding) is quite important, and it is recommended that sufficient margins be left around the UV area when creating textures.
The default setting of 16px should be fine, but if the image to be baked is very large, it may be better to use a little more space than the default.
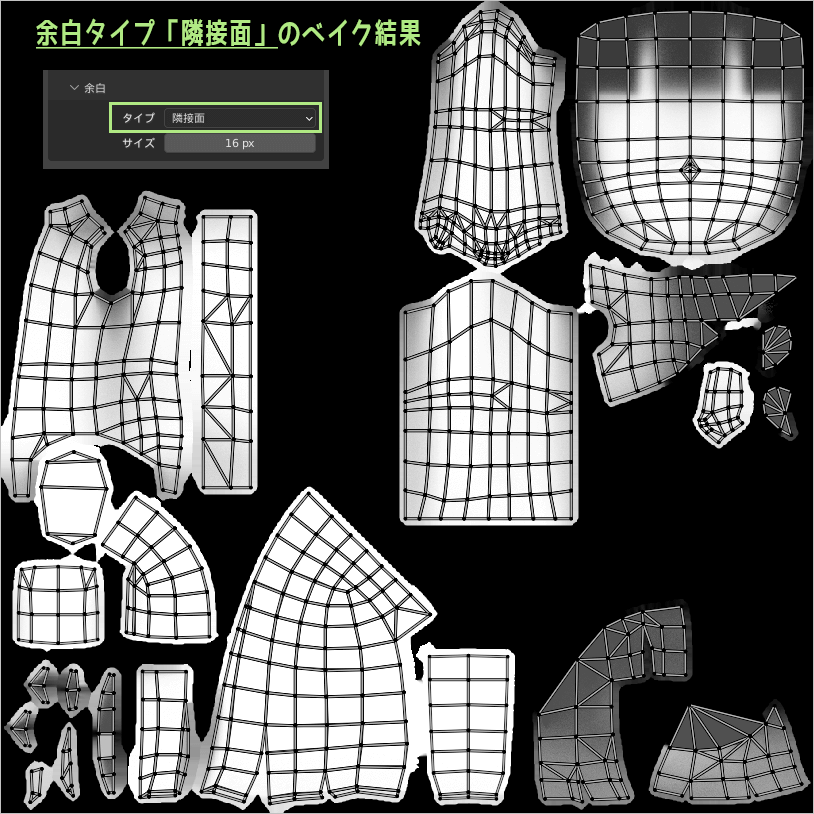
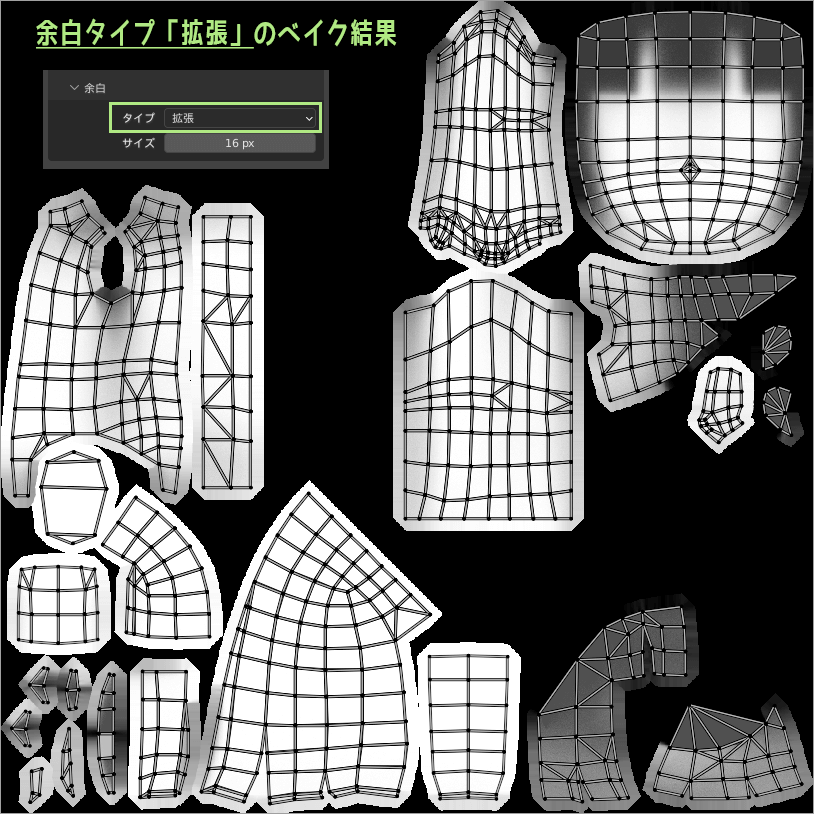
There are also two types of margins: “adjacent surface” and “extend”.
The default setting is adjacent surfaces, but baking results may be cleaner if the type is set to extend.
Smooth shade/Flat shade affects bake results
Note that the degree of smoothing of the object to be AO-baked will affect the baked result.
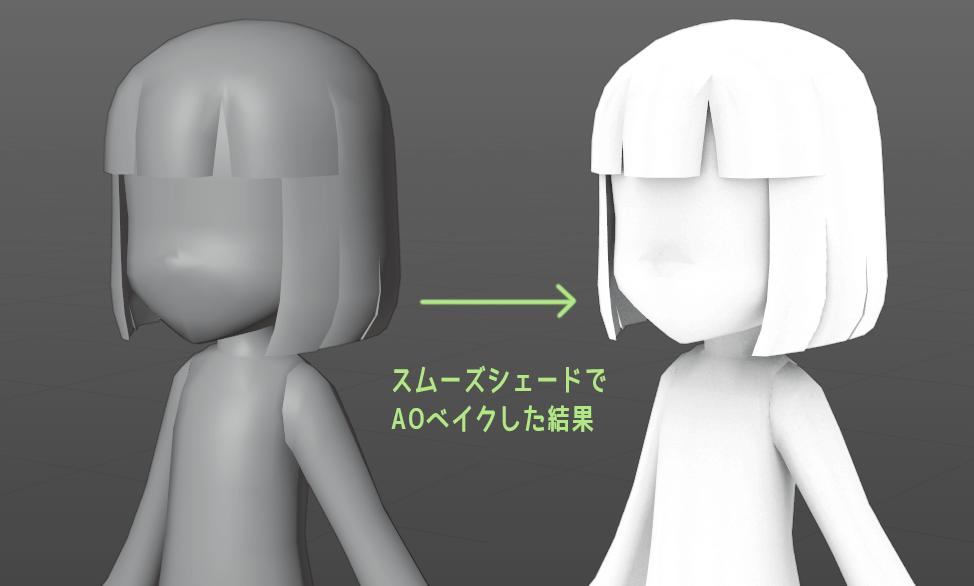
*For smooth/flat shades, see here.
Render enable/disable of other objects also affects the baking result
When baking AO, if the rendering of other objects is enabled, it will affect the baked result. Note that it does not matter whether the object is visible or invisible in the viewport.
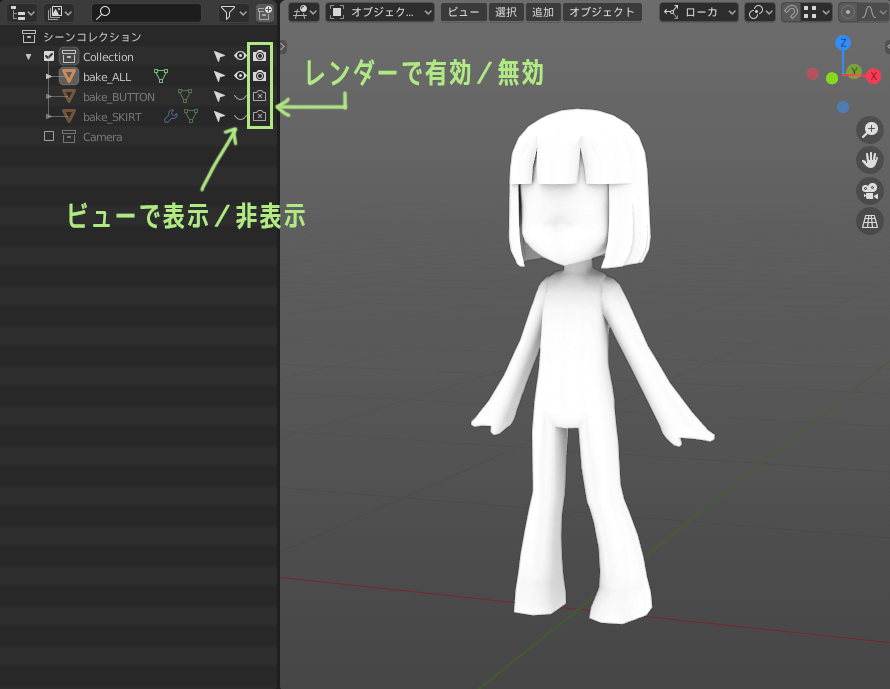
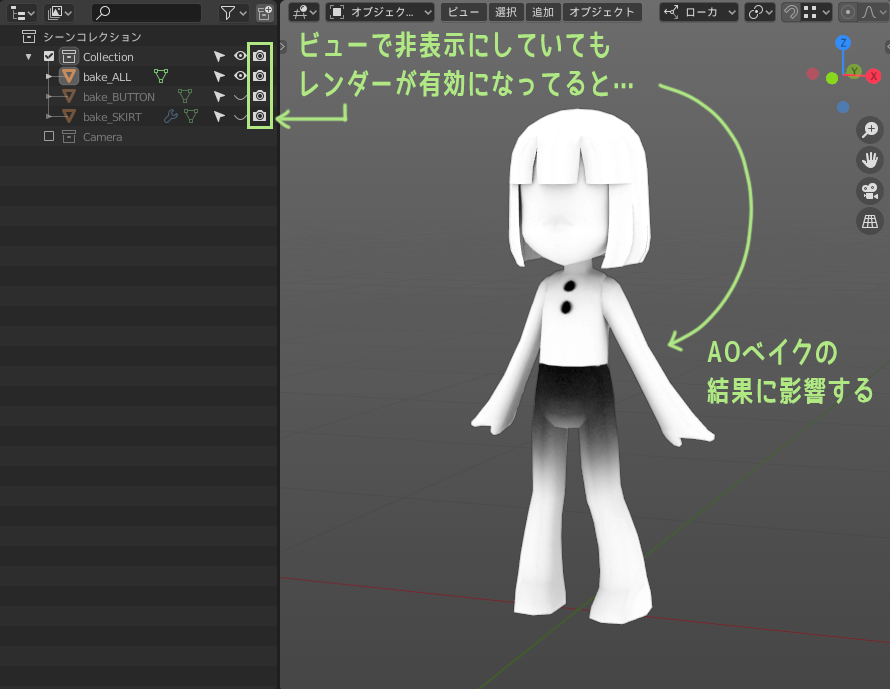
*How to enable/disable render (camera symbol) in the outliner See here.
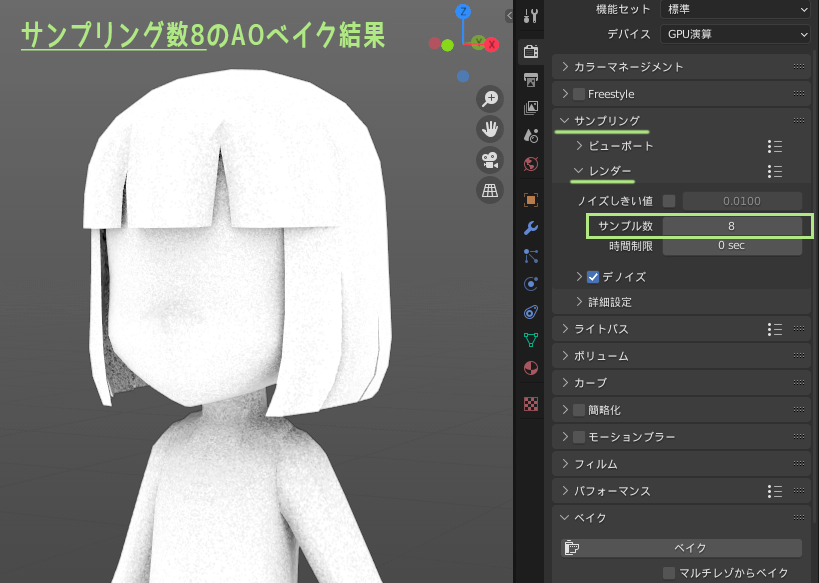
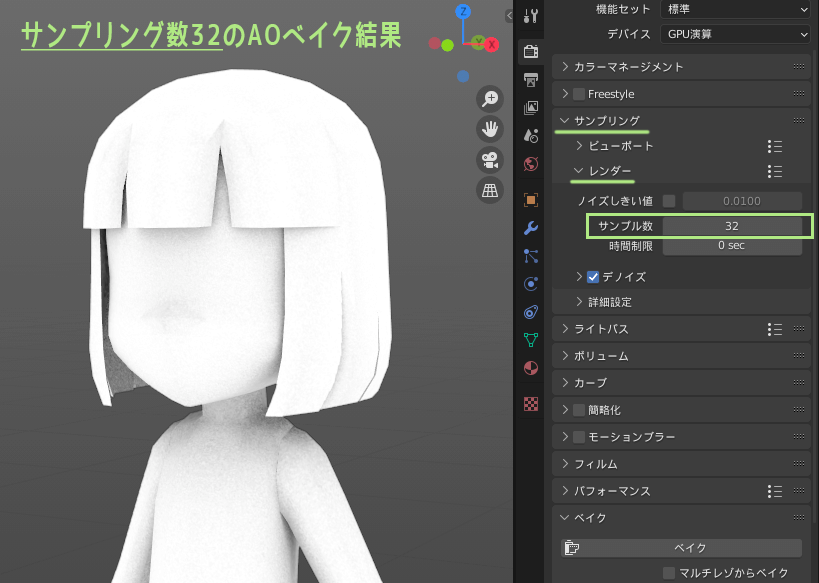
Increase the sampling rate if you want finer AO
The fineness of the AO bake result depends on the number of samplings.
A higher sampling rate can be expected to produce cleaner baking results, but the higher the sampling rate, the longer the baking time will be.

Extra: What is Ambient Occlusion?
Ambient Occlusion (AO)
A rendering method that calculates the degree of occlusion of ambient light in a scene. It calculates the occlusion of light from one point in the scene to the hemisphere direction to generate realistic shadows.
From CG WORLD List of CG Terms
To put it bluntly.
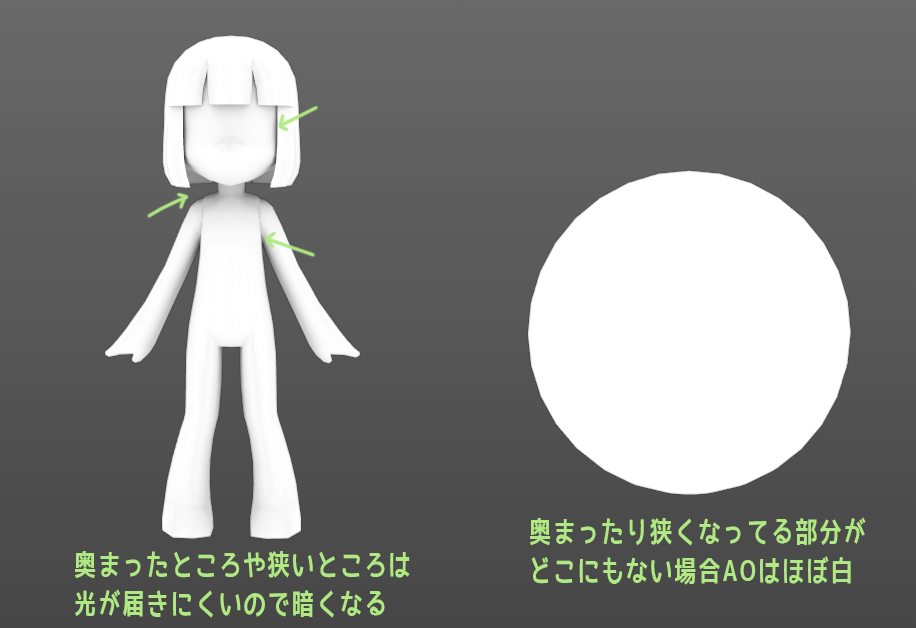
Deep parts of an object and narrow gaps appear to be darker because light does not reach them easily.
The ambient occlusion is the output of the calculation of the state of
If the object has no deep or narrow areas, the ambient occlusion will be almost nonexistent (near pure white).
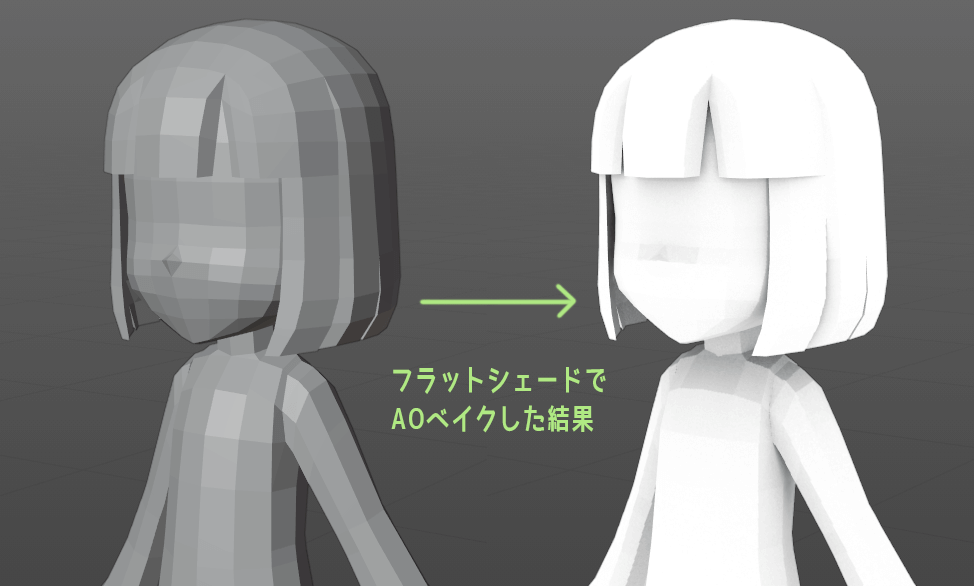
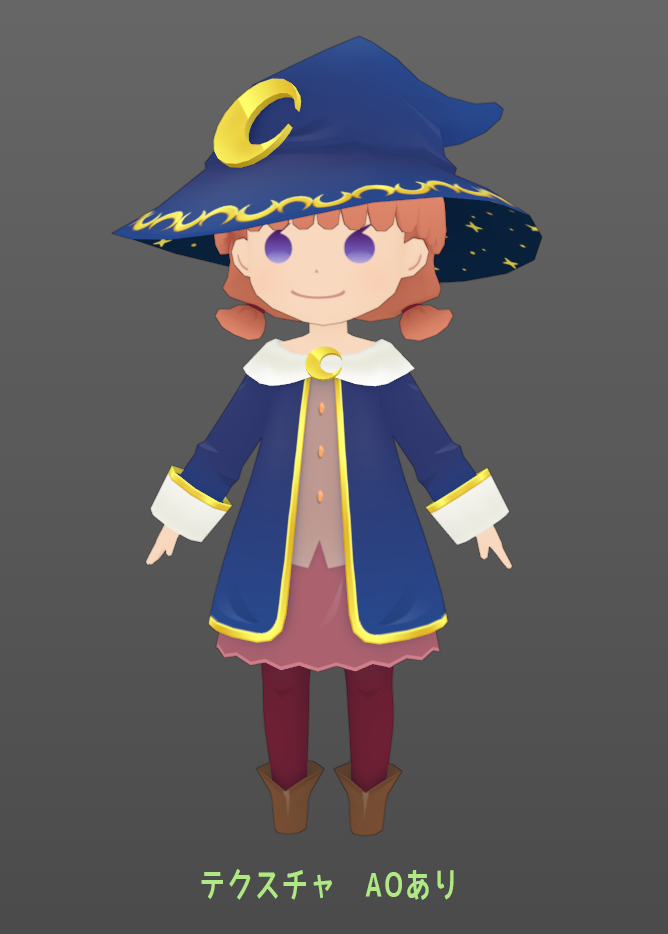
I love AO baking when I create textures by hand because ambient occlusion gives a three-dimensional effect and improves the atmosphere.
For example, Lopo-san model looks like a very flat texture, but it is AO-baked. If you compare the model with/without AO in the texture, you can see the difference.
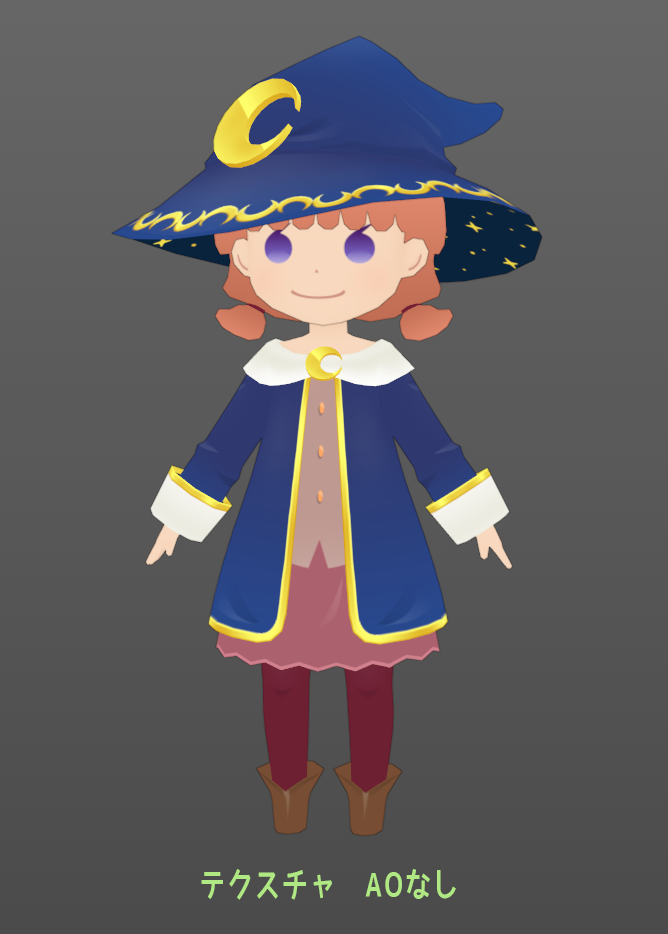
But if you want to make a 3D model that looks like a celluloid-like animation, for example, it may look better without AO.
This was extra information!
AO should be utilized as needed.
Bake in Blender for the gradient version is here.
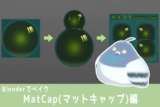
Bake in Blender for the MatCap version is here.

- Coments - コメント一覧