I recently replaced the hard drive on my computer with an SSD.
My computer is now running faster and much more comfortably!
If you have an old computer that is slow to start up, or if you are suffering from the 100% disk usage problem…
You don’t have to buy a new computer, just an SSD migration could be the answer!
Therefore, this article will summarize the effects, methods, and precautions of HDD to SSD migration.
This is especially helpful for those who use one hard drive partitioned into C drive and others.
The long-standing 100% disk usage problem was solved with SSD migration!

The computer that Toha is currently using was purchased in 2013. Older.
However, I have added more memory, changed the grabbing board, replaced the power supply unit, etc., so I am still able to use it without any problems. It takes a while to boot up, but it’s OK if you turn it on early.
The only problem that plagued me was the phenomenon of disk usage suddenly reaching 100% and slowing down my computer.
If you search for “disk usage 100” on the Internet, you will find various articles on causes and countermeasures.
However, no matter what I tried, the symptoms did not improve at all. The cause of the problem is unknown.
All I can tell you is that “the process is slowed down by the abnormally high availability of the hard disk.
Then it occurred to me.
SSDs rumored to make computers blazing fast…
If I replace the heavy processing hard disk with an SSD, perhaps this problem can be fixed.

As it turns out, the disk usage 100% problem was completely eliminated with the SSD migration!
SSDs are amazing!
In addition, computer startup is a blast.
In the past, I used to turn on the computer and leave it on an hour before starting work, because the disk usage could reach 100% for a while after the computer started up.
After replacing the SSD, I measured the time it took for the desktop to appear after the computer started up…
50 sec. I’m not sure what to do with it. Haya!
The C drive where Windows is installed, changing this from HDD to SSD has a tremendous effect. I don’t get frustrated anymore because of the heavy processing of my computer.
Glad to hear it♪
I would encourage anyone who is having trouble with a slow computer to consider an SSD migration.
However, there are a few caveats to SSD migration, so we will summarize them next.
Please refer to it if you like…
Things to check before replacing HDD with SSD

The computer used by TOHA is a desktop, not a laptop.
When adding an SSD to a desktop computer, check the following
- Consider the capacity of the SSD to be purchased and cloning software
- Can the SSD be connected to the motherboard with a SATA3 cable?
- Can power be supplied to the SSD from the power supply unit?
Let’s look at them in order.
*If you are interested in migrating your laptop to SSD, this article may be helpful.

(1) Consideration of SSD capacity and cloning software to be purchased

First, you will need to purchase an SSD.
The safest SSD to purchase is one with a capacity equal to or greater than the HDD in use.
If the HDD in use is 500 GB, it means that the SSD should also be 500 GB.
However, high-capacity SSDs are expensive, so it is better to choose an SSD with ample capacity than the actual usage of HDDs.
If the HDD in use is 100GB, it’s like choosing a 250GB or so SSD.
Here is an explanation of the case of TOHA.
There was one 2TB HDD in Tohja’s computer, which was partitioned into a C drive and another drive with 1TB each.
Each drive had about 450 GB in use each. The diagram looks like this.

Since the C drive was used for installing Windows and other applications and the other drive was completely used for storing work data, the only drive we want to migrate to SSD is the C drive.
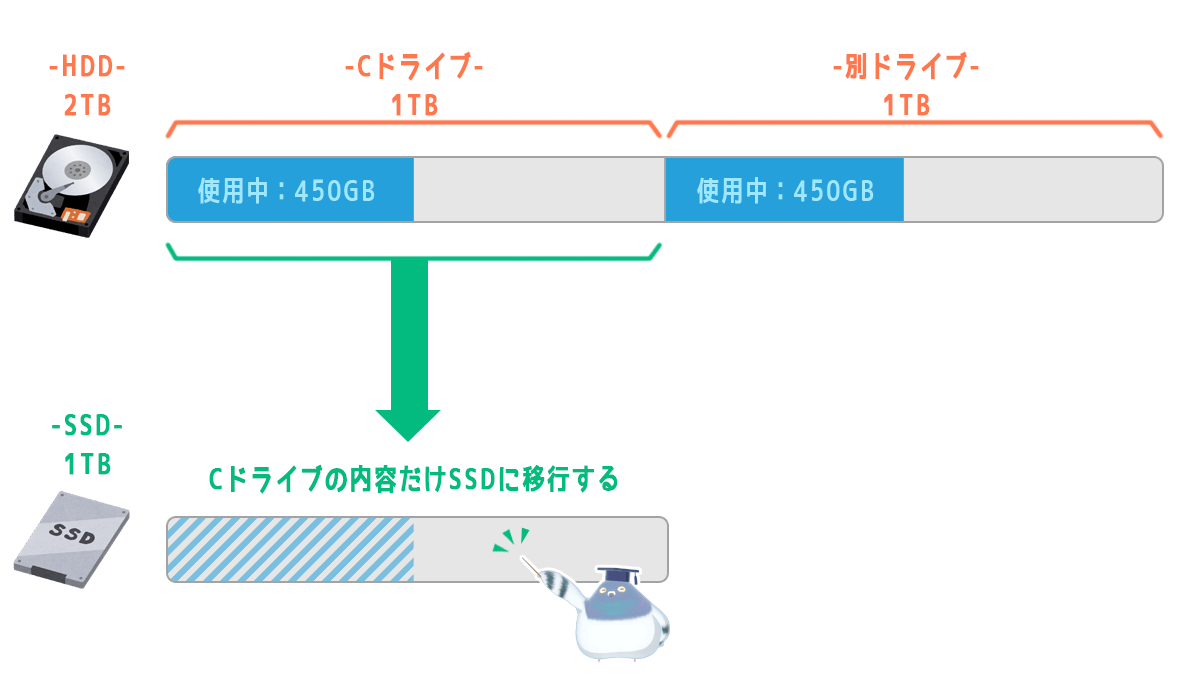
So I thought, “If I have 1TB, I can afford it…” So I bought this 1TB SSD.

In this case, a 1TB SSD is
- Plenty of space to spare considering the 450 GB used by the C drive, but
- Considering the overall HDD usage of 900 GB, just barely enough capacity.
This later caused a bit of a messy problem.
As described below, migration from HDD to SSD involves cloning and copying the entire data.
Cloning is done using dedicated software, some of which can only clone entire disks, while others can clone selected partitioned drives.
Even if the SSD you purchased has ample capacity relative to the C drive. If you are on the edge of capacity for the entire HDD, consider using cloning software that can clone a drive at a time.
Many software programs that can clone individual drives are available for a fee.
There is a free cloning software called Acronis True Image for Crucial that can only be used with Crucial HDDs or SSDs, but it cannot clone an entire drive.
Toha purchased a Crucial SSD because of the free cloning software, but it did not work for the reasons mentioned above, so we eventually used the paid cloning software.
One free software that can clone an entire drive is AOMEI Backupper Standard
Toha used Ease US Todo Backup Home, which is a paid software.
So, to summarize the above
The capacity of SSD to be prepared when replacing HDD to SSD is…
- Choose an SSD with ample capacity over HDD usage.
- Most cloning software, both paid and free, can be used.
- Select an SSD with more ample capacity than the entire HDD usage.
- In this case, most cloning software, both paid and free, can be used.
- Choose an SSD with ample capacity rather than C drive usage.
- In this case, use cloning software that can clone by drive.
When purchasing an SSD, please consider whether or not the HDD is partitioned, the total HDD capacity used, and which cloning software will be used to migrate data.
If you choose an SSD that satisfies the requirements sufficiently, the migration from HDD to SSD will be completed smoothly.
(2) Can you connect the SSD to the motherboard with a SATA3 cable?
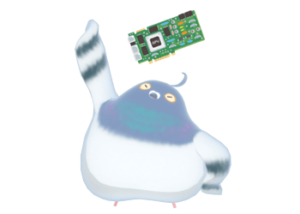
When placing an SSD inside a desktop computer enclosure, the SSD must be connected to the motherboard.
The SSD is connected to the motherboard with a SATA cable, but it cannot be connected unless there is a place on the motherboard where the SATA cable can be plugged in.
Open the desktop computer casing and check inside.
The cable extending from the hard disk in use should be plugged into the place marked [SATA] on the motherboard. If there are other available [SATA] locations around it, you can connect an SSD there.
If there is no available [SATA] space, I would have to completely replace the HDD I am using now with an SSD, or add an external SSD.
For external SSDs, prepare a SATA⇔USB conversion adapter or an SSD case for external use.


There is usually an open [SATA] on the motherboard, but check to be sure.
If you are placing an SSD in a computer, incidentally, you should also check the location where the SSD will be installed.
Using an item called a bracket, a small 2.5-inch SSD can be installed inside a computer in the same way as a 3.5-inch hard disk.

Once you have decided where to install the SSD, also prepare a SATA3 cable long enough to reach the motherboard.

There are two types of SATA3 cables: one with a straight connector and the other with an L-shaped connector. You can choose whichever type seems easier to handle the cable.
(3) Can power be supplied to the SSD from the power supply unit?
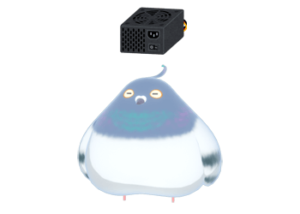
When SSDs are installed inside a computer chassis, power must be supplied to the SSD itself.
If you check the HDD in use in the computer, there should be a cable that connects to the power supply unit in addition to the SATA cable that connects to the motherboard.
SSDs can be connected to the power supply unit in the same way as HDDs.
If there is room on the power supply unit side, power can be supplied directly to the SSD with a compatible power cable.
If there is no room on the power supply unit side, a branching cable can be used to branch the SATA power supply that is plugged into the HDD to supply power to both the HDD and SSD.
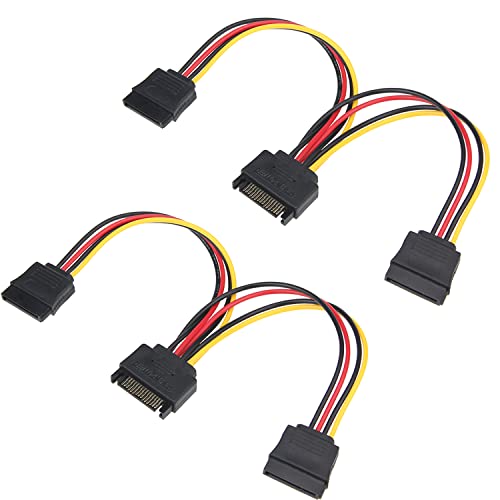
The type of power cable connected to the HDD in use is like this.

If it is the type that has a lot of SATA connectors from the beginning, you can just plug the available connectors into the SSD.
Check the power supply unit and cables to see if they can supply power to the additional SSDs.
Incidentally, external SSDs do not require a power cable because power is supplied from USB.
*For more information about SATA cables and SATA power supplies, please click here.

Migration to SSD is easy with cloning software.

Once the SSD and SATA cable are ready, it is time to migrate the C drive from HDD to SSD.
The actual steps to be taken in SSD migration are as follows
- Install SSD and connect to motherboard & power supply
- Clone from HDD to SSD with cloning software
- Change Windows boot device from HDD to SSD
I’ll try to explain in order.
(1) SSD installed and connected to motherboard & power supply
First, the SSD is physically connected to the computer.
Things to check before replacing HDD with SSD, you will be prepared for where to install the SSD and what you need to connect it. I turn off the computer, open the inside, and do it quickly.
Be careful of static electricity when touching the inside of your computer.
(2) Clone from HDD to SSD with cloning software
Once the SSD is connected to the computer, start the computer.
You can check if the SSD is connected properly from the Windows “Device Manager”. Check [Device Manager] → [Disk Drives] and if you see the name of the SSD you installed, it is OK.
For detailed instructions, please refer to the article Check SSD recognition in Device Manager .
So, as mentioned in the reference article above, when you look up SSD migration methods on the Internet, you will find descriptions that say “Let’s format the SSD,” “Let’s match the partition format of the HDD, and SSD “Let’s match HDD and SSD partition formats.
I didn’t know what to do, so I skipped this part of the procedure and started cloning…
Something about that made it work.
If you want to format the SSD properly before cloning, please refer to This article, but if you want to try to imitate Toha, please launch the cloning software quickly.
One note here!
As I wrote in the section on Consider the capacity of the SSD to be purchased and cloning software, Toha first tried to clone with Acronis True Image for Crucial, a free cloning software and failed.
Acronis True Image for Crucial does not allow you to clone only the C drive from a partitioned HDD.
The result was an attempt to migrate 900 GB of HDD capacity to a 1 TB SSD, which resulted in an error due to insufficient SSD capacity.
At one point, you can select folders that will not be migrated to SSD to reduce the capacity, but it takes a tremendous amount of time to recalculate the capacity to run each time you select a folder, so it feels like it will not be done in a day.
If this happens, it is better to use cloning software that can clone the C drive by itself in a straightforward manner.
Therefore, Toha decided to use Ease US Todo Backup Home, a paid software.
The free version of this software used to be well known for its cloning capability, but cloning is now a feature of the paid version only. The monthly fee is 1,958 yen, and the buy-in fee is 7,898 yen.
I am been using Ease US to back up my computer for a long time, and he bought a buy-one-get-one license because it was just on sale for 50% off. I think they do sales often.
This Ease US Backup has a “System Clone” feature in addition to the normal cloning.
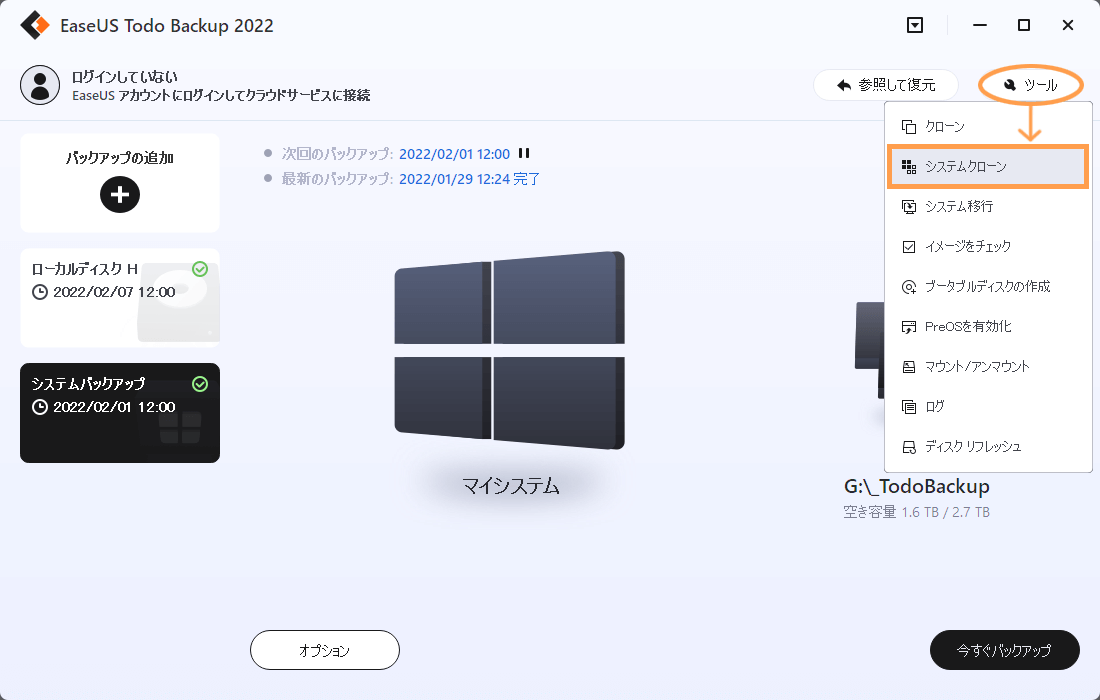
Clicking on System Clone will clone only the C drive required for system migration without any difficulties. You only need to select the SSD to clone to.
Toha did this!
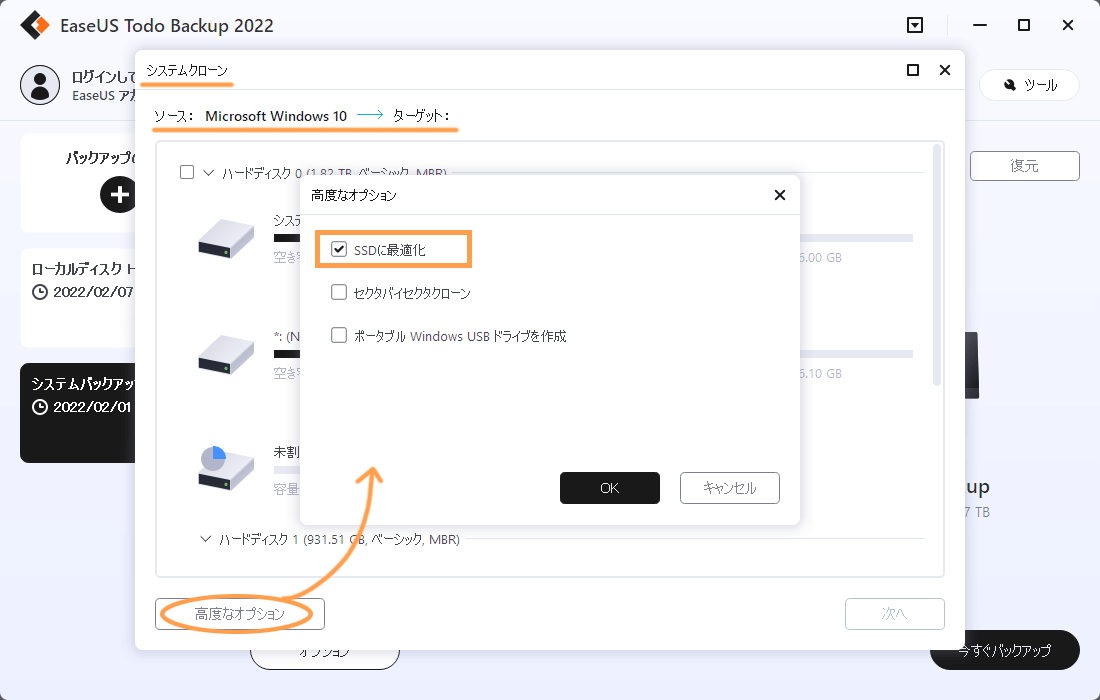
I think I also did open “Advanced Options” and chose “☑Optimize for SSD”.
Once the system clone is performed, simply wait until it is finished.
It took about two hours.
I like Ease US because it counts every second, even during long processes, which gives me peace of mind that it is working properly. (I get worried if the progress bar or clock icon is the only indication that it is working properly.)
Once the C drive has been cloned to the SSD, turn off the computer.
(3) Change Windows boot device from HDD to SSD

If the cloning is successful, the entire contents of the HDD’s C drive are copied to the SSD.
Finally, in the BIOS settings, the boot device must be changed from HDD to SSD!
If you start the computer as is, it will boot the Windows on the HDD, so you need to properly set it to boot the Windows on the cloned one on the SSD.
The boot device used to boot Windows can be set from the BIOS screen, but the way the screen is displayed and the appearance of this BIOS is completely different depending on the computer you are using.
So, there’s little point in explaining it on the BIOS screen of Toha’s computer, so you’ll just have to find out how to set up your own computer’s BIOS somehow~!
However, you will probably find the word [BIOS] and keys like [F2], [Delete], and [ESC] written somewhere in the list of letters when you start up your computer, so if you find them, press the keys written on them.
That will boot the BIOS.
When the BIOS screen appears, there is a place to set [BOOT] somewhere, so set the SSD there.
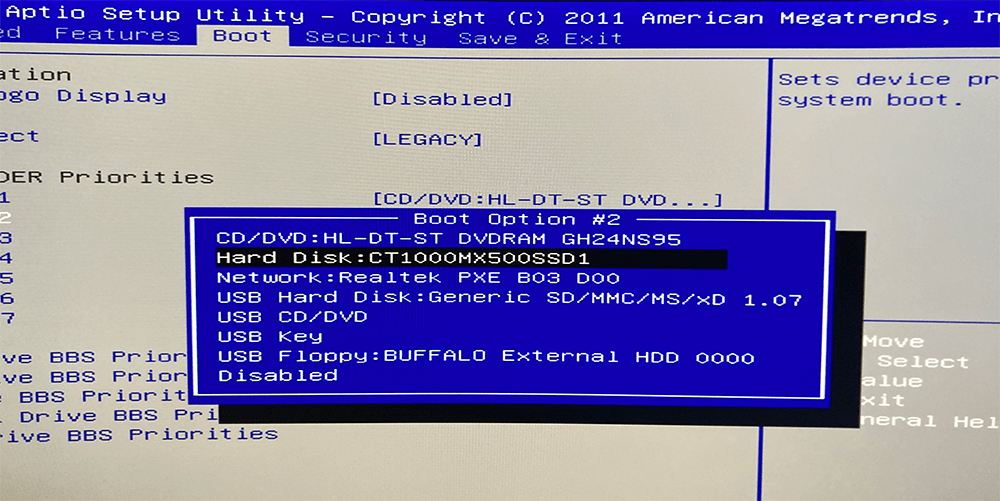
After saving the BIOS settings, try booting Windows.
Ah! If it boots up in a flash, it is a sign that the SSD migration is complete~!
If you bring up the task manager on the booted computer and check the performance of the SSD while launching some application, you should see an increase in the amount of SSD usage.
If that is the case, it is perfect.
Now I have a blazingly fast and comfortable computer!
To be checked after replacing HDD with SSD

After replacing HDDs with SSDs to make your computer more comfortable, there are some things you should remember to check.
Make sure the computer backups you’re setting up are still working properly after the SSD migration!
In my case, when I ran a backup of the C drive, which I do regularly after SSD migration, it backed up the old C drive, which I left on the HDD.
Other times, all sync settings for folders that were set to be backed up by Google Drive were reset.
The backup settings will work properly if you create a new one with the same contents.
I’m wondering if the SSD is the effect of the new C drive, which has more drives and automatically changes the names of the drives, but you should just check anyway.
If you continue to back up your computer incorrectly without realizing it, you will be in serious trouble in the event of an emergency.
After a while, Toha realized.
I’m glad you noticed!

In summary: HDD to SSD migration works like a charm!

So, in this article,
- Replacing HDD with SSD should make computer operation more comfortable.
- Things to check before migrating to SSD
- How to do SSD migration with cloning
- To be checked after SSD migration
The following is a summary of the following information.
I had heard that replacing HDDs with SSDs would speed up my computer.
I was so surprised and impressed that I wrote this article to pass on my impressions to others. I was so surprised and impressed that I wrote this article to share my excitement with others.
The computer in Toka is a little old, but after installing an SSD, it runs much more comfortably, so I think I can still use it for the time being.
If you have a computer that is slow and can become frustrating while working, consider moving to SSD.
SSD ranked in the top 3 best things to buy!

- Coments - コメント一覧